Oh, you’re in for a treat! My Pumpkin Pie in a Cup recipe is the cozy, no-fuss version of that classic Thanksgiving dessert we all love—just right for when you want that warm spiced flavor without committing to a whole pie. I stumbled on this idea years ago when my oven decided to quit right before Friendsgiving. Panic mode? Absolutely. But guess what? Turns out, baking these little cuties in cups is not just a lifesaver—it’s now my go-to for portion control (okay, let’s be real, it’s really so I don’t eat half a pie in one sitting).

Table of Contents
Table of Contents
Why You’ll Love This Pumpkin Pie in a Cup Recipe
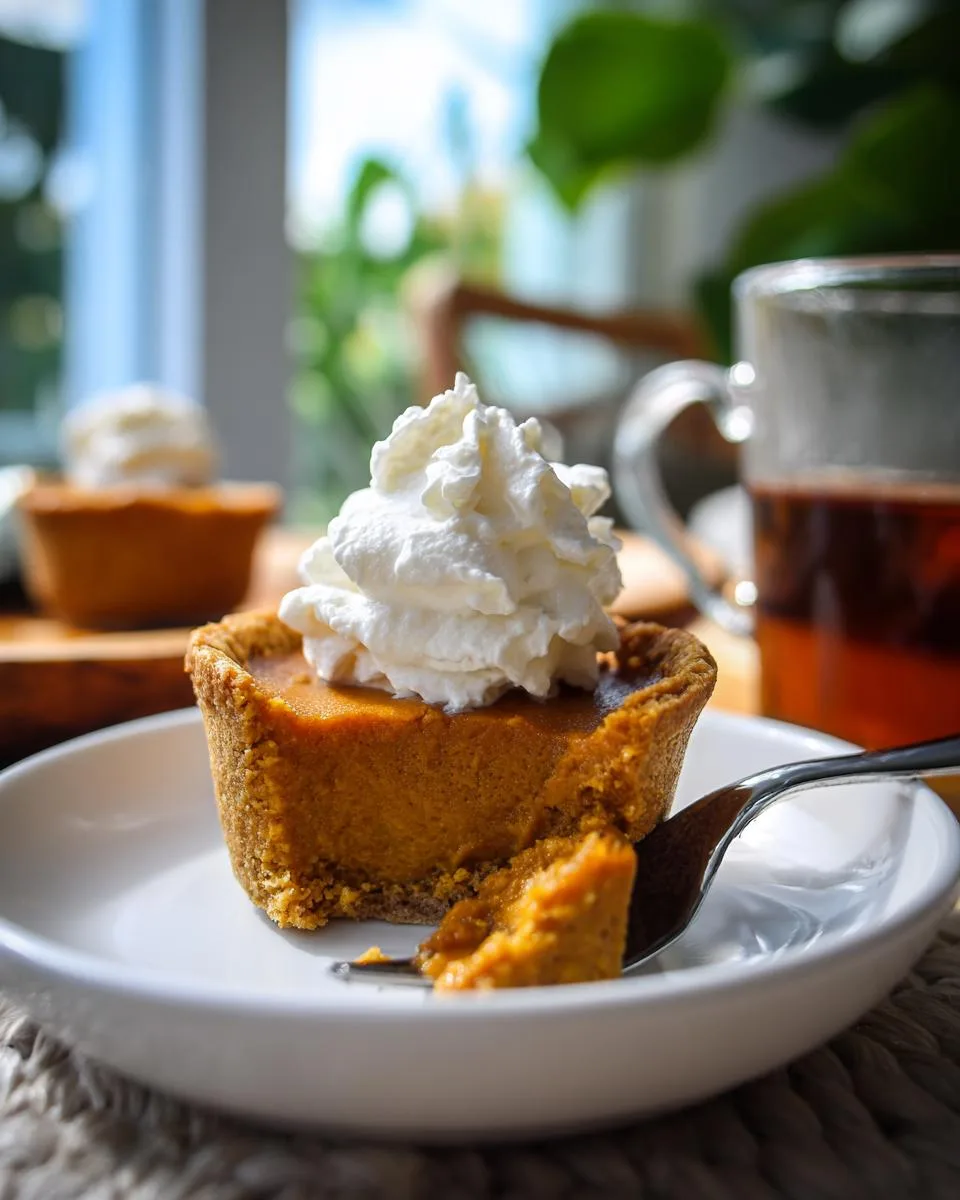
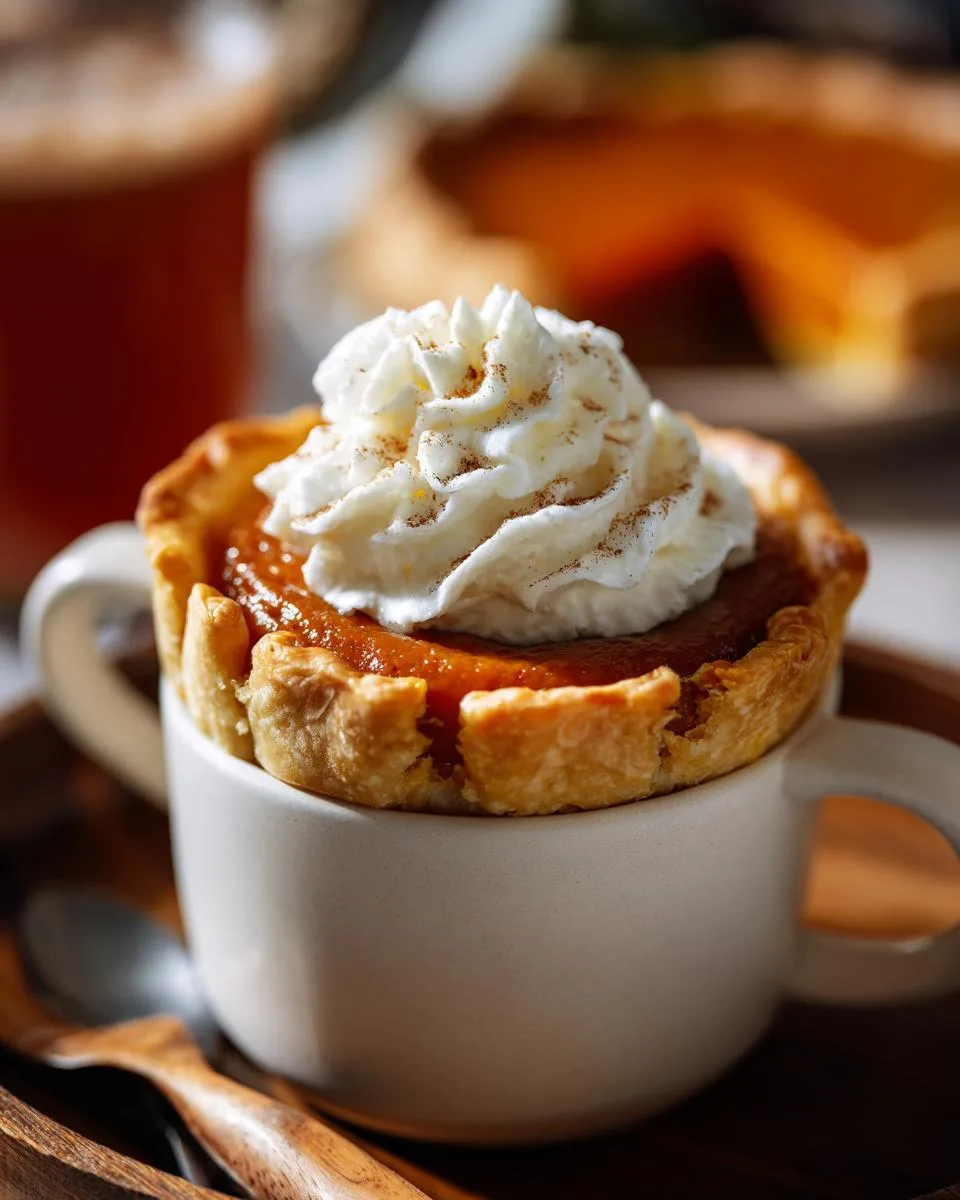
The magic here is in the details—that flaky, buttery crust hugging a silky pumpkin filling spiced just right with cinnamon, ginger, and nutmeg. And the best part? They bake faster than a traditional pie, and you get those adorable individual servings that make everyone feel special. Whether it’s a Tuesday night treat or the star of your holiday spread, this pumpkin pie in a cup recipe never fails to impress. Just wait till you see how the aroma fills your kitchen—pure autumn happiness in every bite.
Trust me, this Pumpkin Pie in a Cup recipe is going to become your new favorite for so many reasons:
- Portion control made easy – No more slicing a whole pie and wondering where it all went. These individual servings keep it just right.
- Quick and simple – Faster than a traditional pie and way less fuss. Perfect for when you need that pumpkin fix ASAP.
- Perfectly spiced – A cozy blend of cinnamon, ginger, and nutmeg that hits all the right autumn notes.
- Adorable presentation – Who doesn’t love their own little pie? It’s a total crowd-pleaser at gatherings.
- Customizable – Add whipped cream, a sprinkle of nutmeg, or even a drizzle of caramel to make it your own.
Seriously, once you try it, you’ll wonder why you ever made pumpkin pie any other way.
Ingredients for Pumpkin Pie in a Cup Recipe
Here’s everything you’ll need to make these adorable little pumpkin pies. I’ve learned through trial and error that using the right ingredients makes all the difference – especially that real butter and fresh spices!
- For the crust:
- 1 ⅓ cups all-purpose flour (spooned and leveled – no packing!)
- ½ teaspoon salt
- ½ cup cold butter (or shortening if you prefer), cut into small cubes
- 3-4 tablespoons ice water
- For the filling:
- 2 cups pure pumpkin puree (not pumpkin pie mix!)
- 1 can (12 oz) evaporated milk
- 2 large eggs, beaten well
- ¾ cup packed brown sugar (dark brown gives the best flavor)
- ½ teaspoon each: cinnamon, ginger, and nutmeg
- ½ teaspoon salt
A quick tip from my kitchen: measure your spices with love – I usually add an extra pinch of cinnamon because it makes the whole house smell heavenly while baking!

How to Make Pumpkin Pie in a Cup Recipe
Alright, let’s dive into making these adorable pumpkin pies! I’ll walk you through each step just like I would if we were baking together in my kitchen. Don’t worry if you’re new to baking – my grandma taught me all these tricks, and I’m passing them right along to you. Learn more about family recipes!
Preparing the Crust
First things first – preheat that oven to 400°F (200°C). While it’s heating up, let’s make our crust. Here’s my foolproof method:
In a large bowl, whisk together the flour and salt. Now comes the fun part – cutting in the cold butter. I like to use my fingers (washed, of course!) to work the butter into the flour until it looks like coarse crumbs with some pea-sized pieces remaining. That’s your ticket to a flaky crust!
Add ice water one tablespoon at a time, mixing gently with a fork after each addition. Stop when the dough just starts to come together – you want it to hold its shape when pinched, but not be wet or sticky. Pro tip: If it’s crumbly, add another half tablespoon of water. Too sticky? Sprinkle in a bit more flour.
Form the dough into a ball, flatten it into a disc, wrap it in plastic, and pop it in the fridge for about 15 minutes. This chill time makes rolling way easier!
Making the Filling
While the dough chills, let’s whip up that dreamy pumpkin filling. In a large bowl, combine the pumpkin puree, evaporated milk, beaten eggs, brown sugar, spices, and salt. Here’s where my trusty hand mixer comes in – blend everything on medium speed until it’s completely smooth and silky, about 1-2 minutes.
Give it a quick taste (chef’s privilege!) and adjust spices if needed. Want more cinnamon? Go for it! That’s the beauty of homemade – you make it exactly how you like it.
Assembling and Baking
Time to assemble our mini masterpieces! Roll out your chilled dough to about 1/8-inch thickness on a lightly floured surface. Use a round cutter or upside-down cup to cut circles slightly larger than your baking cups.
Gently press each dough circle into greased muffin cups or ramekins, forming cute little crusts. Don’t worry if they’re not perfect – rustic is charming! Fill each cup about 3/4 full with your pumpkin mixture.
Bake for about 25-30 minutes. Around the 20-minute mark, peek in and cover the edges with foil if they’re browning too quickly. The pies are done when the centers are just set – they should jiggle slightly like Jell-O when tapped.
Let them cool completely before digging in (hardest part, I know!). This patience pays off with perfect texture. Serve as-is or top with whipped cream – these little cuties are ready to wow!
Print
Irresistible Pumpkin Pie in a Cup Recipe – 5-Star Dessert
A classic pumpkin pie recipe with a flaky crust and spiced filling, baked to perfection.
- Total Time: 1 hour 10 minutes
- Yield: 1 9-inch pie 1x
Ingredients
- 1 ⅓ cups all-purpose flour
- ½ teaspoon salt
- ½ cup cold butter or shortening
- 3 tablespoons cold water, or more as needed
- 2 cups mashed, cooked pie pumpkin
- 1 (12 fluid ounce) can evaporated milk
- 2 large eggs, beaten
- ¾ cup packed brown sugar
- ½ teaspoon ground cinnamon, or more to taste
- ½ teaspoon ground ginger, or more to taste
- ½ teaspoon ground nutmeg, or more to taste
- ½ teaspoon salt
Instructions
- Gather all ingredients and preheat the oven to 400 degrees F (200 degrees C).
- Mix flour and salt together in a bowl. Cut in butter with a pastry blender until mixture resembles coarse crumbs.
- Mix in 3 tablespoons water, one at a time, until dough is moist enough to hold together. Add up to 1 more tablespoon water if needed.
- Shape dough into a ball with lightly floured hands. Roll dough on a lightly floured surface to a thickness of 1/8 inch.
- Place a 9-inch pie pan upside-down on the dough; use a sharp knife to cut a circle of dough 1 ½ inches larger than the pie pan. Remove and discard dough scraps and set pie pan aside.
- Gently roll circular piece of dough around the rolling pin; transfer it right-side up over the pie pan. Unroll, easing dough into the bottom of the pan. Use two hands to flute the dough around the top edges.
- Beat pumpkin, evaporated milk, brown sugar, eggs, cinnamon, ginger, nutmeg, and salt in a large bowl with an electric mixer until well combined. Pour into the prepared crust.
- Bake in the preheated oven until a knife inserted into the filling 1 inch from the edge comes out clean, 40 to 60 minutes. Cover the edges with foil if needed to prevent from burning.
- Remove from the oven and cool to room temperature before serving.
Notes
- Let the pie cool to room temperature before serving for best texture.
- Cover edges with foil if they brown too quickly.
- Store leftovers covered in the refrigerator.
- Prep Time: 20 minutes
- Cook Time: 50 minutes
- Category: Dessert
- Method: Baking
- Cuisine: American
- Diet: Vegetarian
Nutrition
- Serving Size: 1 slice
- Calories: 320
- Sugar: 22g
- Sodium: 280mg
- Fat: 14g
- Saturated Fat: 8g
- Unsaturated Fat: 5g
- Trans Fat: 0g
- Carbohydrates: 42g
- Fiber: 2g
- Protein: 6g
- Cholesterol: 70mg
Tips for Perfect Pumpkin Pie in a Cup Recipe
After making these pumpkin pies more times than I can count, I’ve picked up some foolproof tricks:
- Keep everything cold – Chilled butter and ice water make the flakiest crust. I even pop my flour in the freezer for 10 minutes!
- Watch the edges – Around minute 20, tent the crust edges with foil strips if they’re browning too fast.
- The jiggle test – Pies are done when centers wobble slightly but aren’t liquidy. They’ll firm up as they cool.
- Patience is key – Let them cool completely (about 2 hours) before serving – this prevents soggy bottoms.
- Room temp eggs – For smoothest filling, take eggs out 30 minutes before mixing.
Follow these simple tricks and you’ll get perfect pumpkin pies every single time!
Serving Suggestions for Pumpkin Pie in a Cup Recipe
Oh, the fun part! These little pumpkin pies are like blank canvases for your creativity. My absolute favorite way? A generous dollop of freshly whipped cream with a sprinkle of cinnamon on top – it’s like a cozy hug in dessert form. For special occasions, I’ll drizzle caramel sauce or add candied pecans for crunch. They’re heavenly with a cup of spiced chai or strong coffee too. And here’s a secret – sometimes I serve them slightly warm with a scoop of vanilla ice cream melting over the top. Pure bliss!
Storage and Reheating Instructions
These pumpkin pie cups keep beautifully in the fridge for 3-4 days – just cover them tightly with plastic wrap or pop them in an airtight container. Want to enjoy them warm? A quick 10-second zap in the microwave does the trick, or heat at 300°F for 5 minutes if you’re patient. The crust stays crispest if you reheat them uncovered – and whatever you do, don’t skip that fresh whipped cream on top when serving leftovers!
Nutritional Information for Pumpkin Pie in a Cup Recipe
Now, I’m all for enjoying dessert without overthinking it, but I know some folks like to keep tabs on what they’re eating. Just remember – these numbers are rough estimates that can change based on your exact ingredients and portion sizes. Each little pumpkin pie cup is roughly equivalent to a slice of regular pie, with all that good stuff – protein from the eggs, vitamins from the pumpkin, and yeah, a bit of sugar and butter too (because deliciousness!). If you’re watching specific macros, I’d suggest plugging your exact brands into a nutrition calculator – but personally? I say savor every bite and worry about numbers later!
FAQs About Pumpkin Pie in a Cup Recipe
Over the years, I’ve gotten so many great questions about these little pumpkin pies – here are the ones that come up most often:
How long should pumpkin pie rest before serving?
Oh honey, I know it’s tempting, but you’ll want to wait at least 2 hours for these to cool completely. That patience pays off with the perfect texture – the filling sets up beautifully and won’t ooze everywhere when you take that first bite. If you can resist, letting them chill overnight makes the flavors even better!
Can pumpkin pie be left at room temperature?
For serving, absolutely – but not for too long! These little cups are fine out for about 2 hours (perfect for your holiday party). After that, pop any leftovers in the fridge. The eggs in the filling mean we need to play it safe with food safety.
Why did my pie filling crack?
Don’t panic – it happens to all of us! Usually means it baked a touch too long or cooled too quickly. Next time, try turning off the oven and cracking the door open for gradual cooling. The good news? A dollop of whipped cream covers any cracks beautifully!
Can I make these ahead?
You sure can! The baked pies keep great in the fridge for 3-4 days. For longer storage, freeze them (without toppings) for up to 2 months – just thaw overnight in the fridge when you’re ready to serve.
For More recipes Follow me on Facebook!