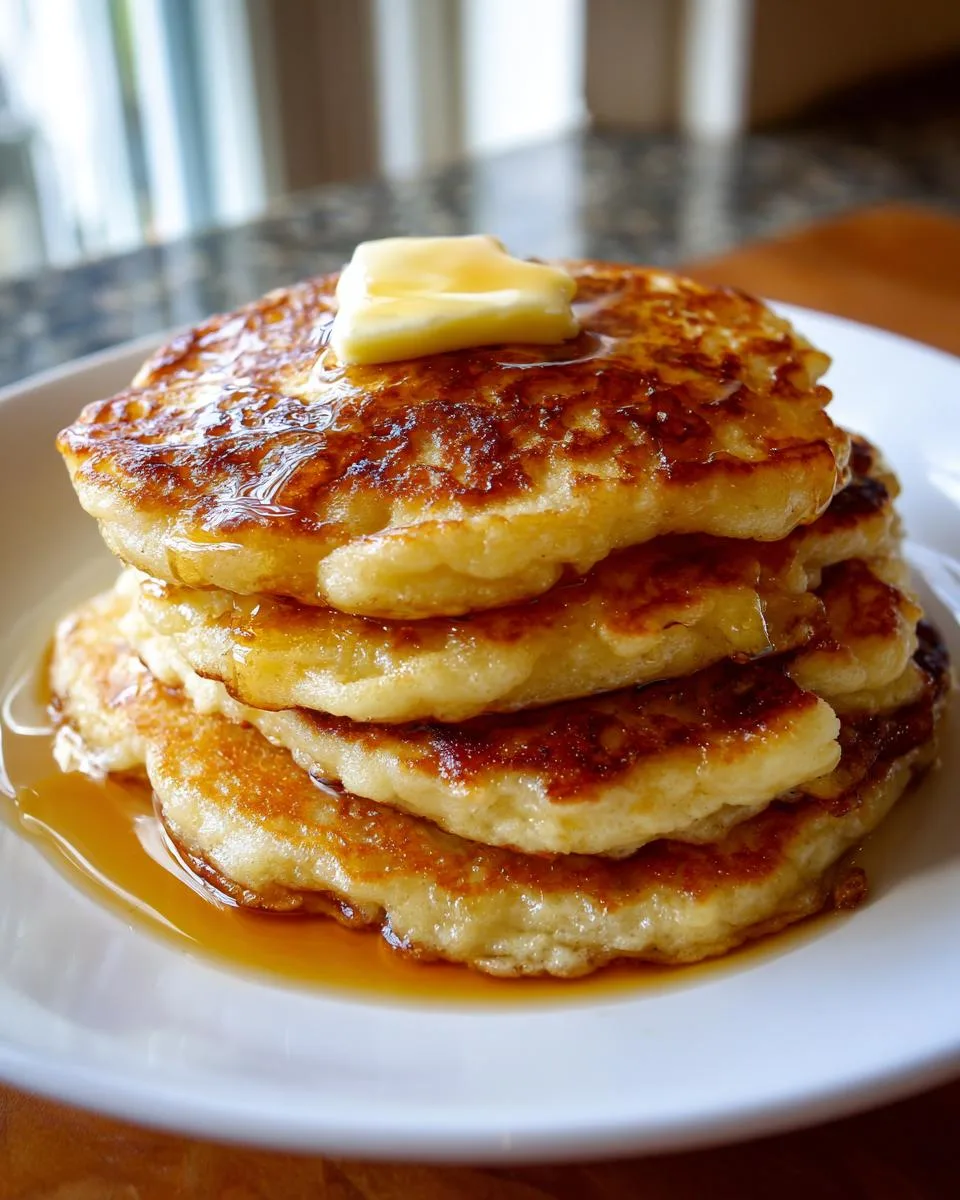
There’s something magical about flipping a stack of golden old-fashioned pancakes on a lazy Sunday morning. I’ve been making this exact recipe for over twenty years—first with my grandma’s well-worn cast iron griddle, now with my own kids perched on the countertop “helping” stir. These aren’t just any pancakes. They’re the kind that puff up perfectly fluffy, with those signature crisp edges that soak up maple syrup like a dream. Simple pantry ingredients transform into breakfast magic in under 15 minutes. No fancy techniques, no weird additives—just honest, old-fashioned pancakes that taste like home.

Table of Contents
Table of Contents
Why You’ll Love These Old-Fashioned Pancakes
Listen, I know everyone claims their pancake recipe is the best—but trust me, these old-fashioned pancakes are special. They’re the kind of recipe that makes you want to linger at the breakfast table just one more minute. Here’s why they’ve been my go-to for decades:
- Fluffy perfection: That first bite? Pure cloud-like magic. The baking powder works its wonders while the melted butter gives them that irresistible richness.
- Weekend easy: You probably have everything in your pantry right now. No special trips to the store—just simple ingredients that come together in minutes.
- Golden crisp edges: Cooked just right in a well-buttered pan, they get those lacy brown edges that crunch ever so slightly before giving way to tender centers.
- Family tradition material: My kids can practically make these blindfolded now (okay, maybe not blindfolded—hot pans!). They’re foolproof enough for little helpers but impressive enough for guests.
- Better than the box: Once you taste homemade, you’ll never go back to that powdery mix. The vanilla scent alone is worth the extra two minutes of measuring.
Seriously—these pancakes turn an ordinary morning into something special. The batter takes less time to make than your coffee brews, and suddenly you’re the hero of breakfast. No fancy techniques, no weird ingredients—just pure, old-fashioned deliciousness that’ll have everyone asking for seconds.
Ingredients for Old-Fashioned Pancakes
Here’s the beautiful part—you likely have everything for these old-fashioned pancakes sitting in your kitchen right now. I’ve made this recipe with bleary-eyed kids tugging at my pajama pants enough times to know simplicity matters. But don’t let the short ingredient list fool you—each one plays a starring role:
- 1½ cups all-purpose flour: Spoon it into your measuring cup and level it off—no packing! That little trick makes all the difference in getting the perfect fluffy texture.
- 3½ teaspoons baking powder: Yes, tablespoons sound crazy, but this is our magic fluff-maker. Make sure yours’s fresh (test it by sprinkling some in hot water—if it bubbles violently, you’re golden).
- 1 tablespoon sugar: Just enough to caramelize those gorgeous golden edges without making them dessert-sweet.
- ½ teaspoon salt: My grandma always said this is what makes flavors “pop”—she wasn’t wrong.
- 1¼ cups milk (or buttermilk): Whole milk gives richness, but buttermilk? Oh, that tangy twist takes these to legendary status. Room temp blends smoother—I usually microwave it for 30 seconds while gathering other ingredients.
- 1 egg: Crack it into a small bowl first—nothing ruins breakfast faster than fishing out eggshells from your batter.
- 3 tablespoons melted butter: Real butter only—no substitutes! I melt mine in the microwave in 15-second bursts so it doesn’t get too hot.
- 1 teaspoon vanilla extract (optional): My secret weapon—that warm, comforting scent wafting through the house is half the breakfast experience.
See? Nothing fancy—just honest ingredients that turn into something extraordinary. Now let’s talk about how these simple things become pancake magic…

How to Make Old-Fashioned Pancakes
Okay, here’s where the magic happens! I’ve burned my fair share of pancakes over the years (who hasn’t?), but these steps will give you perfect old-fashioned pancakes every single time. The key? Patience and trusting the process—no rushing allowed!
Mixing the Batter
First, grab two bowls—one big, one medium. In the big bowl, whisk together your flour, baking powder, sugar, and salt. Don’t skip the whisking—this is how we get those ingredients evenly distributed without overmixing later.
Now for the wet team: In the medium bowl, whisk the egg like you mean it—about 30 seconds until it’s nice and frothy. Pour in the milk (or buttermilk if you’re feeling fancy), melted butter, and vanilla if using. Whisk again until it looks like golden silk.
Here’s the crucial part—pour the wet ingredients into the dry ingredients and stir with a wooden spoon or rubber spatula. Stir just until the flour disappears—lumps are totally fine! Overmixing makes pancakes tough, and nobody wants that. The batter should look thick but pourable—if it seems too stiff, add a splash more milk.
Cooking the Pancakes
Heat your griddle or nonstick pan over medium heat—not too hot, not too cold. I test mine by flicking a few drops of water—if they dance and evaporate quickly, you’re golden. Melt a little butter (about ½ teaspoon) right before the first pancake.
Pour about ¼ cup batter per pancake—I use a measuring cup for consistency. Now here’s where patience comes in: Wait until bubbles form across the surface and the edges look set—about 2 minutes. Don’t peek too soon!
When it’s time, slide your spatula underneath and flip with confidence. The second side cooks faster—just 1 to 2 minutes until golden brown. Resist the urge to press down—that just squeezes out all the fluffiness we worked so hard for!
Transfer to a plate and repeat, adding a tiny bit more butter between batches. Pro tip: Keep finished pancakes warm in a 200°F oven while you cook the rest—they’ll stay perfect until serving.
See? Simple as can be. Now let’s talk about how to make these even better with a few insider tricks…
Print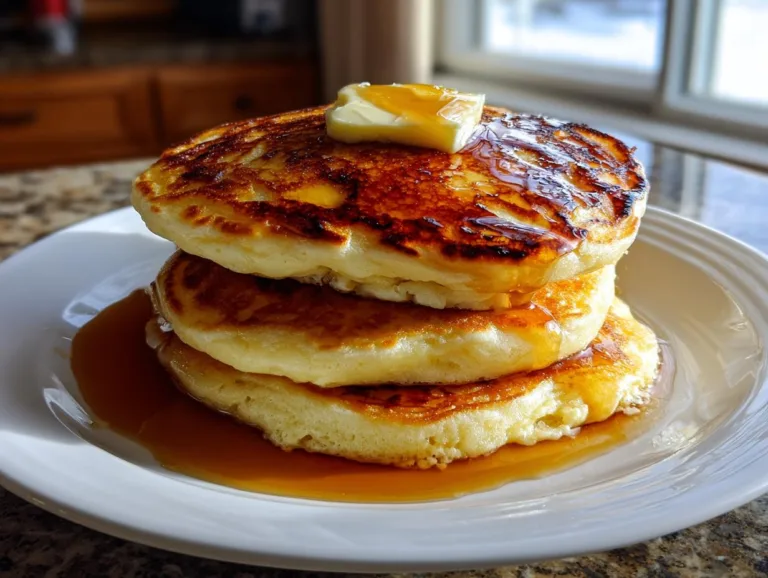
3 Secrets to Perfect Old-Fashioned Pancakes Every Time
Classic old-fashioned pancakes made from scratch with simple ingredients for a perfect breakfast.
- Total Time: 15 minutes
- Yield: 8–10 pancakes 1x
Ingredients
- 1½ cups all-purpose flour
- 3½ teaspoons baking powder
- 1 tablespoon sugar
- ½ teaspoon salt
- 1¼ cups milk (or buttermilk)
- 1 egg
- 3 tablespoons melted butter (plus more for cooking)
- 1 teaspoon vanilla extract (optional)
Instructions
- Whisk flour, baking powder, sugar, and salt in a large bowl.
- In another bowl, whisk egg, milk, melted butter, and vanilla extract (if using).
- Pour wet mixture into dry ingredients and stir gently until combined (small lumps are fine).
- Heat a nonstick pan or griddle over medium heat and lightly butter the surface.
- Pour ¼ cup batter per pancake onto the pan.
- Cook until bubbles form and edges set (about 2 minutes), then flip and cook the other side for 1-2 minutes until golden brown.
- Serve warm with butter, syrup, or fresh fruit.
Notes
- For fluffier pancakes, avoid overmixing the batter.
- Buttermilk adds extra tenderness and tang.
- Do not press down on pancakes while cooking.
- Prep Time: 5 minutes
- Cook Time: 10 minutes
- Category: Breakfast
- Method: Stovetop
- Cuisine: American
- Diet: Vegetarian
Nutrition
- Serving Size: 1 pancake
- Calories: 150
- Sugar: 3g
- Sodium: 250mg
- Fat: 5g
- Saturated Fat: 3g
- Unsaturated Fat: 2g
- Trans Fat: 0g
- Carbohydrates: 22g
- Fiber: 1g
- Protein: 4g
- Cholesterol: 35mg
Tips for Perfect Old-Fashioned Pancakes
After flipping thousands of pancakes over the years (and yes, sacrificing a few to the pancake gods), I’ve learned a few secrets that’ll take your old-fashioned pancakes from good to “can I have your recipe?” great. These aren’t just tips—they’re pancake commandments in my kitchen:
1. The batter should look lumpy – I know it’s tempting to keep stirring until smooth, but resist! Those little flour pockets create steam pockets as they cook, giving you that dreamy fluffiness. Stir just until the dry ingredients disappear—about 10 folds max.
2. Buttermilk is worth the trip – That slight tang? The extra tenderness? Absolute magic. If you don’t have buttermilk, make your own: Stir 1 tablespoon lemon juice or vinegar into 1 cup milk and let it sit for 5 minutes. Game changer.
3. Let the batter rest (but not too long) – Five minutes is perfect—it gives the flour time to hydrate and the baking powder to start working. Any longer and you’ll lose those precious bubbles. Set a timer!
4. Butter is your friend (but don’t drown them) – A little butter in the pan gives gorgeous golden color, but too much makes them greasy. I wipe excess with a paper towel between batches—just enough to coat the surface.
5. Keep the heat steady – Medium heat is the sweet spot. Too hot and they’ll burn before cooking through; too low and they’ll be pale and doughy. If your first pancake isn’t perfect, adjust the heat—it’s your test run!
6. Hands off the spatula! – Pressing down on cooking pancakes is like popping a balloon—all that lovely air escapes. Flip once, then walk away. Your patience will be rewarded with cloud-like stacks.
7. Frozen pancakes? Yes please! – Cool extras completely, then layer between parchment paper in a freezer bag. Reheat in the toaster—they’ll taste nearly fresh-made on busy mornings.
Remember—perfect pancakes aren’t about fancy techniques, they’re about respecting these simple rules. Once you get the rhythm down, you’ll be flipping flawless stacks without even thinking about it. Now, who’s ready for seconds?
Ingredient Substitutions & Notes
Listen, I’m all for sticking to the original recipe—it’s perfect as is—but life happens! Maybe you’re out of milk or someone in your house suddenly declares they hate vanilla (how?!). Here’s how to tweak these old-fashioned pancakes without losing that classic charm:
Milk Swap: Out of milk? No panic. Buttermilk gives that signature tang, but regular milk works beautifully too. For dairy-free, unsweetened almond or oat milk blends right in—just expect slightly less richness. My lactose-intolerant niece swears by canned coconut milk (the thin kind, not the creamy stuff).
Butter Blues: If you’re truly out of butter (who let this happen?), neutral oil like canola or vegetable oil works in a pinch. But—and this is a big but—you’ll miss that rich, buttery flavor. Melted coconut oil adds nice flavor if you don’t mind a hint of tropical vibes.
Flour Fixes: All-purpose flour is ideal, but if you need to go gluten-free, a 1:1 gluten-free blend does the job. Whole wheat flour makes denser pancakes—I mix it half-and-half with all-purpose when I’m feeling virtuous.
Egg Emergency: Forgot to buy eggs? Mix 1 tablespoon ground flaxseed with 3 tablespoons warm water, let it thicken for 5 minutes, and use that. It won’t be exactly the same, but it’ll hold your batter together.
Vanilla Variations: Not a fan of vanilla? Try almond extract instead—just use half the amount. Or skip it entirely and add a pinch of cinnamon to the dry ingredients for cozy warmth.
Sweet Tweaks: That tablespoon of sugar is just enough, but if you’re feeling fancy, brown sugar adds caramel notes. Honey or maple syrup work too—reduce the milk slightly since they add extra liquid.
Remember—the best pancakes are the ones you can actually make with what’s in your kitchen right now. Don’t let a missing ingredient stop you from flipping up some breakfast magic! You can find more great recipe ideas over at our recipe index.
Serving Suggestions for Old-Fashioned Pancakes
Now comes the best part—decking out your stack of golden old-fashioned pancakes! I’ve served these a hundred different ways over the years, from lazy Sunday mornings to impromptu “breakfast for dinner” nights. Here’s how to turn your pancakes into a full-blown experience:
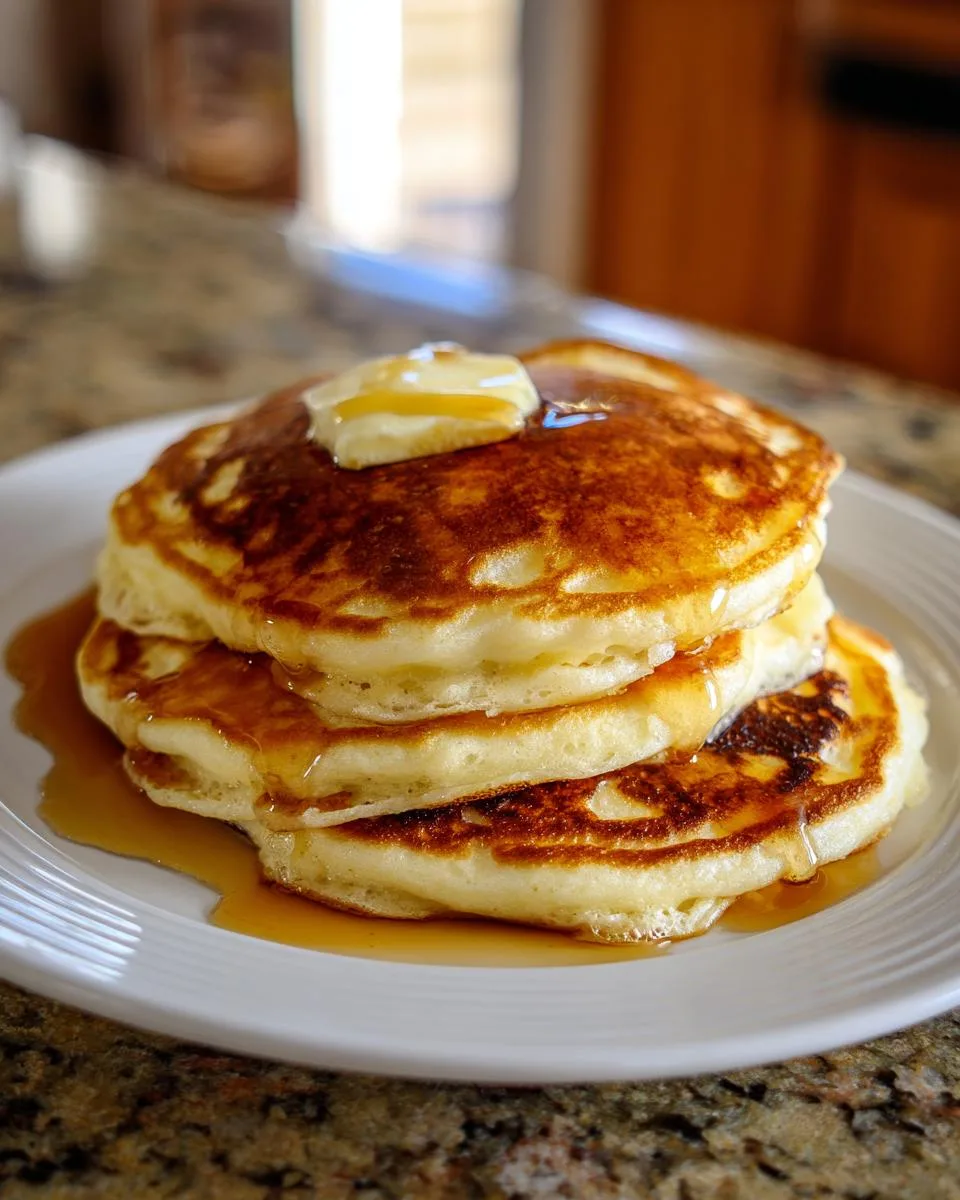
The Classic: You can’t go wrong with a generous pour of real maple syrup (none of that corn syrup imposter stuff!) and a pat of butter melting into those little craters. Pro tip—warm your syrup for 30 seconds in the microwave first—it’ll soak into the pancakes like a dream.
Fruit Fiesta: Fresh berries are my go-to—their bright tartness cuts through the richness perfectly. In summer, I pile on sliced peaches or bananas; in winter, sautéed apples with cinnamon steal the show. Frozen berries work too—just microwave them with a teaspoon of sugar until syrupy.
Whipped Cream Wonderland: A dollop of homemade whipped cream takes these from breakfast to dessert territory. I add a splash of vanilla or a pinch of powdered sugar to mine. For extra fun, let the kids squirt it straight from the can—they’ll think it’s the fanciest thing ever.
Nutty Crunch: Toasted pecans or walnuts add wonderful texture. I keep a jar of candied pecans in my pantry just for pancake days—their caramelized crunch is irresistible. Almond slivers work great too if you’re feeling fancy.
Savory Twist: Don’t laugh—try topping your pancakes with crispy bacon or sausage links! The sweet-salty combo is magical. My husband swears by a fried egg on top with hot sauce—”breakfast lasagna,” he calls it. (If you like that sweet/savory combo, check out our viral lasagna soup recipe for a different take!)
Kid-Approved: Chocolate chips (mix them right into the batter!), rainbow sprinkles, or a drizzle of Nutella turn ordinary pancakes into a celebration. My little one loves when I make “pancake sandwiches” with peanut butter and banana slices in between.
The beauty of old-fashioned pancakes? They’re like a blank canvas for whatever flavors you’re craving. Some days I go all out with berries and whipped cream; other mornings, just a quick swipe of jam does the trick. However you dress them, that first bite of warm, fluffy goodness will taste like home.
Storing and Reheating Old-Fashioned Pancakes
Let’s be real—leftover pancakes are basically breakfast gold when you’re rushing out the door on a weekday. But nothing’s sadder than a soggy, rubbery pancake resurrection. After years of trial and error (and yes, a few tragic microwave disasters), here’s exactly how to keep those old-fashioned pancakes tasting fresh-made:
Room Temp Short-Term: If you’re eating them within an hour or two, just stack them on a plate and cover loosely with a clean kitchen towel. The steam keeps them soft without making them soggy. My grandma used to tuck them in the oven with just the pilot light on—old-school warmth! You can see some of our family cooking adventures over on our Facebook page.
Fridge for Next-Day Use: Cool pancakes completely first—hot ones create condensation that turns them gummy. Layer between parchment paper in an airtight container—they’ll stay fresh for 2 days. Pro tip: Add a paper towel above and below the stack to absorb any extra moisture.
Freezer Magic: This is my secret weapon for busy mornings! Freeze pancakes in a single layer on a baking sheet first (about 30 minutes), then transfer to freezer bags with parchment between each. They’ll keep beautifully for 2 months—just grab however many you need.
Reheating Like a Pro: The toaster is king here—medium setting gives you that perfect crisp exterior while warming the center. No toaster? A dry skillet over medium heat works wonders—about 30 seconds per side. Microwave in 15-second bursts if you must, but sprinkle with water first to prevent toughness.
Bonus Hack: Frozen pancakes go straight into the toaster—no thawing needed! They come out tasting nearly fresh. My kids think I’m a wizard when I “magically” produce warm pancakes on school mornings in under 2 minutes.
Remember—good pancakes deserve a proper second act. With these tricks, your leftovers will taste just as glorious as that first hot-off-the-griddle bite. Now go forth and conquer breakfast—even on your busiest days!
Old-Fashioned Pancakes FAQs
After years of making these pancakes (and fielding countless questions from friends and family), I’ve heard it all! Here are the answers to the most common old-fashioned pancake mysteries—straight from my flour-dusted notebook:
Why are my pancakes flat as cardboard?
Oh honey, we’ve all been there! Flat pancakes usually mean your baking powder’s gone stale (test it with hot water—if it doesn’t bubble like crazy, toss it). Or maybe you overmixed the batter—those lumps are your friends! Also check your heat—too low and they won’t puff properly.
Can I really freeze these pancakes?
Absolutely! In fact, I always make extra just for freezing. Cool them completely first, then layer between parchment paper in freezer bags. They’ll keep beautifully for 2 months. Pop them straight in the toaster—no thawing needed—and they taste nearly fresh-made!
Buttermilk vs regular milk—what’s the difference?
Buttermilk adds a lovely tang and makes pancakes extra tender thanks to its acidity. Regular milk gives a cleaner, sweeter flavor. Both work great—I use whatever’s in my fridge! No buttermilk? Stir 1 tablespoon lemon juice into 1 cup milk and let it sit for 5 minutes.
Why do my pancakes burn before cooking through?
Your pan’s too hot, friend! The perfect temperature is when a drop of water sizzles gently but doesn’t immediately vaporize. Medium heat is usually just right—if your first pancake’s too dark, dial it back. Also, make sure your baking powder’s fresh—old powder won’t give proper rise.
Can I make the batter the night before?
I don’t recommend it—the baking powder starts working right away, and you’ll lose all those precious bubbles. However, you can mix the dry and wet ingredients separately the night before, then combine them in the morning. Takes just 2 minutes and makes morning prep a breeze!
Nutritional Information
Okay, let’s talk numbers—but remember, these are just estimates since your exact ingredients might vary slightly from mine. Here’s the scoop on what you’re getting in each glorious old-fashioned pancake (based on the recipe making about 8 pancakes):
- Calories: Around 150 per pancake—but let’s be honest, who stops at one?
- Carbs: About 22g (that’s your flour and sugar doing their thing)
- Protein: 4g—not bad for breakfast!
- Fat: 5g (thank that glorious butter)
- Sugar: Just 3g per pancake—most of that’s natural from the milk
A few notes: Using buttermilk adds a smidge more protein and reduces sugar slightly. Swap to whole wheat flour? You’ll get more fiber but similar calories. And obviously, syrup and toppings add their own numbers—but that’s where the fun is, right?
Remember, these old-fashioned pancakes are meant to be enjoyed—not stressed over. They’re homemade goodness with simple ingredients you can pronounce. That’s nutrition I can get behind!