You know that feeling when you crave something sweet but don’t want the sugar crash afterwards? That’s exactly why I fell in love with these healthy pumpkin bars! I first made them last fall when my neighbor brought over a giant pumpkin from her garden – talk about perfect timing. These bars became my go-to afternoon pick-me-up that actually gives me energy instead of making me want a nap.

Table of Contents
Table of Contents
Why You’ll Love These Healthy Pumpkin Bars
The magic happens with simple ingredients you probably already have: pumpkin puree (fresh or canned – no judgment here!), warm spices, and a creamy filling that feels indulgent but won’t weigh you down. What I love most is how they satisfy my dessert cravings while packing in fiber and protein. Plus, they come together in one bowl – because who has time for complicated recipes on busy weeknights?
These pumpkin bars aren’t just delicious—they’re downright magical. Here’s why they’ve become my fall obsession (and why you’ll keep coming back to this recipe):
- Guilt-free indulgence: Creamy filling meets moist pumpkin spice bars without the sugar crash
- Pantry-friendly ingredients: No fancy health food store runs required—just simple staples
- Perfect texture every time: Soft yet sturdy enough to hold that dreamy cream cheese layer
- Meal prep hero: Makes 9 generous squares that stay fresh all week (if they last that long!)
- Versatile: Breakfast? Snack? Dessert? These healthy pumpkin bars do it all
My kids go crazy for them, and I love that they’re getting real pumpkin instead of artificial flavors. The maple syrup sweetness is just right—not overpowering like some store-bought treats. Trust me, one bite and you’ll understand why I make these weekly from September through December!
Ingredients for Healthy Pumpkin Bars
What I love most about these pumpkin bars? You likely have most ingredients sitting in your pantry right now! Here’s everything you’ll need – and yes, I’ve included all my little preparation notes that make all the difference.
For the Bars
- 3/4 cup pure pumpkin puree – Not pumpkin pie filling! Make sure it’s the plain stuff
- 3/4 cup unsweetened almond milk – Any milk works, but almond keeps it light
- 1/4 cup pure applesauce – The secret to keeping them moist without extra oil
- 1 large egg – Room temperature works best (just leave it out for 30 minutes)
- 1/2 teaspoon pure vanilla extract – Splurge on the good stuff here
- 2 cups oat flour – Measure by spooning into cup, not scooping!
- 1/2 tablespoon dried raisins – Optional, but adds nice little bursts of sweetness
- 1 1/4 teaspoons baking powder – Make sure yours is fresh
- 1 1/2 teaspoons ground cinnamon – The star of the spice show
- 1 teaspoon ground ginger – Gives that warm, cozy kick
- 1/4 teaspoon freshly grated nutmeg – Worth grating it fresh if you can
- 1/4 teaspoon salt – Just a pinch to balance flavors
- 1/4 cup pure maple syrup – Grade A for best flavor
For the Cream Cheese Filling
- 8 ounces fat-free cream cheese – Let it soften at room temp first
- 1 egg yolk – Room temperature helps it blend smoothly
- 1/2 teaspoon pure vanilla extract – Same good stuff as above
- 2 tablespoons honey – Local if you can find it!
See? Nothing crazy here. Just real, simple ingredients that come together to make something special. Now let’s get mixing!
How to Make Healthy Pumpkin Bars
Okay, let’s get baking! These healthy pumpkin bars come together in just a few simple steps. I’ve made this recipe dozens of times, and I promise – once you get the rhythm down, you’ll be whipping up batches without even thinking about it.
Preparing the Cream Cheese Filling
First things first – let’s tackle that dreamy cream cheese layer. Grab your softened cream cheese (I forgot to take mine out once – not pretty!) and beat it until it’s smooth and fluffy. Then add in that egg yolk, vanilla, and honey. Keep mixing until everything is perfectly combined – no lumps allowed! Pop this in the fridge while we work on the bars. Chilling helps it firm up so it spreads beautifully later.
Mixing the Dry Ingredients
Now for the pumpkin bar base! In a big bowl, whisk together all your dry ingredients – oat flour, cinnamon, raisins (if using), salt, baking powder, ginger, and nutmeg. Here’s my trick: I like to sift the baking powder with the flour to avoid any bitter clumps. Take a deep breath – that spice combo smells like fall in a bowl!
Combining Wet and Dry Ingredients
In another bowl (or just use your 2-cup measuring cup like I do), whisk together the almond milk, egg, vanilla, pumpkin puree, and maple syrup until smooth. Now comes the fun part – gently fold the wet ingredients into the dry ones. Don’t overmix! A few flour streaks are totally fine – they’ll disappear as everything comes together. The batter should be thick but pourable – if it seems too stiff, add a splash more almond milk.
Baking and Cooling
Pour your batter into your prepared 8×8 pan (I line mine with parchment paper for easy lifting later) and smooth the top. Into the 350°F oven it goes! Set your timer for 20 minutes, but start checking at 18 – oven temps vary. The bars are done when they spring back lightly to the touch and a toothpick comes out clean.
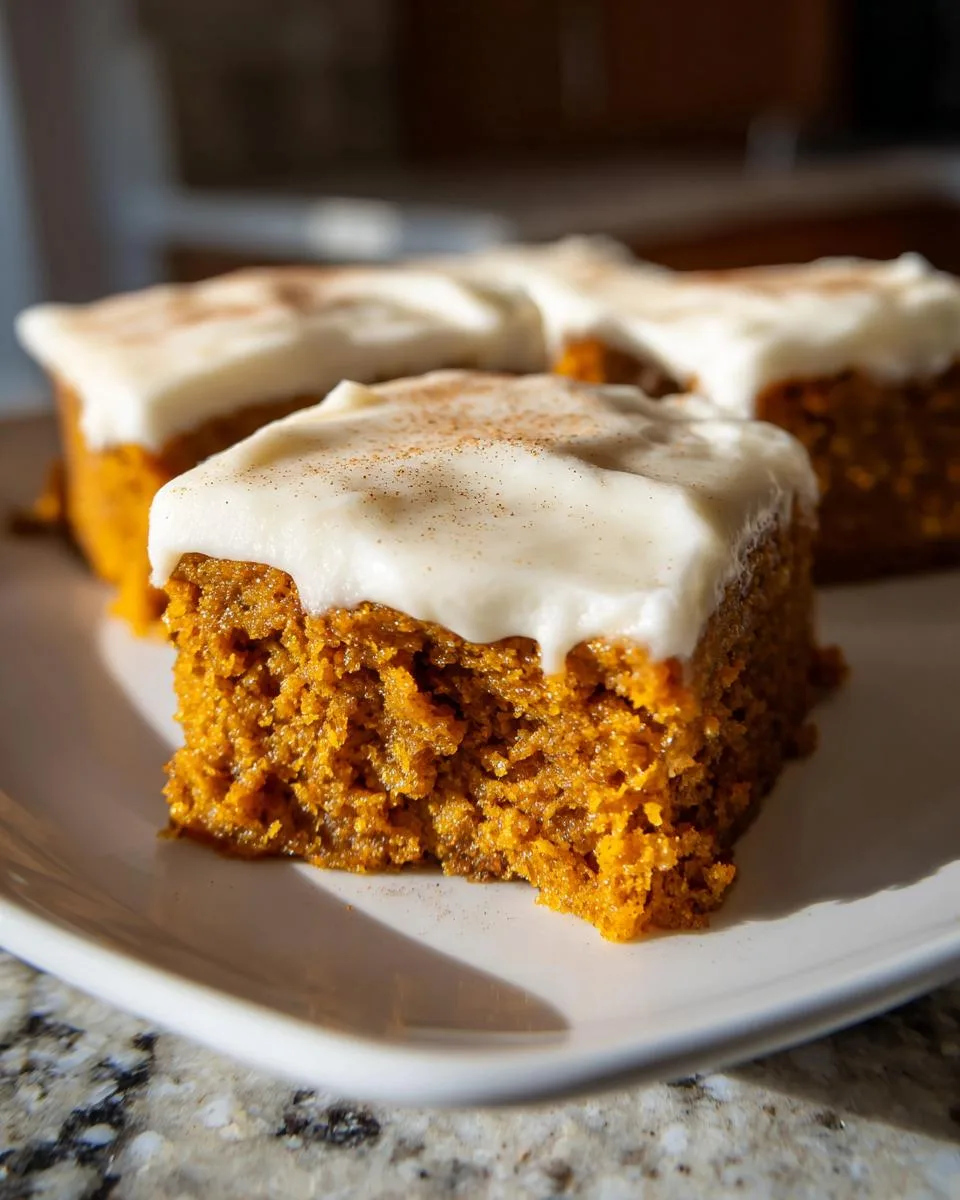
Here’s the hardest part – waiting! Let the bars cool in the pan for 10 minutes (they’ll keep cooking slightly), then transfer to a wire rack. Once completely cool, spread that chilled cream cheese filling evenly over the top. I like to use an offset spatula for this – makes it look bakery-perfect. Now slice into squares and try not to eat them all at once!
Print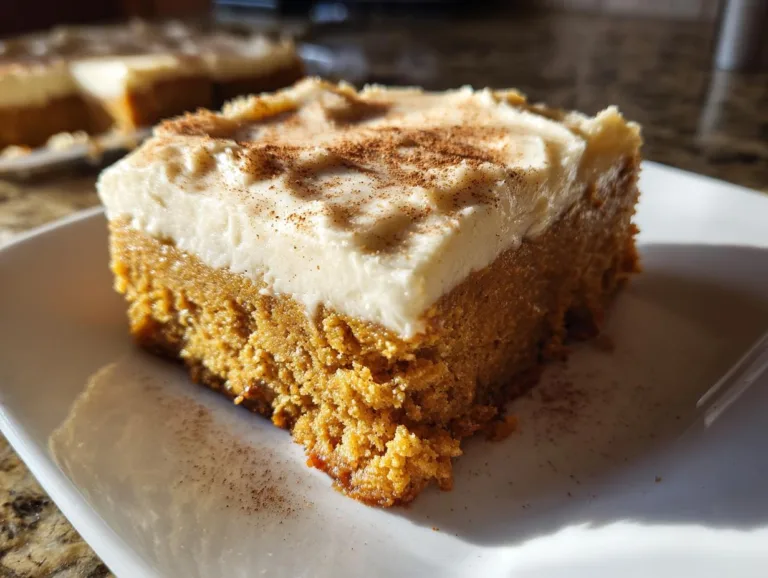
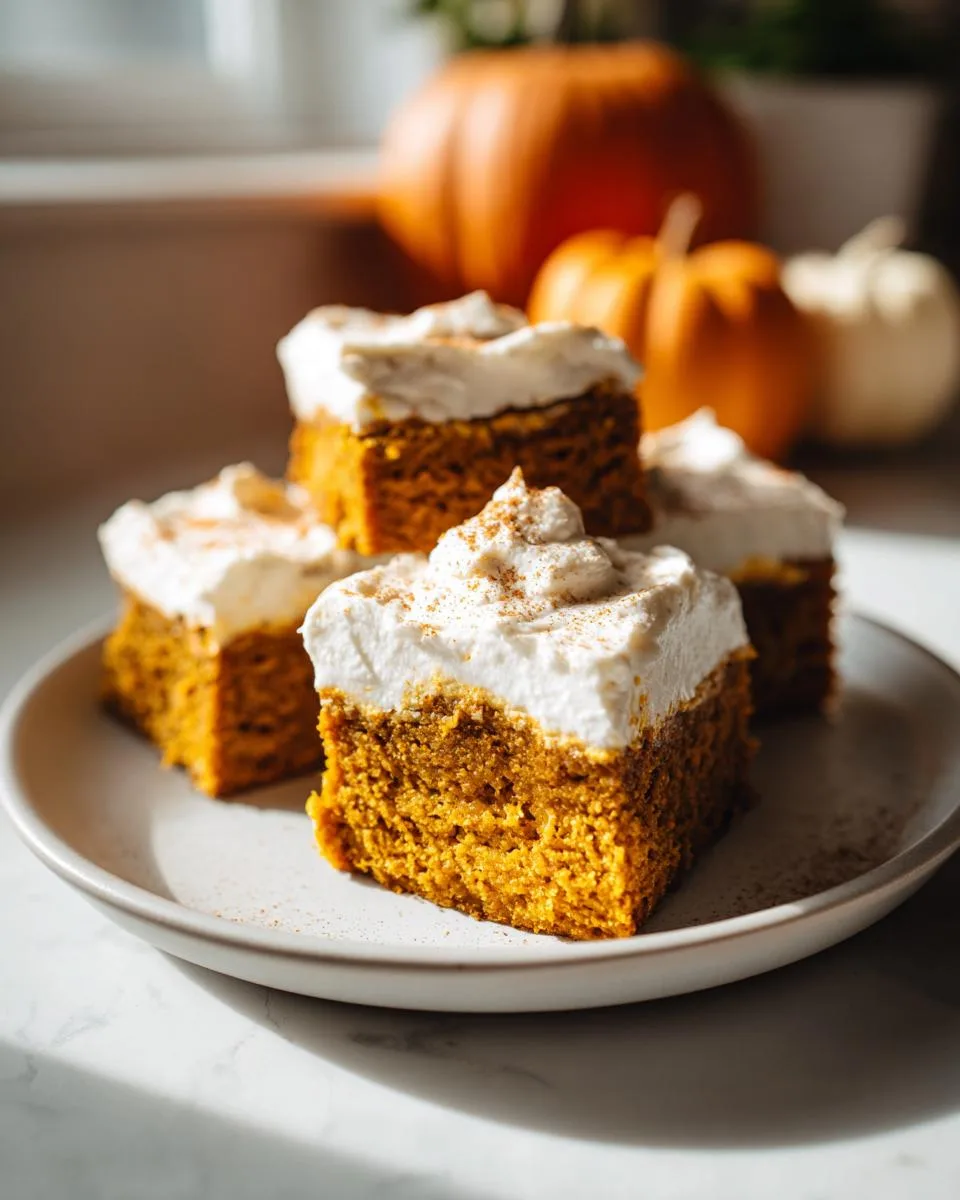
9 Irresistible Healthy Pumpkin Bars You’ll Crave Daily
Healthy pumpkin bars with a creamy filling, perfect for a nutritious snack or dessert.
- Total Time: 40 minutes
- Yield: 9 bars 1x
Ingredients
- 3/4 cup of pure pumpkin puree
- 3/4 cup of almond milk (unsweetened)
- 1/4 cup of pure applesauce
- 1 large egg
- 1/2 teaspoon of pure vanilla extract
- 2 cups of oat flour
- 1/2 tablespoon of dried raisins
- 1 1/4 teaspoons of baking powder
- 1 1/2 teaspoons of ground cinnamon
- 1 teaspoon of ground ginger
- 1/4 teaspoon of nutmeg (freshly grated)
- 1/4 teaspoon of salt
- 1/4 cup of pure maple syrup
- 8 ounces of cream cheese (fat-free)
- 1 egg yolk (room temperature)
- 1/2 teaspoon of pure vanilla extract
- 2 tablespoons of honey
Instructions
- Make the cream cheese filling by whisking the cream cheese until soft and fluffy.
- Add egg yolk, vanilla extract, and honey to the cream cheese, then beat until well combined. Refrigerate.
- Preheat oven to 350°F and line an 8×8 baking pan with parchment paper or lightly coat with cooking spray.
- In a large bowl, mix dry ingredients (oat flour, cinnamon, raisins, salt, baking powder, ginger, and nutmeg).
- In another bowl, whisk almond milk, egg, vanilla, pumpkin puree, and maple syrup until smooth.
- Combine wet and dry ingredients, folding gently with a rubber spatula.
- Transfer batter to the pan and smooth the top.
- Bake for 20-25 minutes or until a toothpick comes out clean.
- Let bars cool in the pan for 10 minutes, then transfer to a wire rack.
- Once fully cooled, spread cream cheese filling and cut into squares.
Notes
- Store pumpkin bars in the fridge for up to 4 days.
- For best texture, let them cool completely before cutting.
- Substitute honey with maple syrup if preferred.
- Use gluten-free oat flour if needed.
- Prep Time: 15 minutes
- Cook Time: 25 minutes
- Category: Dessert
- Method: Baking
- Cuisine: American
- Diet: Low Fat
Nutrition
- Serving Size: 1 bar
- Calories: 180
- Sugar: 10g
- Sodium: 120mg
- Fat: 5g
- Saturated Fat: 2g
- Unsaturated Fat: 2g
- Trans Fat: 0g
- Carbohydrates: 28g
- Fiber: 3g
- Protein: 5g
- Cholesterol: 40mg
Tips for Perfect Healthy Pumpkin Bars
After making these pumpkin bars more times than I can count, I’ve picked up some game-changing tricks that’ll make yours turn out perfect every single time:
- Cool completely before cutting – I know it’s tempting, but wait! The cream cheese layer needs time to set, and the bars firm up beautifully as they cool.
- Room temp ingredients matter – That egg and cream cheese blend so much better when they’re not cold. I set mine out when I preheat the oven.
- Toast your oat flour – Just 5 minutes in a dry skillet brings out an amazing nutty flavor. Game changer!
- Substitute with confidence – No almond milk? Use whatever milk you have. Out of maple syrup? Honey works great too.
- Storage secret – Keep them in an airtight container with parchment between layers. They stay fresh for 4 days (if they last that long!).
The best part? These bars actually taste even better the next day as the flavors meld. Trust me, your future self will thank you for making a double batch!

Storage and Reheating Instructions
Okay, let’s talk about keeping these healthy pumpkin bars fresh – because let’s be real, you’re probably not eating all nine squares in one sitting (though I wouldn’t judge if you did!). Here’s how I store mine to keep them tasting just-baked fresh:
First, make sure they’re completely cooled before storing – that cream cheese layer needs to set properly. I pop mine in an airtight container with parchment paper between layers if I’m stacking them. They’ll stay perfect in the fridge for up to 4 days. The oat flour actually helps them stay moist longer than you’d expect!
Now, about reheating – you’ve got options! My favorite way is to let a square sit at room temperature for about 15 minutes before eating. But if you’re impatient like me sometimes, 10 seconds in the microwave brings back that just-baked warmth. Just don’t overdo it or the cream cheese will get too soft.
Freezing works great too! Wrap individual squares tightly in plastic wrap, then pop them in a freezer bag. They’ll keep for about 2 months. When you’re ready, thaw overnight in the fridge or give them a quick zap in the microwave. Pro tip: freeze them without the cream cheese topping and add it fresh after thawing for best texture.
FAQs About Healthy Pumpkin Bars
I get so many questions about these pumpkin bars – seems like everyone wants to make them their own! Here are answers to the ones I hear most often:
Can I Use Fresh Pumpkin Instead of Puree?
Absolutely! I actually prefer fresh pumpkin when it’s in season. Just roast your pumpkin chunks until tender (about 45 minutes at 400°F), then puree the flesh until smooth. The key is to drain it well – I spread mine on paper towels for about 15 minutes to remove excess moisture. Fresh pumpkin gives these bars an incredible earthy sweetness that canned can’t quite match. Just remember – never use pumpkin pie filling by accident!
How Long Do These Bars Stay Fresh?
In the fridge, they’re perfect for about 4 days in an airtight container. The oat flour helps them stay moist longer than you’d expect! If you need them to last longer, freeze them (without the cream cheese topping) for up to 2 months. The texture holds up surprisingly well – just thaw overnight in the fridge and add fresh topping when you’re ready to serve.
Can I Make These Gluten-Free?
You’re in luck – they’re already mostly gluten-free! Just make sure your oat flour is certified gluten-free (oats can sometimes get contaminated during processing). All the other ingredients are naturally gluten-free. I’ve made these for my gluten-sensitive friends dozens of times, and they never know the difference. The texture stays perfectly soft and tender – no weird grittiness that some gluten-free baked goods get.
Why Is My Cream Cheese Filling Runny?
Oh honey, I’ve been there! Usually it’s one of three things: the cream cheese wasn’t cold enough when mixing, you didn’t chill it long enough before spreading, or (the most common culprit) you tried to spread it on warm bars. That filling needs a cold base to set properly. If it does turn out too soft, just pop the whole pan in the fridge for an extra 30 minutes – it’ll firm right up!
Can I Skip the Cream Cheese Layer?
Of course! These pumpkin bars are delicious plain too. If you want something lighter, try dusting with cinnamon instead. Or get creative – I’ve topped them with Greek yogurt mixed with honey, or even a drizzle of almond butter. The bars themselves are moist and flavorful enough to stand alone if you’re not feeling the cream cheese vibe.
Serving Suggestions
Now let’s talk about enjoying these healthy pumpkin bars – because trust me, you’ll want to get creative with how you serve them! My absolute favorite way is with a hot cup of coffee in the morning – the warm spices in the bars pair perfectly with a dark roast. It feels indulgent but actually gives me energy to start my day.
For an extra protein boost, try pairing a square with Greek yogurt and fresh berries. The tangy yogurt balances the sweetness beautifully. When my kids want an after-school snack, I’ll sometimes drizzle theirs with almond butter and banana slices – instant smiles!

Feeling fancy? These bars make a stunning (and secretly healthy) dessert when served with a dollop of whipped coconut cream and a sprinkle of cinnamon. Honestly though? They’re delicious enough to enjoy all on their own – no embellishments needed!
Nutritional Information
Let’s talk numbers – because what’s the point of healthy pumpkin bars if we don’t know just how good they are for us? Here’s the breakdown per bar (based on cutting into 9 generous squares):
- Calories: 180 – Perfect for a satisfying snack
- Protein: 5g – Thanks to that oat flour and egg
- Fiber: 3g – Pumpkin and oats team up for this
- Sugar: 10g – All natural from maple syrup and honey
- Fat: 5g – Mostly the good kind from nuts and eggs
Now, here’s my nutritionist friend’s favorite part – these bars pack vitamin A from the pumpkin, calcium from the almond milk, and iron from the oat flour. They’re basically a multivitamin in dessert form!
Quick note: These numbers are estimates – your exact nutrition will vary slightly based on your specific ingredients. Using different milk or sweetener brands, or if your “heaping teaspoon” is more generous than mine, will change things a bit. But no matter what, you’re getting way better nutrition than from store-bought treats!
Rate This Recipe
I’d love to hear how your healthy pumpkin bars turned out! Did you add any fun twists? Maybe some chopped walnuts or a dash of cardamom? Every time I make these, I learn something new – like how my neighbor’s kids go crazy when I add mini chocolate chips (okay, not the healthiest addition, but so worth it!).
Drop me a note in the comments about your experience – was the texture perfect? Did your family gobble them up like mine always does? Your feedback helps me tweak the recipe and share even better versions with everyone. And if you snapped a photo of your beautiful bars, I’d be over the moon to see your creation! You can also follow along for more recipes on my Facebook page!
Happy baking, friends – may your pumpkin bars be moist, your cream cheese smooth, and your autumn afternoons cozy!