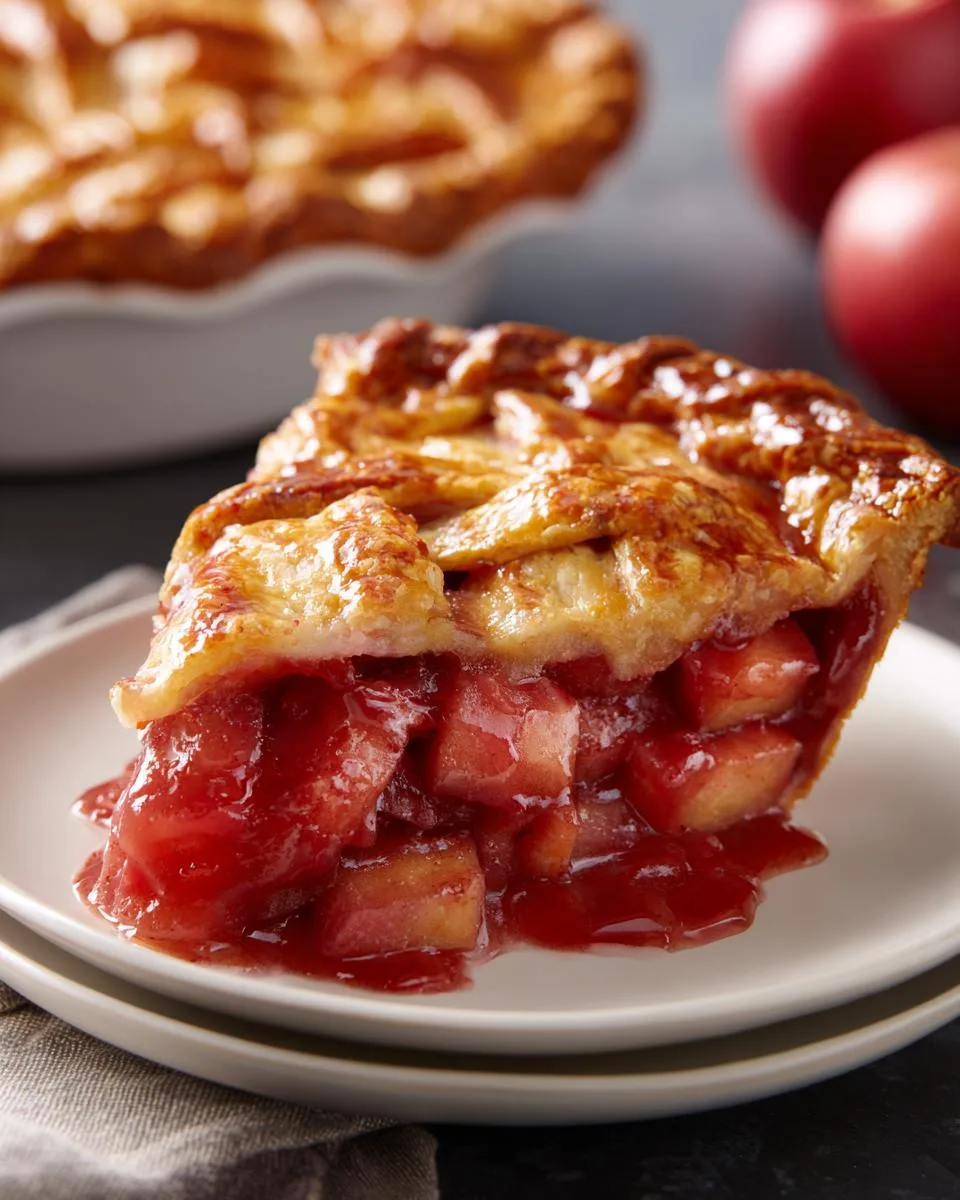
Nothing says “classic American dessert” quite like a fresh rhubarb pie – that perfect balance of sweet and tart wrapped in a flaky, buttery crust. I can still remember my grandmother pulling hers out of the oven when I was little, the kitchen filling with that unmistakable tangy-sweet aroma that made my mouth water before I even saw the golden crust.

Table of Contents
Table of Contents
Why You’ll Love This Classic Fresh Rhubarb Pie Recipe
What makes this recipe special? That flaky crust that shatters just right when you cut into it, paired with a filling that holds its shape without being gummy or runny. And trust me – using fresh rhubarb makes all the difference here. Those ruby-red stalks straight from the garden (or farmers market) give this pie its signature zing that’ll have everyone asking for seconds.
After baking pies professionally for over a decade, I can tell you this classic fresh rhubarb pie recipe is the one I keep coming back to year after year. It’s simple enough for beginners but impressive enough to serve at any gathering. The magic happens when the sugar caramelizes against the tart rhubarb, creating this incredible flavor dance that’ll make you close your eyes with every bite.
This isn’t just any pie – it’s the kind of dessert that makes people’s eyes light up when you bring it to the table. Here’s why it’s become my go-to recipe year after year:
- Quick prep with pantry staples: You probably have most ingredients already, and the filling comes together in minutes
- That magic sweet-tart balance: The sugar mellows the rhubarb’s natural zing without overpowering its unique flavor
- Showstopper presentation: That golden lattice crust makes it look like you spent hours baking (our little secret!)
- Instant nostalgia: One bite transports you back to summer picnics and grandma’s kitchen
Seriously – this pie disappears faster than you can say “seconds please!”
Ingredients for Classic Fresh Rhubarb Pie Recipe
Now let’s talk ingredients – and I mean exactly what you’ll need to make this pie sing. Baking is part science, after all, and these measurements matter more than you might think!
The Sugar Situation: You’ll want exactly 1 ⅓ cups white sugar – and no, don’t pack it down like brown sugar. Just scoop and level it off. Too much sugar and you’ll lose that perfect tartness that makes rhubarb pie so special.
Flour Power: Six level tablespoons of all-purpose flour (I use my butter knife to scrape off the excess). This thickens the juices just enough without turning your filling into paste.
Crust Confidence: One 14.1 ounce package of double-crust pie pastry, thawed overnight in the fridge. Trust me, trying to unroll frozen pastry leads to tears (both yours and the dough’s).
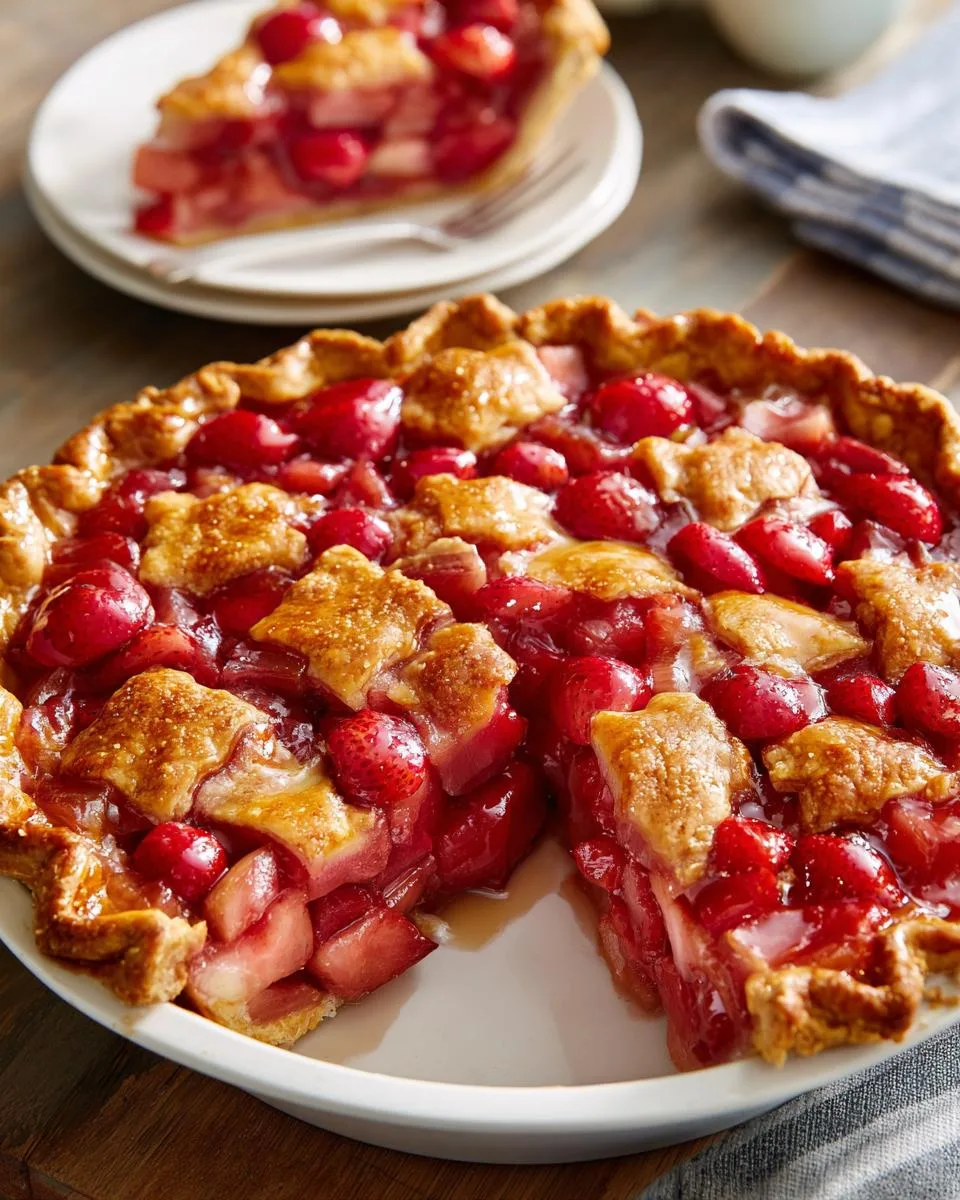
Rhubarb Rules: Four cups of freshly chopped rhubarb in ½-inch pieces – about 1 pound of stalks. And yes, fresh makes all the difference! Those grocery store pre-cut pieces dry out and lose their zing.
Butter Bonus: Just one tablespoon of cold butter, diced small. Dotting these over the filling before sealing creates little pockets of richness that’ll make you swoon.
See? Simple ingredients, but each one plays a crucial role in creating pie perfection. Now let’s get baking!
Essential Equipment
Okay, let’s talk tools! You don’t need fancy gadgets to make this pie – just a few trusty kitchen essentials that’ll make your life easier. I’ve learned the hard way that having the right equipment makes all the difference between pie stress and pie success.
Your Pie Plate: A standard 9-inch pie plate is perfect here. Glass is my favorite because you can see the bottom crust browning (no soggy bottoms allowed!). Metal works too, but avoid dark pans – they can over-brown the crust.
The Rolling Pin: My well-loved wooden rolling pin has rolled out more pie crusts than I can count. If you’re using store-bought pastry, you’ll still need this to gently flatten any seams and roll it slightly larger than your pie plate.
Mixing Bowl: Grab a large one – like, bigger than you think you’ll need. Those rhubarb pieces take up space, and you want room to toss everything without making a mess.
Measuring Tools: Dry measuring cups for the flour and sugar, measuring spoons for precision, and a liquid measuring cup if you’re making your own crust. Baking is chemistry, folks!
Pastry Brush: For brushing egg wash or milk on the crust (optional but makes it gorgeously golden). A silicone brush is easier to clean than bristle.
Oven Thermometer: Here’s my secret weapon! Oven temps can be liars – mine runs 25°F hot. A $5 thermometer prevents underbaked filling or burnt crust disasters.
That’s it! No fancy mixers or special tools required. Just good old-fashioned pie-making basics that let the rhubarb shine.
How to Make Classic Fresh Rhubarb Pie Recipe
Alright, let’s get to the fun part – turning those simple ingredients into pie magic! I’ll walk you through each step like I’m right there in the kitchen with you. Don’t worry – it’s easier than it looks, and I’ve got all the little tricks to make sure your pie turns out perfect.
Preparing the Crust
First things first – that flaky crust foundation! Here’s how we set the stage for pie success:
Take your refrigerated pie pastry out of the fridge about 15 minutes before rolling. It should still be cool but pliable – think “cold butter” texture, not “room temperature butter.” Trying to roll ice-cold dough leads to cracks, and too warm makes it sticky.
Lightly flour your work surface – I use about 2 tablespoons sprinkled in a circle. Unfold one pastry round onto the flour and give it a gentle roll with your pin to smooth any seams. Roll from the center outward, turning the dough occasionally to prevent sticking. You want it about 12 inches across – just big enough to drape over your pie plate with some overhang.
Carefully transfer the dough to your pie plate by rolling it loosely around the rolling pin, then unrolling it over the plate. Gently press it into the corners without stretching (stretched dough shrinks back while baking). Trim the edges to about 1 inch overhang – we’ll deal with that later. Pop the whole thing in the fridge while you prep the filling.
Creating the Filling
Now for the star of the show – that sweet-tart rhubarb filling! Here’s how we get it just right:
In your large mixing bowl, whisk together the sugar and flour first. This ensures even distribution so you don’t get pockets of flour in your finished pie. I like to give it about 15 good whisks – you’ll see the mixture go from looking separated to uniformly fluffy.
Add your chopped rhubarb and toss gently with a rubber spatula or your hands. You want each piece lightly coated – don’t go crazy mixing or you’ll break down the rhubarb. The flour-sugar mix will look dry at first, but don’t panic! Those juices will start releasing as it sits.
Taste a small piece of rhubarb – is it mouth-puckeringly tart? If your stalks are extra sharp, you might want to add another 2 tablespoons of sugar. But trust me – that tartness mellows beautifully when baked.
Assembling and Baking
Time to bring it all together! Here’s where the magic happens:
Preheat your oven to 450°F (230°C) with the rack in the lowest position. This intense initial heat sets the bottom crust quickly to prevent sogginess.
Pull your chilled crust from the fridge and sprinkle about 1/4 of the sugar-flour mixture evenly over the bottom. This creates a protective layer between the juicy filling and crust.
Heap the rhubarb mixture into the crust – it’ll look like a mountain at first but settles as it bakes. Dot the top with those cold butter pieces – they’ll melt into little pockets of richness.
Now for the top crust! You can simply lay the second pastry round over the filling, trim and crimp the edges, and cut a few steam vents. Or get fancy with a lattice: Cut the pastry into 1-inch strips, weave them over the filling, and trim the excess. Either way, crimp the edges decoratively to seal.
Bake at 450°F for exactly 15 minutes – this sets the crust. Then reduce heat to 350°F (175°C) and bake 40-45 minutes until the crust is deep golden and juices bubble thickly through the vents. If edges brown too fast, cover loosely with foil.
Let the pie cool at least 2 hours before slicing – I know it’s hard to wait, but this lets the filling set properly. Then slice, serve, and prepare for compliments!
Print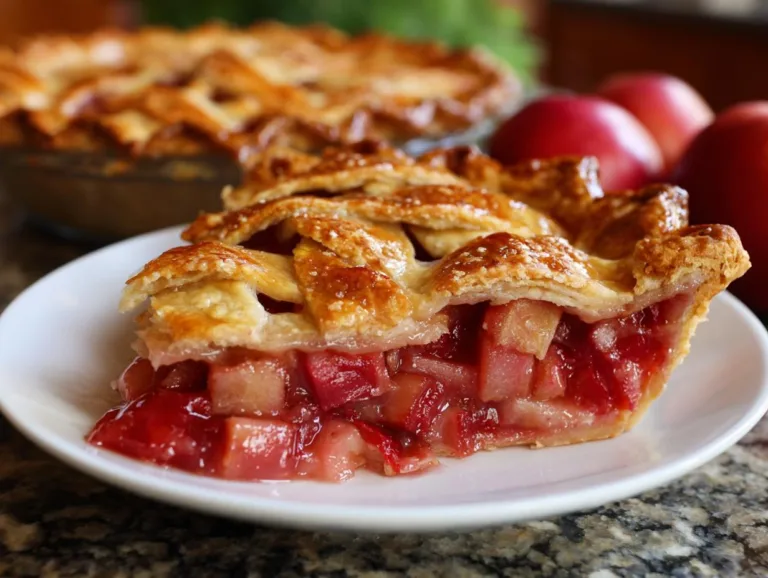
Perfect Classic Fresh Rhubarb Pie Recipe in 6 Simple Steps
A classic rhubarb pie recipe with a sweet-tart filling and flaky crust.
- Total Time: 1 hour 15 minutes
- Yield: 8 servings 1x
Ingredients
- 1 ⅓ cups white sugar
- 6 tablespoons all-purpose flour
- 1 (14.1 ounce) package double-crust pie pastry, thawed
- 4 cups freshly chopped rhubarb
- 1 tablespoon butter
Instructions
- Preheat oven to 450°F (230°C). Place rack in lowest position.
- Line pie plate with one crust. Mix sugar and flour, sprinkle 1/4 over crust.
- Heap rhubarb on crust. Top with remaining sugar mixture and dot with butter.
- Cover with top crust.
- Bake at 450°F for 15 minutes. Reduce heat to 350°F (175°C) and bake 40-45 minutes until bubbly and golden.
- Serve warm or cold.
Notes
- Use fresh rhubarb for best results
- Thicker rhubarb pieces may require longer baking
- Let pie cool slightly before slicing
- Prep Time: 20 minutes
- Cook Time: 55 minutes
- Category: Dessert
- Method: Baking
- Cuisine: American
- Diet: Vegetarian
Nutrition
- Serving Size: 1 slice
- Calories: 320
- Sugar: 32g
- Sodium: 180mg
- Fat: 12g
- Saturated Fat: 4g
- Unsaturated Fat: 6g
- Trans Fat: 0g
- Carbohydrates: 52g
- Fiber: 2g
- Protein: 3g
- Cholesterol: 5mg
Expert Tips for Perfect Classic Fresh Rhubarb Pie Recipe
After baking hundreds of rhubarb pies, I’ve learned all the little tricks that take it from good to “oh my goodness, can I have the recipe?” Here are my can’t-live-without secrets:
The Soggy Bottom Solution: That pre-sprinkle of flour-sugar mix on the bottom crust? Non-negotiable! It creates a barrier that keeps the juices from making your crust mushy. Think of it like waterproofing your pie.
Doneness Detective Work: Forget the timer – your pie tells you when it’s ready. Look for thick, slow bubbles coming through the vents, not thin, fast ones. The crust should be golden brown, and if you peek underneath (carefully!), it should look baked through, not pale.
The Waiting Game: I know it’s torture, but letting the pie rest for at least 2 hours lets the filling set properly. Cut into it too soon, and you’ll have rhubarb soup (still tasty, but not pie). The reward? Clean slices that hold their shape beautifully.
One bonus tip? If your rhubarb is extra juicy, toss in an extra tablespoon of flour with the filling. Better safe than soggy!
Common Questions About Classic Fresh Rhubarb Pie Recipe
I get asked about rhubarb pie all the time – it’s one of those desserts that makes people curious and maybe a little nervous to try making themselves. Let me answer the most common questions I hear, so you can bake with confidence!
How do I keep my rhubarb pie from being runny?
Oh, the dreaded runny pie! Here’s my trick: If your rhubarb is super juicy, make a quick slurry by mixing 1 tablespoon flour or cornstarch with 2 tablespoons cold water. Stir this into your filling right before baking – it’ll thicken those juices beautifully without changing the flavor.
Do I need to peel the rhubarb?
Absolutely not! Just give the stalks a good rinse and trim off the ends. The skin holds so much of that gorgeous color and flavor. Peeling is extra work you don’t need – though I do recommend removing any super tough strings if your stalks are particularly fibrous.
Why is my pie too tart?
Rhubarb’s natural tartness can vary wildly depending on the season and variety. If your pie makes you pucker, don’t worry! Just drizzle each slice with a teaspoon of warm honey or sprinkle with coarse sugar right before serving. The extra sweetness balances things out perfectly.
How do I know when the pie is done?
Watch for three signs: 1) The crust is deep golden brown (no pale spots) 2) The filling bubbles slowly and thickly through the vents (not thin and fast) 3) The pie smells incredible – that sweet-tart aroma fills your kitchen. If you’re still unsure, insert a knife near the center – the rhubarb should be tender but not mushy.
Remember – every oven is different, and rhubarb’s moisture content varies. Don’t be afraid to trust your instincts and give it a few extra minutes if needed!
Serving Suggestions
Now for the best part – eating your masterpiece! A warm slice of classic fresh rhubarb pie is heavenly all on its own, but let me share my favorite ways to serve it that’ll make your taste buds sing.
The Classic: A scoop of vanilla ice cream melting over the warm pie creates that perfect hot-cold contrast. The creamy sweetness balances the tartness beautifully. My grandma always used homemade vanilla – the kind with real bean specks – and wow, what a difference! You can see some of my family’s favorite recipes over at https://www.facebook.com/grandmaandmecooking/.
Whipped Cream Wonder: For something lighter, fresh whipped cream with just a hint of vanilla is divine. I like to whip mine until soft peaks form – not too stiff – so it melts gently into the pie.
Cheese Please: Here’s an old-school trick – serve your pie with a slice of sharp cheddar cheese. Sounds weird, but trust me, that salty tang against the sweet-tart filling is magical. My grandpa swore by this combo!
However you serve it, make sure to take that first bite slowly – close your eyes and let all those flavors dance. That’s the moment that makes all the work worthwhile!

Storage Instructions
Okay, let’s talk about keeping that gorgeous pie tasting fresh! Here’s the scoop on storing your masterpiece – because let’s be real, sometimes you want to savor it over a few days (if it lasts that long!).
Room Temperature: If you’re serving the pie within 2 days, just cover it loosely with foil or a clean kitchen towel and leave it on the counter. The sugar acts as a natural preservative, and honestly? I think pie tastes best at room temp – all those flavors really pop when they’re not chilled.
Fridge Friendly: For longer storage, pop it in the fridge covered tightly with plastic wrap or foil. It’ll keep beautifully for up to 5 days this way. The crust might soften a bit, but the filling stays perfect. Pro tip: Put it on a flat shelf, not in the door where it gets jostled!
Reheating Magic: Want that just-baked warmth? Place individual slices on a baking sheet and warm at 300°F for about 10 minutes. Watch closely – you just want to take the chill off, not cook it further. The butter in the crust will re-crisp slightly, and that filling will get all gooey again. Heavenly!
One warning though – never freeze rhubarb pie! The texture turns mushy when thawed. Trust me, I learned this the hard way after a disappointing Thanksgiving. Better to share it fresh or refrigerate those leftovers.
Nutritional Information
Now, I’m no nutritionist, but I know folks like to have an idea of what they’re eating – especially when it comes to dessert! Keep in mind these numbers are estimates based on standard ingredients. Your exact pie might vary depending on things like how thick you slice it or whether you use homemade vs store-bought crust.
Per Serving (1 slice, about 1/8 of pie):
- Calories: 320
- Sugar: 32g (that sweet-tart balance at work!)
- Sodium: 180mg
- Fat: 12g (4g saturated, 6g unsaturated)
- Carbohydrates: 52g
- Fiber: 2g (thanks to all that rhubarb!)
- Protein: 3g
- Cholesterol: 5mg
Now, if you’re watching your sugar intake, you could try reducing it by 1/4 cup – but honestly, rhubarb needs that sweetness to balance its natural tartness. My philosophy? Life’s too short not to enjoy a proper slice of pie now and then!