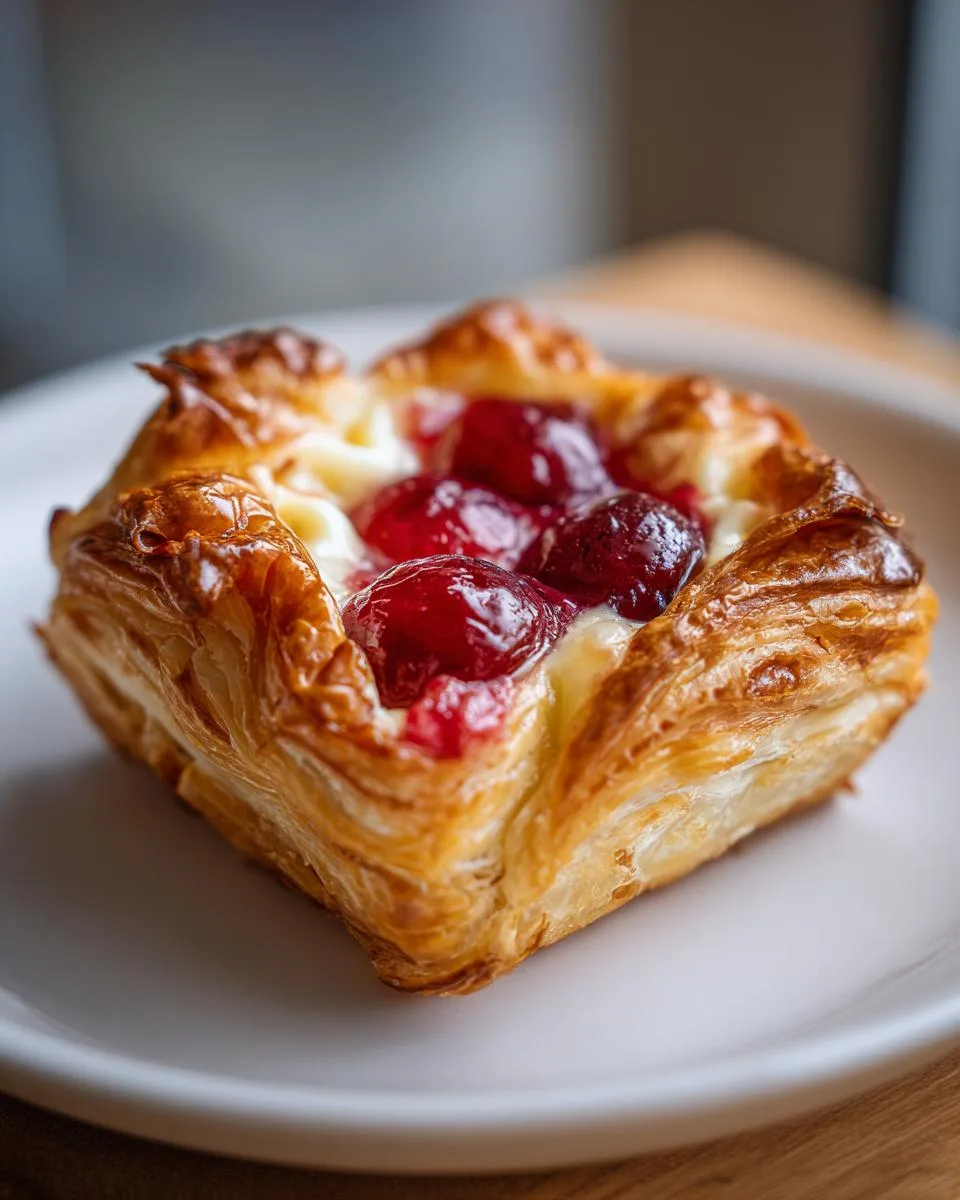
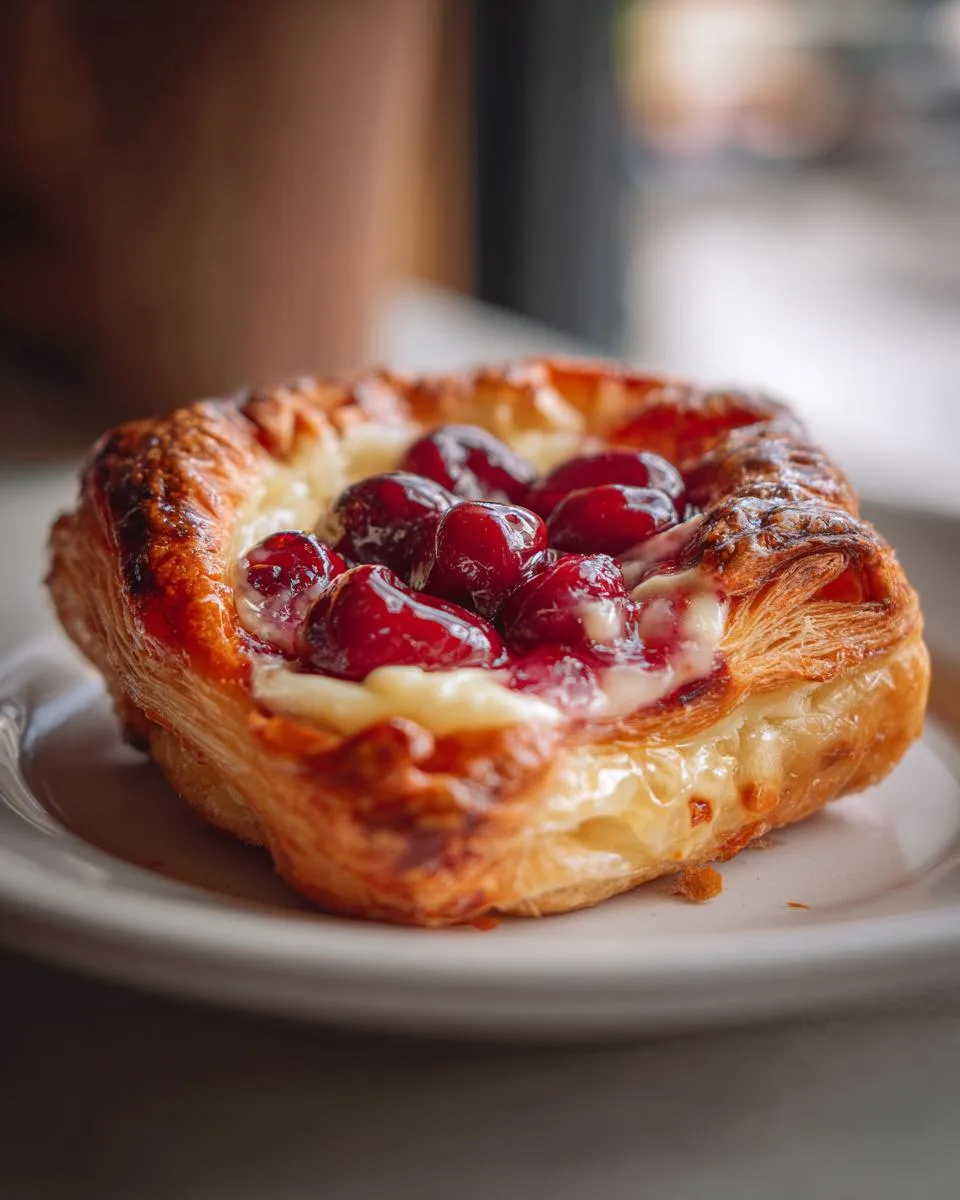
Oh my goodness, have I got a treat for you! This Cherry Cheese Danish Recipe is my secret weapon when I need something impressive but don’t want to spend all day in the kitchen. Picture this: flaky puff pastry hugging a creamy, sweet cream cheese filling, all topped with juicy cherry pie filling that oozes just enough to make every bite pure heaven. It’s the kind of recipe that makes people think you slaved for hours, but trust me—it’s so easy, you’ll be pulling these golden beauties out of the oven before your coffee even finishes brewing. Whether it’s a lazy Sunday brunch or a last-minute dessert for guests, this danish never lets me down. Let’s bake some magic together!

Table of Contents
Table of Contents
Why You’ll Love This Cherry Cheese Danish Recipe
This recipe is my go-to for so many reasons, and I just know you’ll fall in love with it too! Here’s why:
- Effortlessly impressive – Looks like a bakery masterpiece but comes together in minutes
- Perfect texture – Flaky puff pastry with that dreamy cream cheese filling
- Sweet-tart balance – The cherry topping cuts through the richness beautifully
- Versatile – Equally perfect for lazy breakfasts or elegant desserts
- Forgiving – Even if your folds aren’t perfect, it still tastes amazing
Seriously, once you try this recipe, you’ll understand why I make it at least twice a month!
Ingredients for Cherry Cheese Danish
Gathering your ingredients is the first step to danish perfection! Here’s exactly what you’ll need:
- 1 sheet puff pastry – thawed but still cool (I keep mine in the fridge until the last minute)
- 8 oz cream cheese – softened to room temperature (this makes all the difference!)
- 1/4 cup granulated sugar – for that perfect sweetness
- 1 tsp vanilla extract – pure vanilla if you have it
- 1 cup cherry pie filling – the canned stuff works beautifully here
- 1 egg – beaten, for that gorgeous golden shine
That’s it! Just six simple ingredients that transform into something magical. Now let’s get baking!
Equipment You’ll Need
Don’t worry—you won’t need any fancy gadgets for these danishes! Just grab:
- A baking sheet (lined with parchment for easy cleanup)
- A medium mixing bowl (for that dreamy cream cheese filling)
- A pastry brush (or your fingers in a pinch!) for the egg wash
- A sharp knife or pizza cutter (to slice that puff pastry)
That’s seriously all you need—I promise this recipe stays wonderfully simple from start to finish!
How to Make Cherry Cheese Danish
Okay, let’s get to the fun part—making these gorgeous danishes! I promise it’s easier than you think, and I’ll walk you through every step. Just follow along, and soon you’ll have golden, flaky pastries that smell like heaven!
Step 1: Prep the Puff Pastry
First things first—preheat that oven to 375°F (190°C). While it’s heating up, lightly flour your counter and unfold your thawed puff pastry sheet. Now here’s my trick: roll it out just slightly (maybe an extra inch in each direction) to smooth any creases. Then, using a sharp knife or pizza cutter, slice it into four perfect squares. Don’t worry if they’re not perfectly even—rustic is charming!
Step 2: Make the Cream Cheese Filling
Grab your softened cream cheese (I leave mine out for about 30 minutes), sugar, and vanilla. Beat them together in a bowl until silky smooth—no lumps allowed! Taste it (I always do!) and add a pinch more sugar if you like it sweeter. This creamy filling is what makes these danishes so irresistible.
Step 3: Assemble the Danish
Now the fun begins! Spoon about 2 tablespoons of the cream cheese mixture onto the center of each pastry square. Top with a generous spoonful of cherry pie filling—about 1 tablespoon per danish. Here comes the magic: fold two opposite corners toward the center, then the other two, pinching gently to seal. Don’t stress if some filling peeks out—that’s part of the charm!
Step 4: Bake to Golden Perfection
Brush each danish with beaten egg (this gives them that beautiful shine) and pop them in the oven. Set your timer for 20 minutes, but start checking at 18—you want them golden brown with puffed, flaky layers. When you smell that buttery pastry and see the filling bubbling slightly, they’re done! Let them cool just enough so you don’t burn your tongue—though I won’t judge if you can’t wait!
See? Told you it was easy! Now go enjoy your beautiful creations—you’ve earned it!
Print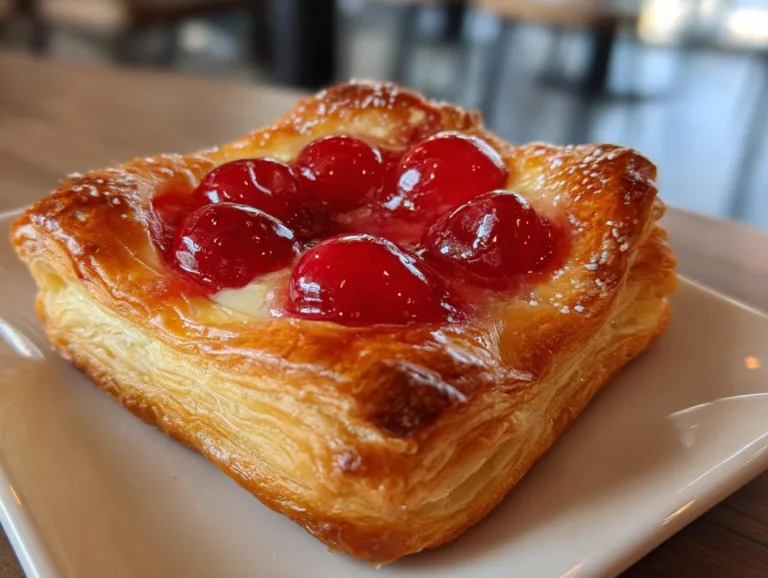
Irresistible Cherry Cheese Danish Recipe in Just 20 Minutes
A simple and delicious cherry cheese danish recipe using puff pastry, cream cheese, and cherry pie filling.
- Total Time: 40 minutes
- Yield: 4 danishes 1x
Ingredients
- 1 sheet puff pastry (thawed)
- 1 cup cherry pie filling (canned)
- 8 oz cream cheese (softened)
- 1/4 cup granulated sugar
- 1 tsp vanilla extract
- 1 egg (for egg wash)
Instructions
- Preheat the oven to 375°F (190°C).
- Roll out the thawed puff pastry on a floured surface and cut into four 4×4-inch squares.
- In a bowl, mix softened cream cheese, sugar, and vanilla until smooth.
- Place a spoonful of cream cheese mixture in the center of each square and add a dollop of cherry pie filling on top.
- Fold the corners of the pastry over the filling to create pockets and pinch to seal.
- Brush each danish with beaten egg for a golden finish.
- Bake for 20-25 minutes or until golden brown.
Notes
- Store leftovers in an airtight container for up to 3 days.
- Use fresh cherries if preferred, but adjust sugar accordingly.
- Serve warm for best texture.
- Prep Time: 15 minutes
- Cook Time: 25 minutes
- Category: Dessert
- Method: Baking
- Cuisine: American
- Diet: Vegetarian
Nutrition
- Serving Size: 1 danish
- Calories: 320
- Sugar: 18g
- Sodium: 210mg
- Fat: 20g
- Saturated Fat: 9g
- Unsaturated Fat: 8g
- Trans Fat: 0g
- Carbohydrates: 30g
- Fiber: 1g
- Protein: 5g
- Cholesterol: 65mg
Tips for the Best Cherry Cheese Danish
After making these danishes more times than I can count, I’ve picked up some tricks that guarantee perfection every time! First – don’t rush the puff pastry thawing. Leave it in the fridge overnight or on the counter for about 40 minutes. You want it cool but pliable. Second – resist the urge to overfill! Too much cream cheese or cherries makes them burst open. Third – that egg wash isn’t optional! It gives that gorgeous golden color we all love. And my secret tip? A tiny sprinkle of coarse sugar on top before baking adds the most delightful crunch!
Variations & Substitutions
One of my favorite things about this recipe is how easily you can mix it up! Swap the cherry filling for blueberry or apple pie filling—they’re all delicious. Fresh cherries work too (just chop and toss with a tablespoon of sugar). Feeling fancy? Try lemon zest in the cream cheese or almond extract instead of vanilla. And if you’re feeling extra indulgent, a drizzle of icing or sprinkle of sliced almonds takes these danishes to the next level!
Serving & Storage
Oh, you’ve gotta try these cherry cheese danishes warm—that’s when the pastry is at its flakiest and the filling is just slightly gooey. Pure bliss! If you miraculously have leftovers (rare in my house), pop them in an airtight container—they’ll keep for about 3 days at room temperature. The microwave does revive them okay, but nothing beats that fresh-from-the-oven magic!
Cherry Cheese Danish Nutrition
Just so you know, these nutritional estimates can vary depending on your specific ingredients and brands. While these danishes are definitely a treat, I like to think of them as little pockets of happiness—worth every bite! Remember, everything’s fine in moderation.
FAQs About Cherry Cheese Danish
How long do cherry cheese danishes last?
Honestly, they rarely stick around long enough to find out! But if you’re the disciplined type, they’ll keep beautifully in an airtight container at room temperature for about 3 days. The pastry loses some crispness, but a quick 5-minute warm-up in the oven brings back that flaky magic.
Can I use homemade puff pastry?
You absolutely can—if you’ve got the time and patience! I’ve tried both, and while homemade pastry is incredible, the store-bought stuff works shockingly well here. The frozen puff pastry sheets are my secret weapon for quick, impressive pastries without all the work.
What if I don’t have cherry pie filling?
No worries! Any fruit pie filling works—blueberry is my second favorite. Fresh fruit works too—just toss pitted cherries (or berries) with a tablespoon of sugar and cornstarch to thicken the juices. The beauty of this recipe is how adaptable it is!
Can I make these ahead?
Yes! Assemble them the night before, cover tightly with plastic wrap, and refrigerate. Just add an extra minute or two to the baking time since they’ll be cold. The egg wash still goes on right before baking—that’s the one step I don’t do ahead.
Why did my danishes open up while baking?
Oh honey, we’ve all been there! Usually it means you didn’t pinch the corners tightly enough or got a bit overenthusiastic with the filling. But guess what? They’ll still taste amazing—just call them “rustic” and no one will know the difference!
Final Thoughts
Now that you’ve got all my secrets, it’s your turn to bake up some magic! Tag me when you make these cherry cheese danishes—I’d love to see your beautiful creations. And don’t be surprised when everyone starts begging you for the recipe—it’s that good! You can find more of my favorite baking adventures over on my Facebook page!