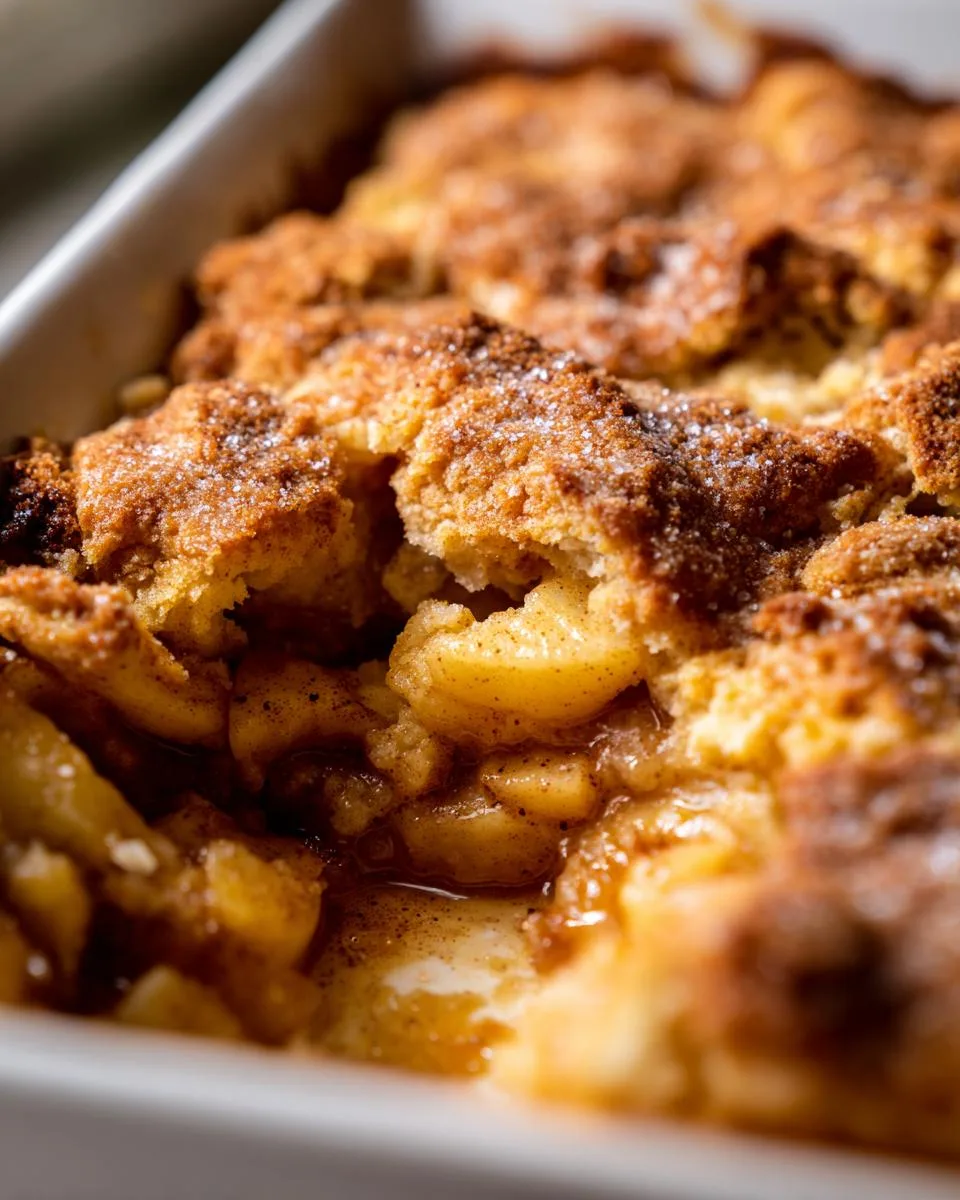
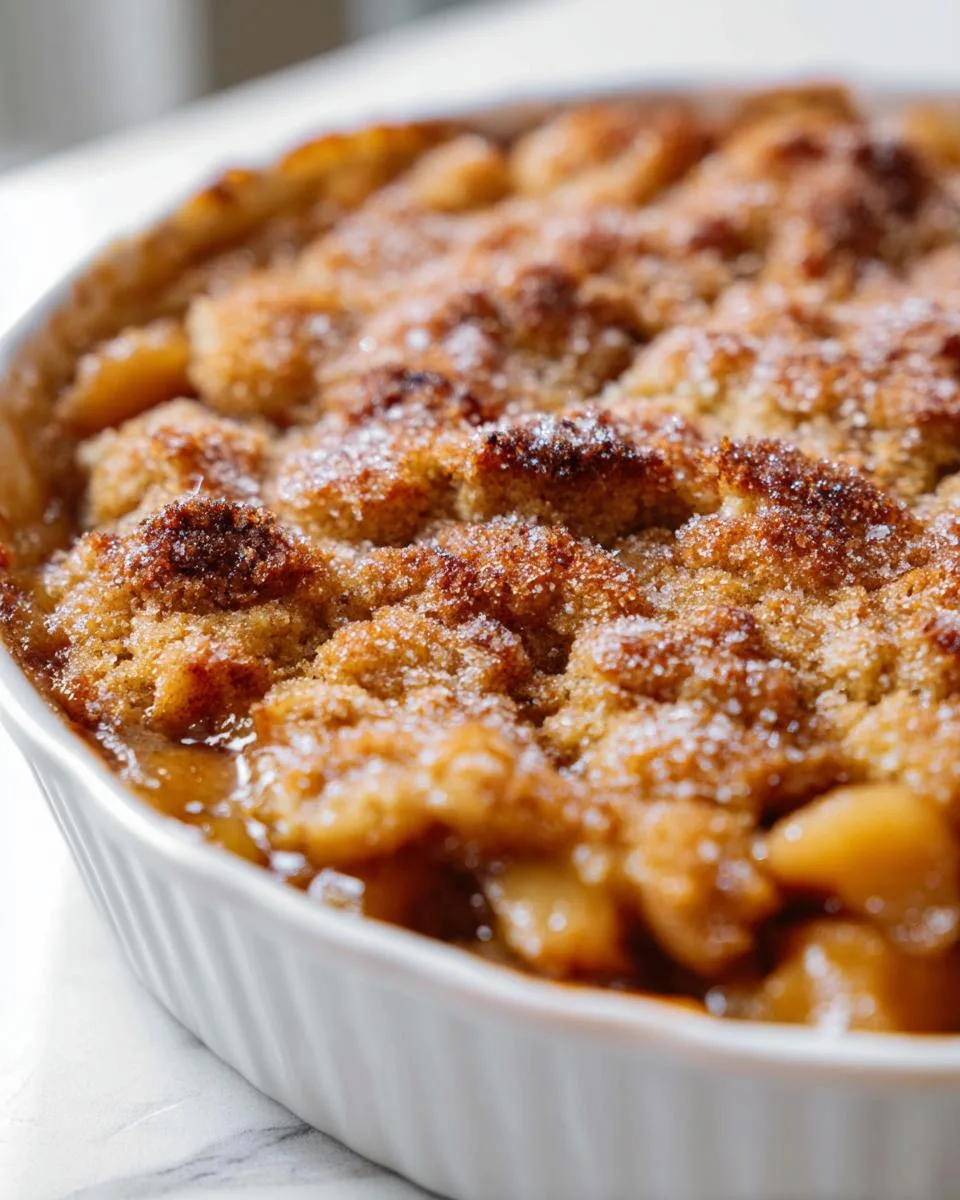
There’s nothing quite like the smell of warm apples and cinnamon filling your kitchen—it’s pure comfort in a dish. This Apple Cobbler Recipe has been my go-to for years, especially when I want something cozy and satisfying without spending hours in the kitchen. The crispy, buttery topping paired with tender, spiced apples is downright irresistible. And the best part? It’s simple enough for a weeknight treat but special enough to serve at gatherings. Trust me, one bite of this cobbler with a scoop of vanilla ice cream, and you’ll understand why it’s a classic that never goes out of style.
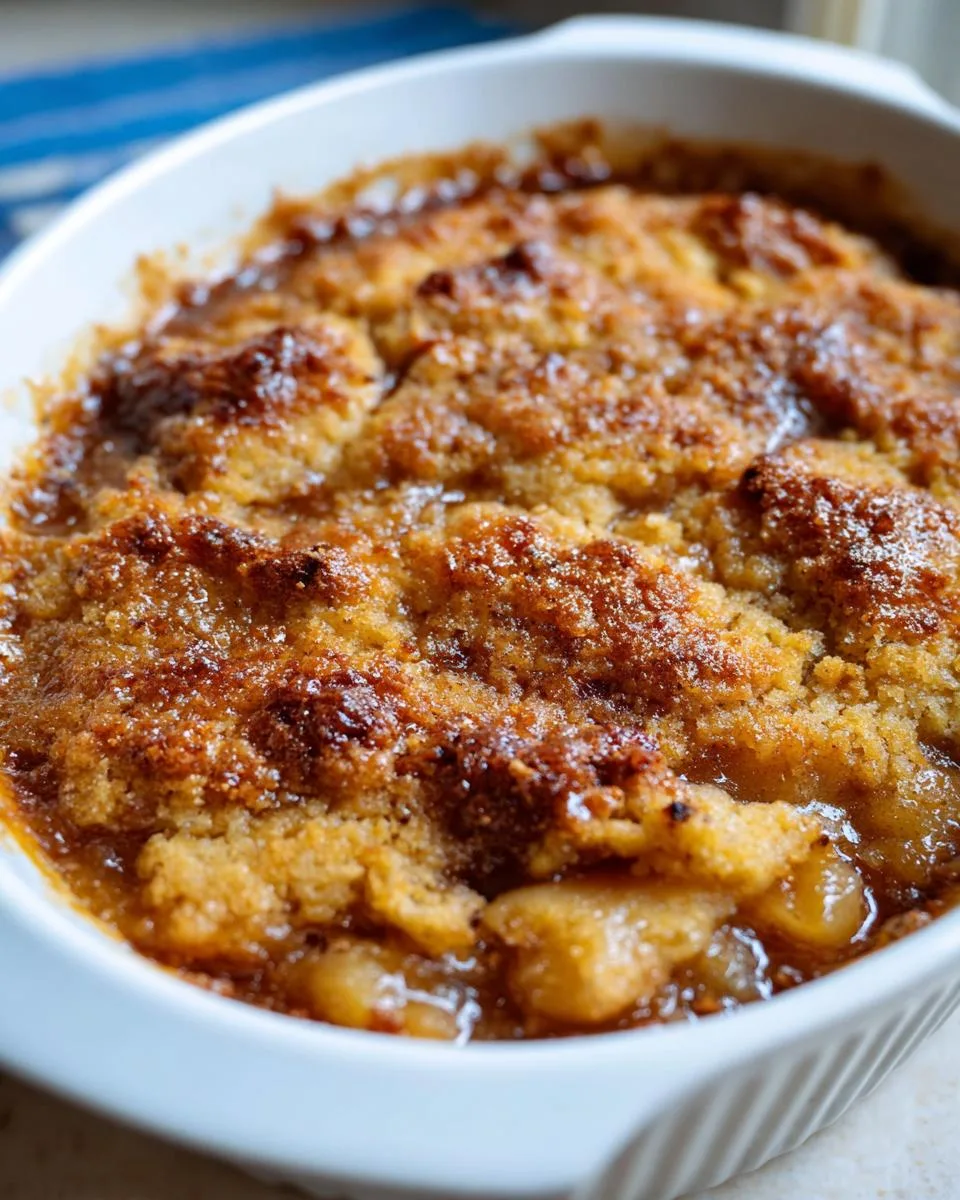
Table of Contents
Table of Contents
Why You’ll Love This Apple Cobbler Recipe
- Easy to make: No fancy techniques here—just simple steps for a dessert that feels homemade and heartwarming.
- Perfect balance: Sweet apples with a hint of tartness, plus warm spices like cinnamon and nutmeg, create a flavor that’s just right.
- Crispy topping: The buttery, golden crust is the star of the show—crunchy on top and soft underneath.
- Tender filling: The apples cook down to a luscious, jammy texture that pairs perfectly with the topping.
- Versatile: Serve it warm with ice cream for dessert or enjoy it as a sweet breakfast treat—it’s perfect any time of day.
Ingredients for Apple Cobbler
- 5 pounds apples, peeled and thinly sliced – about 9-11 large apples; use a mix of sweet and tart varieties like Honeycrisp, Granny Smith, or Fuji.
- 1/2 teaspoon lemon zest – from 1 small lemon.
- 3 tablespoons lemon juice – from 1 small lemon.
- 3/4 cup granulated sugar – for the apple filling.
- 3/4 cup brown sugar, packed – adds depth and richness to the filling.
- 5 tablespoons all-purpose flour – thickens the apple mixture.
- 1 1/2 teaspoons cinnamon – for that classic warm spice flavor.
- 3/4 teaspoon nutmeg – complements the cinnamon perfectly.
- 1/2 teaspoon cardamom – optional, but adds a lovely aromatic note.
- 1/4 teaspoon kosher salt – balances the sweetness.
- 1 teaspoon vanilla extract – enhances the overall flavor.
- 2 1/2 cups all-purpose flour, spooned and leveled – for the cobbler topping.
- 1 1/2 cups granulated sugar – for the topping.
- 1 teaspoon kosher salt – keeps the topping balanced.
- 1 teaspoon baking powder – helps the topping rise slightly.
- 1/2 cup buttermilk – adds moisture to the topping.
- 1 egg – binds the topping together.
- 1/2 cup cold butter, chopped into chunks – creates a flaky, buttery crust.
- 2 tablespoons sugar – granulated or raw sugar, for sprinkling on top.
- Vanilla ice cream – for serving, because it’s a must!
Ingredient Notes & Substitutions
- Apples: Use a mix of varieties for the best flavor—Honeycrisp for sweetness, Granny Smith for tartness, and Fuji for a balanced bite.
- Buttermilk: No buttermilk? Mix 1/2 cup milk with 1 1/2 teaspoons white vinegar or lemon juice and let it sit for 5 minutes.
- Cardamom: Skip it if you don’t have it on hand—the cobbler will still be delicious with just cinnamon and nutmeg.
- Lemon juice: Fresh is best, but bottled lemon juice works in a pinch.
- Butter: Cold butter is key for a flaky topping—don’t substitute with softened butter.
Equipment You’ll Need
This apple cobbler recipe keeps things simple, but you’ll need a few trusty tools to make it just right. Grab a 12-inch skillet for cooking those apples—the high sides help prevent spills. A 9×13-inch baking dish is perfect for even baking, and mixing bowls (one large, one small) for prepping the topping. Don’t forget a pastry cutter to blend the butter into the flour—though a fork works in a pinch. Oh, and a microplane grater for that lemon zest makes all the difference. That’s it—no fancy gadgets required!
How to Make Apple Cobbler
Making this apple cobbler is a breeze once you get the hang of it. The key is to take your time with each step—trust me, it’s worth it. Let’s break it down so you can nail this recipe on your first try.
Step 1: Preparing the Apples
Start by peeling all those apples—yes, it’s a bit of a task, but it’s so worth it. I like to use a mix of sweet and tart apples for the best flavor. Slice them thin, about 1/8 inch, so they cook down evenly. Throw them into your skillet with the lemon zest and juice to keep them from browning. Now, here’s the important part: add the sugars, flour, spices, and salt, and give it all a good stir. Cook it over medium heat, stirring every 3 minutes, for about 20 minutes. You’ll know it’s ready when the apples are tender and the mixture is thick and bubbly. Stir in the vanilla at the end—it adds that extra layer of warmth. Transfer the apples to your baking dish and let them hang out while you make the topping.
Step 2: Making the Cobbler Topping
This topping is what makes the cobbler truly special. In a large bowl, whisk together the flour, sugar, salt, and baking powder. In a smaller bowl, mix the buttermilk and egg—this is what gives the topping its richness. Pour the wet ingredients into the dry and mix it all together with a pastry cutter (or a fork if you don’t have one). You’re looking for a crumbly texture here, not smooth. Scatter the cold butter chunks over the mixture—this is what creates those irresistible flaky bits. Sprinkle the sugar on top for a little extra crunch. Don’t overthink it; this step is all about creating that rustic, homemade vibe.
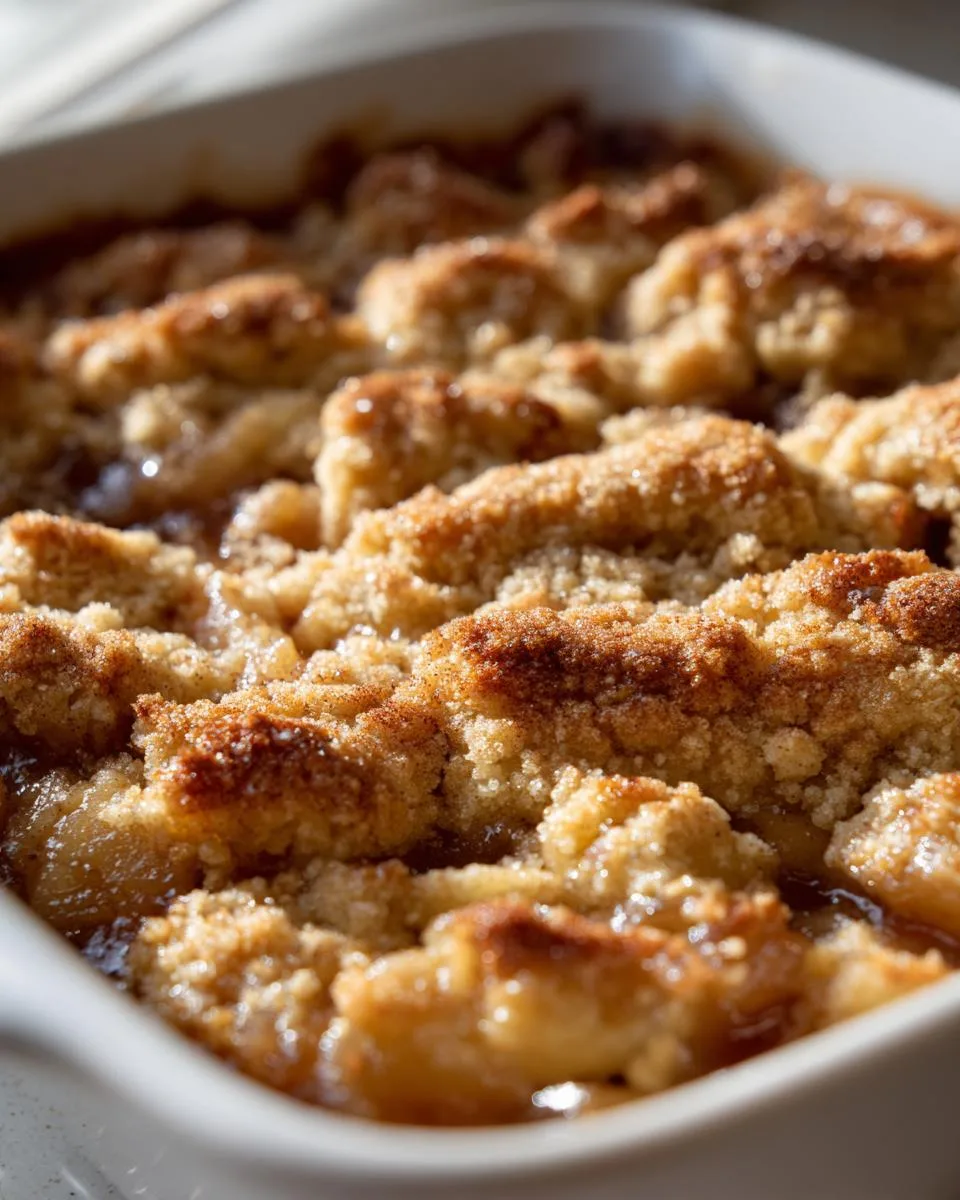
Step 3: Baking & Serving
Preheat your oven to 375°F while you finish prepping. Spread the topping evenly over the apples—don’t press it down too much; you want it to stay light and airy. Bake for 45-55 minutes, or until the top is golden brown and the filling is bubbling around the edges. If you’re feeling fancy, pop it under the broiler for 1-3 minutes for an extra crispy crust. Let it cool for about 15 minutes before serving—this gives the filling time to set. And don’t forget the vanilla ice cream! It’s the perfect finishing touch to this cozy dessert.
Print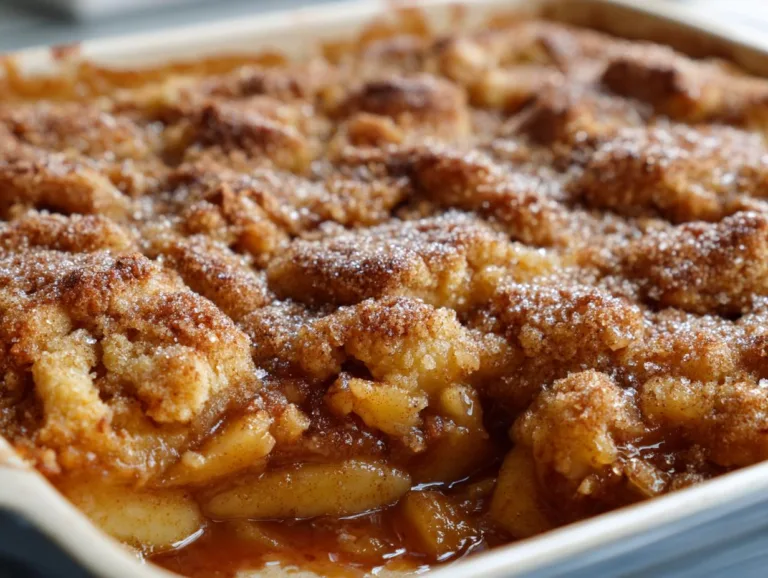
Irresistible 5-Pound Apple Cobbler Recipe for Pure Bliss
A classic apple cobbler recipe with a crispy topping and tender apple filling.
- Total Time: 85 minutes
- Yield: 12 servings 1x
Ingredients
- 5 pounds apples, peeled, about 9–11 large apples; use a variety of flavors
- 1/2 teaspoon lemon zest, from 1 small lemon
- 3 tablespoons lemon juice, from 1 small lemon
- 3/4 cup granulated sugar
- 3/4 cup brown sugar, packed
- 5 tablespoons all purpose flour
- 1 & 1/2 teaspoons cinnamon
- 3/4 teaspoon nutmeg
- 1/2 teaspoon cardamom, optional
- 1/4 teaspoon kosher salt
- 1 teaspoon vanilla extract
- 2 & 1/2 cups all purpose flour, spooned and leveled
- 1 & 1/2 cups granulated sugar
- 1 teaspoon kosher salt
- 1 teaspoon baking powder
- 1/2 cup buttermilk
- 1 egg
- 1/2 cup cold butter, chopped into chunks
- 2 tablespoons sugar, granulated or raw sugar or both
- vanilla ice cream, for serving
Instructions
- Choose your apples. You need 5 pounds of apples for this recipe, which is about 9-11 large apples. Use a mix of apples for the best flavor.
- Use a microplane grater to zest 1/2 teaspoon lemon peel into a high-sided 12-inch skillet.
- Peel all the apples with a vegetable peeler. Slice the apples very thin, about 1/8 inch.
- Cook the apples. Set the skillet over medium heat on the stove.
- Add granulated sugar, brown sugar, flour, cinnamon, nutmeg, cardamom, and kosher salt to the apples. Stir gently.
- Cover the mixture with a lid and cook for 20 minutes, stirring every 3 minutes.
- Once off heat, stir in vanilla. Transfer the apples to a 9×13 inch casserole dish.
- Preheat your oven to 375 degrees F.
- In a large bowl, whisk together flour, granulated sugar, kosher salt, and baking powder.
- In a small bowl, whisk together buttermilk and egg. Pour into the flour mixture and mix with a pastry cutter.
- Spread the flour mixture evenly over the apples.
- Chop butter into pieces and scatter over the flour mixture.
- Sprinkle sugar over the top.
- Bake at 375 for 45-55 minutes until the top is light brown and bubbling.
- Optional: Broil for 1-3 minutes for extra crispiness.
- Let cool for 15 minutes before serving with vanilla ice cream.
Notes
- You can skip cooking the apples first and place raw apples directly in the baking dish.
- Store leftovers loosely covered on the counter; transfer to the fridge after 2 days.
- Prep Time: 30 minutes
- Cook Time: 55 minutes
- Category: Dessert
- Method: Baking
- Cuisine: American
- Diet: Vegetarian
Nutrition
- Serving Size: 1 serving
- Calories: 350
- Sugar: 45g
- Sodium: 200mg
- Fat: 10g
- Saturated Fat: 6g
- Unsaturated Fat: 3g
- Trans Fat: 0g
- Carbohydrates: 65g
- Fiber: 4g
- Protein: 3g
- Cholesterol: 35mg
Tips for the Best Apple Cobbler
Want to take your cobbler from good to wow? Here are my tried-and-true secrets:
- Mix those apples: Combine sweet Honeycrisp with tart Granny Smith – the contrast makes every bite interesting.
- Slice thin, cook right: 1/8-inch slices mean perfectly tender apples – no crunchy surprises!
- Butter matters: Keep it cold when making the topping – those little butter chunks create flaky pockets of goodness.
- Taste as you go: Love extra spice? Add a pinch more cinnamon. Too sweet? Cut the sugar by 1/4 cup.
- Broiler trick: For extra crunch, broil the last 2 minutes – just watch closely so it doesn’t burn!
- Leftovers? Cover loosely with foil – the topping stays crispier than wrapping tight.
Trust me, these small touches make all the difference between “nice dessert” and “can I have seconds?”
Storing & Reheating Apple Cobbler
Here’s the thing about apple cobbler – it never lasts long in my house! But when you do have leftovers (lucky you), here’s how to keep them tasting fresh:
First off, let it cool completely before storing – I learned this the hard way when my early attempts turned soggy from trapped steam. For the first two days, just cover it loosely with foil or a clean kitchen towel and leave it on the counter. That buttery topping stays crispier at room temp.
After two days (if it lasts that long!), pop it in the fridge in an airtight container for up to 5 days. When reheating, skip the microwave – it makes the topping soft. Instead, warm individual servings in a 350°F oven for 10-15 minutes until heated through. For the full experience, throw it under the broiler for 30 seconds to crisp up that topping again!
Pro tip: You can freeze unbaked cobbler too – just assemble in a freezer-safe dish, wrap tightly, and freeze. When ready, bake straight from frozen, adding 15-20 extra minutes to the cooking time. The apples might be a bit softer, but it’s still delicious!
Apple Cobbler Recipe FAQs
Got questions? I’ve got answers! Here are the most common things people ask about making this apple cobbler – plus a few insider tips you won’t find in most recipes.
How do you know when apple cobbler is done?
Look for three signs: First, the topping should be golden brown – no pale spots! Second, you should see thick, bubbly juices around the edges. Third, when you poke the topping with a knife near the center, it should come out clean (no wet batter). If you’re still unsure, scoop a tiny bit from the center – the apples should be tender but not mushy.
Can I use frozen apples?
You can, but here’s the deal – frozen apples release more liquid, so your filling might be runnier. If using frozen, thaw them first and drain any excess juice. Better yet? Toss them with an extra tablespoon of flour to help thicken things up. Personally, I prefer fresh apples for the best texture, but frozen works in a pinch!
What’s the best apple variety for cobbler?
My golden rule? Mix ’em up! I love combining tart Granny Smiths with sweet Honeycrisps – about 2/3 sweet to 1/3 tart. The tart apples balance the sweetness while the sweet ones break down beautifully. Fuji, Braeburn, and Pink Lady apples work great too. Avoid super soft apples like Red Delicious – they turn to mush.
Does apple cobbler need to be refrigerated?
Only after two days! The sugar acts as a preservative, so you can leave it covered on the counter for up to 48 hours (that’s how grandma did it). After that, pop it in the fridge for up to 5 more days. Pro tip: If your kitchen is really warm, play it safe and refrigerate after 24 hours.
Can I make this ahead of time?
Absolutely! Here’s how: Prep the apples and topping separately, then store them in the fridge (apples in one container, topping in another) for up to 24 hours. When ready to bake, assemble and add 5-10 extra minutes to the cooking time since everything’s cold. The topping might not rise quite as much, but the flavor will still be amazing!
Nutritional Information
Okay, let’s talk numbers – but don’t let them scare you off! Here’s roughly what you’re looking at per serving of this glorious apple cobbler (assuming you cut it into 12 reasonable portions – though in my house, “reasonable” often goes out the window!):
- Calories: About 350 – Hey, it’s dessert – live a little!
- Sugar: 45g – Mostly from those naturally sweet apples and just enough added sugar to make them sing
- Fat: 10g – Thank that glorious butter in the topping
- Saturated Fat: 6g – The good stuff that makes it taste like grandma made it
- Carbs: 65g – Worth every delicious gram
- Fiber: 4g – At least the apples are doing something healthy for you!
- Protein: 3g – Surprise! A little bonus from the egg and flour
Important note: These numbers are estimates – your actual nutrition will vary based on the exact apples you use, how much ice cream you pile on top (I won’t judge!), and whether you sneak extra butter into the topping (I might). For precise counts, use a nutrition calculator with your specific ingredients.
Personally? I don’t stress about the numbers with homemade desserts like this. When you’re using real ingredients and enjoying reasonable portions, there’s always room for a little indulgence – especially when it’s as soul-satisfying as warm apple cobbler!
Rate & Share This Recipe
I’d love to hear how your apple cobbler turns out! Did you add extra cinnamon? Try it with a scoop of salted caramel ice cream instead? Drop a comment below – your tips might help other bakers too. Nothing makes me happier than hearing about your kitchen adventures! Share your creations with us!
And if this recipe becomes your new go-to dessert (like it is for me), why not share the love? Pin it to your favorite baking board, text it to your sister who’s always asking for the recipe, or post a photo on Instagram and tag me – I’ll probably beg you for a bite through the screen. Happy baking, friends!
For More recipes Follow me on Facebook!