Oh, deviled eggs – those little bites of nostalgia that somehow make every gathering feel special, right? I’ve been making them for years (seriously, I once brought three dozen to a potluck and they vanished in 10 minutes!). But these Deviled Eggs with Chives and Dill? They’re my go-to when I want something classic yet *just* fancy enough to impress. The fresh herbs make all the difference – that pop of green, the bright flavor cutting through the creamy filling. Trust me, once you try the combo of snappy chives and feathery dill, you’ll never go back to plain paprika sprinkles. Plus, they’re stupid easy – boil, mix, fill, done. Perfect for when you need a quick appetizer that looks like you fussed (but we’ll keep that our little secret).

Table of Contents
Table of Contents
Why You’ll Love These Deviled Eggs With Chives And Dill
Listen, I know everyone claims their deviled eggs are the best – but these? They’ve got that special *something* that keeps people coming back for seconds (and thirds!). Here’s why:
- Creamy dreamy texture: That Greek yogurt-Dijon combo gives you richness without feeling heavy – just smooth, velvety perfection in every bite
- Herb garden freshness: The dill and chives aren’t just pretty – they add this bright, grassy flavor that cuts through the richness
- No-fuss prep: Boil, mix, fill – done in under 30 minutes (even faster if you cheat with pre-boiled eggs like I sometimes do)
- Make-ahead magic: These actually taste better after chilling, so you can prep them hours before guests arrive
- Lighter but still indulgent: Swapping mayo for Greek yogurt means you can eat three without guilt (not that I’ve tested this theory… repeatedly)
Seriously, these disappear faster than you can say “pass the plate” – consider yourself warned!
Ingredients For Deviled Eggs With Chives And Dill
Here’s what you’ll need to make these little bites of heaven – and yes, every ingredient matters! I’ve learned the hard way that skimping on freshness or measurements can turn perfect deviled eggs into “meh” deviled eggs. Gather these:
- 4 large eggs – older ones peel easier, trust me
- 1 tbsp finely chopped fresh dill – none of that dried stuff, please!
- 1 tbsp packed fresh chives – snip them small so they distribute evenly
- 1/4 tsp fine sea salt – it dissolves better than coarse
- 1/4 tsp freshly ground black pepper – freshly cracked makes all the difference
- 3 tbsp nonfat plain Greek yogurt – my secret for creamy lightness
- 1 tsp Dijon mustard – just enough for a subtle tang
That’s it! Simple, fresh ingredients that come together beautifully. Now let’s make some magic.
How To Make Deviled Eggs With Chives And Dill
Okay, let’s get cooking! I’ve made these so many times I could probably do it in my sleep, but I’ll walk you through each step carefully. The secret to perfect deviled eggs is all in the technique – trust me, these little details make all the difference between “good” and “oh-my-gosh-I-need-the-recipe” good.
- Boil those eggs just right: Place your eggs in a single layer in a saucepan and cover with cold water by about an inch. Bring to a full boil over medium-high heat (watch for those bubbles!), then immediately remove from heat, cover, and let sit for exactly 13 minutes. This timing gives you perfectly cooked yolks – not chalky, not runny.
- Ice bath magic: Drain the hot water and transfer eggs to a bowl of ice water. Let them chill for at least 5 minutes – this stops the cooking and makes peeling way easier. (Pro tip: Gently crack the shells all over before peeling under cool running water.)
- The yolk transformation: Once peeled, carefully slice each egg lengthwise and pop the yolks into a bowl. Mash them thoroughly with a fork until they’re completely smooth – no lumps allowed! This is key for that velvety filling texture.
- Mix in the goodness: Add your chopped dill, chives, salt, pepper, Greek yogurt, and Dijon to the yolks. Stir until everything is beautifully combined and creamy. Taste and adjust seasoning if needed – I often add an extra pinch of salt.
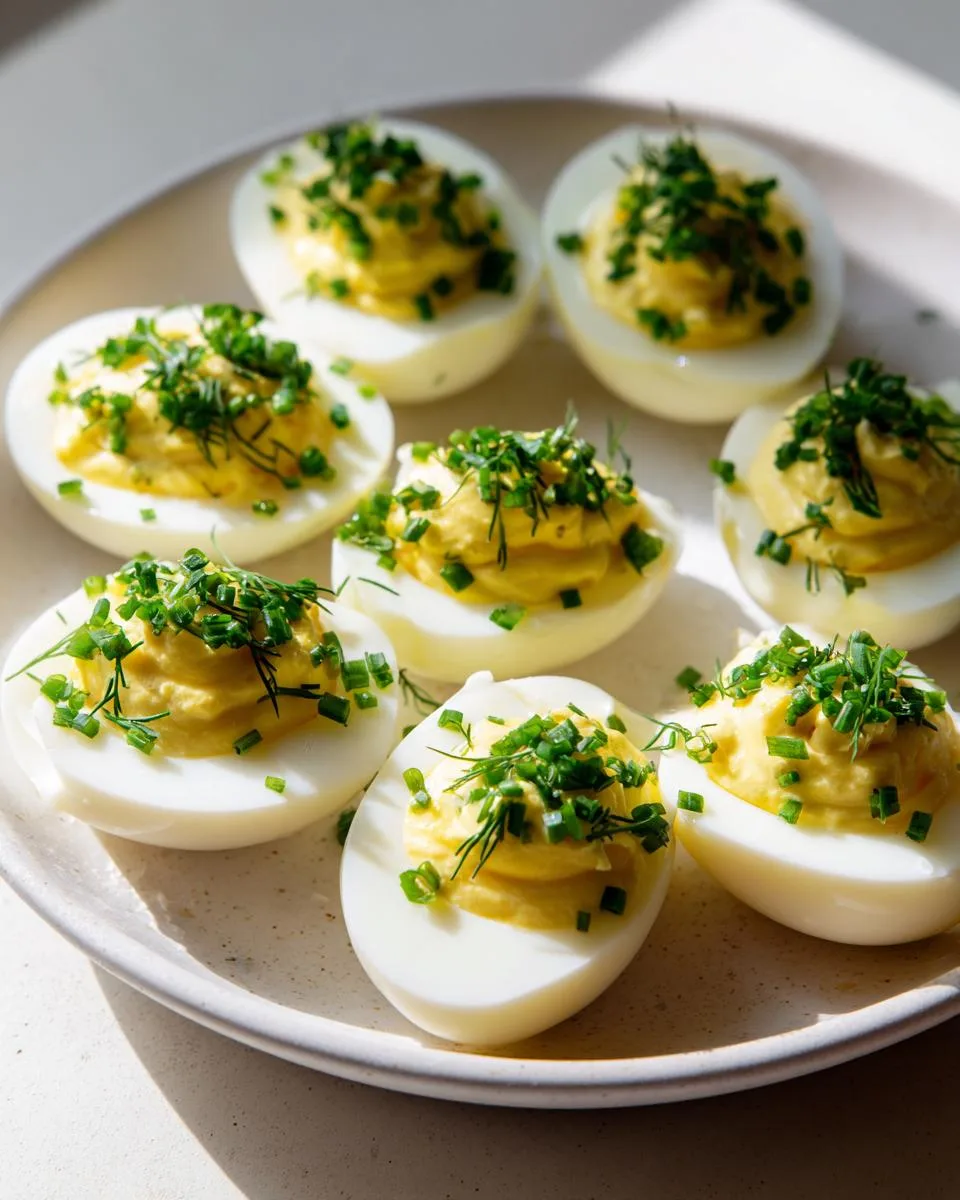
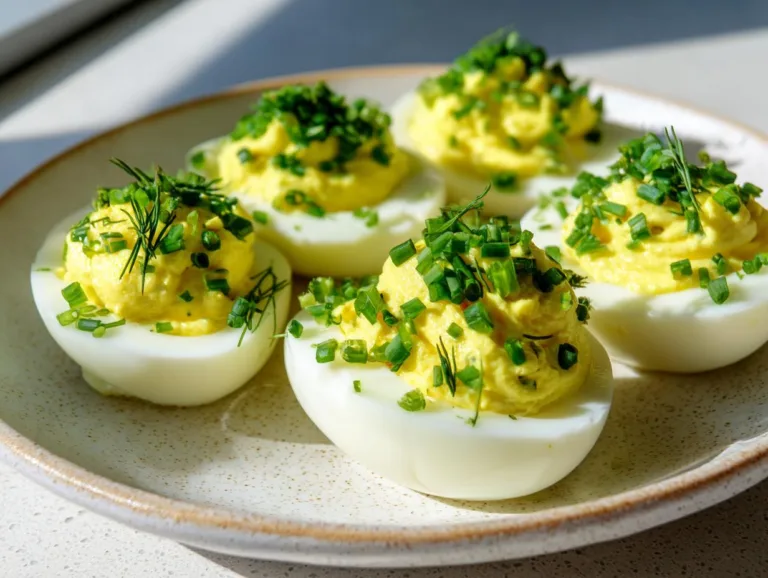
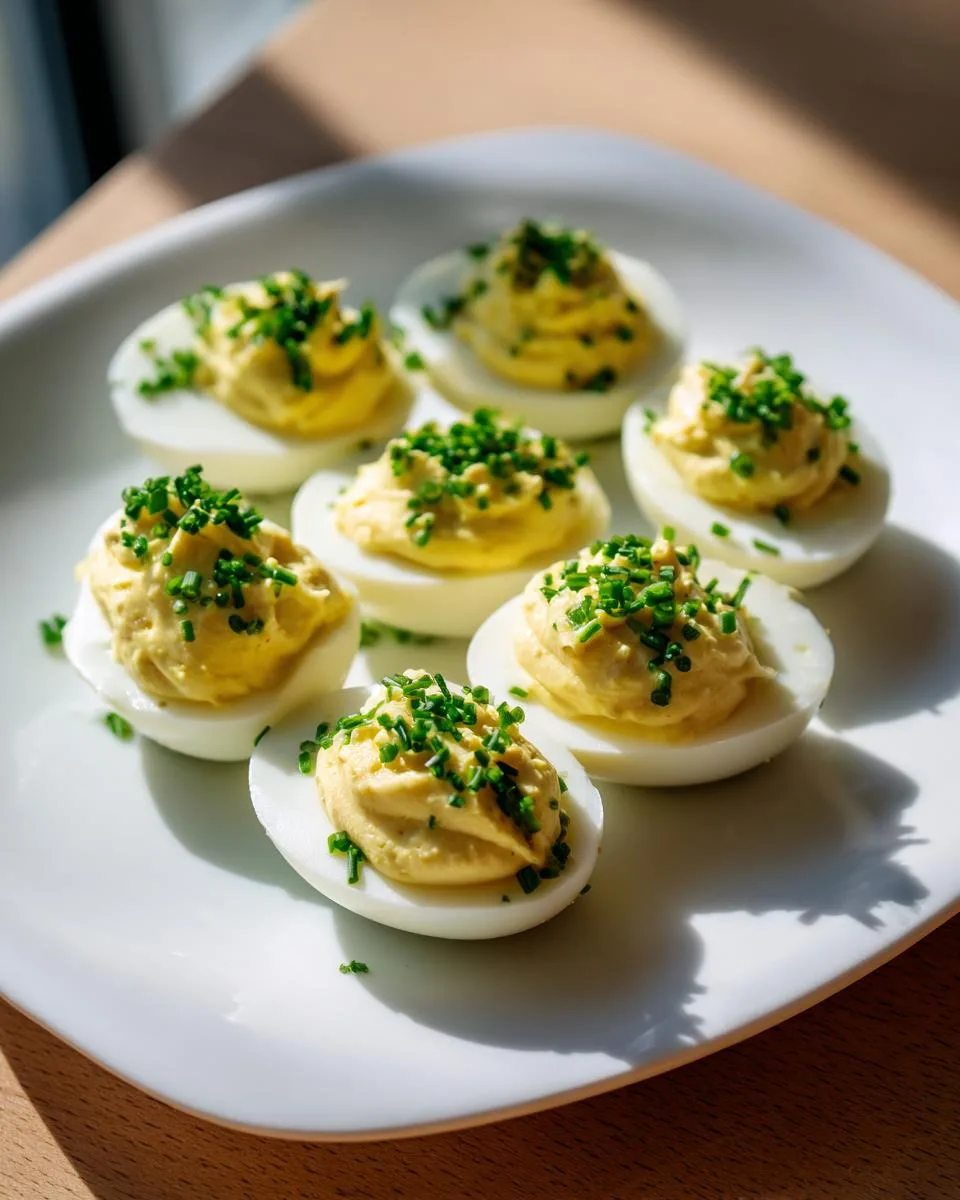
- Fill those whites: Arrange your egg white halves on a plate (I like using a deviled egg tray if I have one). Spoon or pipe the yolk mixture evenly into each one. For fancy presentation, use a piping bag with a star tip – or just spoon it in for rustic charm!
- The waiting game: Cover loosely with plastic wrap and refrigerate for at least 15 minutes (up to 24 hours) to let the flavors meld and filling set. This chilling step is non-negotiable – it makes all the flavors come together.
Creamy Deviled Eggs With Chives And Dill – 6 Simple Steps
Classic deviled eggs with fresh dill and chives, a simple and flavorful appetizer.
- Total Time: 25 minutes
- Yield: 8 deviled egg halves 1x
Ingredients
- 4 large eggs
- 1 tbsp finely chopped fresh dill
- 1 tbsp finely chopped fresh chives
- 1/4 tsp fine sea salt
- 1/4 tsp freshly ground black pepper
- 3 tbsp nonfat plain Greek yogurt
- 1 tsp Dijon mustard
Instructions
- Place eggs in a medium saucepan and add enough cold water to cover by 1 inch. Bring to boil over medium-high heat.
- Remove from heat, cover, and let stand for 13 minutes.
- Drain and transfer eggs to a bowl of ice water. Let stand until cool.
- Peel eggs and cut in half lengthwise. Transfer yolks to a medium bowl and mash with a fork until smooth.
- Stir in dill, chives, salt, pepper, yogurt, and mustard.
- Place egg whites, hollow side up, on a serving plate. Spoon yolk mixture into egg whites, dividing evenly.
- Cover and refrigerate for at least 15 minutes until filling is set, or for up to 24 hours.
Notes
- Deviled eggs can be stored in the refrigerator for up to 24 hours.
- Greek yogurt can be substituted for mayonnaise for a lighter version.
- Make ahead for easy entertaining.
- For easier peeling, use older eggs and cool them quickly in ice water.
- Prep Time: 10 minutes
- Cook Time: 15 minutes
- Category: Appetizer
- Method: Boiling
- Cuisine: American
- Diet: Low Fat
Nutrition
- Serving Size: 2 egg halves
- Calories: 70
- Sugar: 1g
- Sodium: 150mg
- Fat: 4g
- Saturated Fat: 1g
- Unsaturated Fat: 2g
- Trans Fat: 0g
- Carbohydrates: 2g
- Fiber: 0g
- Protein: 6g
- Cholesterol: 185mg
Tips For Perfect Deviled Eggs
Here are my hard-earned secrets after many (many) batches:
- Egg age matters: Use eggs that are at least 7-10 days old – fresh eggs are nightmares to peel!
- Season boldly: The filling should taste slightly stronger than you think – chilling mellows flavors.
- Presentation pro tip: Pipe filling for pretty swirls, or use a small cookie scoop for uniform mounds.
- Keep it cold: Serve on a chilled platter to prevent sweating.
Ingredient Substitutions & Variations
Look, I’m all about sticking to the original recipe – but sometimes you gotta improvise! Here are my favorite tweaks that still keep the spirit of these deviled eggs:
- Mayo lovers: Swap Greek yogurt for an equal amount of good mayo if you prefer that classic richness
- Herb hacks: In a pinch, use 1 tsp dried dill (but fresh chives are non-negotiable for that bright flavor)
- Extra zing: Add 1 tbsp chopped capers or a dash of hot sauce for a tangy kick
- Smoky twist: Sprinkle smoked paprika on top instead of black pepper for depth
- Creamy alternative: Sour cream works beautifully if you’re out of Greek yogurt
The beauty of deviled eggs? They’re like a blank canvas – have fun with them! If you enjoy experimenting with appetizers, check out more recipes here.
Serving & Storing Deviled Eggs With Chives And Dill
Presentation is everything with these little beauties! I always serve them on a chilled platter – pop your serving dish in the freezer for 10 minutes beforehand to keep everything crisp. Scatter some extra dill fronds and chive blossoms around for that “I just picked these from my garden” look (even if they came from the grocery store). As for storage, these keep beautifully covered in the fridge for up to 24 hours – any longer and the whites can get soggy. Pro tip: Wait to garnish with fresh herbs until just before serving so they stay bright and perky! You can see some of my other appetizer ideas over on my Facebook page.
Nutritional Information For Deviled Eggs With Chives And Dill
Here’s the scoop on what you’re eating (not that you need justification for these delicious bites!): Each serving (2 egg halves) packs about 70 calories, 4g fat, and 6g protein. The Greek yogurt keeps it lighter than traditional versions, while still delivering that creamy satisfaction we all crave. Remember – exact numbers may vary slightly based on your specific ingredients.

FAQs About Deviled Eggs With Chives And Dill
I get asked about these deviled eggs all the time – here are the answers to the most common questions:
How long do deviled eggs last in the fridge?
They’re best eaten within 24 hours – after that, the whites start getting rubbery. Keep them covered with plastic wrap pressed right against the filling to prevent drying.
Can I use mayonnaise instead of Greek yogurt?
Absolutely! Swap equal amounts – though I find mayo makes them richer while yogurt keeps them lighter. Your call!
Can I make these ahead of time?
Yes! In fact, they taste better after chilling for at least an hour. Just wait to garnish until serving.
Why won’t my egg shells peel cleanly?
Fresh eggs are the worst for peeling. Use eggs that are at least a week old, and that ice bath is crucial. If they’re stubborn, peel them under cool running water.
Share Your Deviled Eggs Creation
Did you make these herby little delights? I’d love to see your creations! Snap a photo of your prettiest deviled eggs and tag me – bonus points if you got creative with the garnishes. Your feedback makes my day, so don’t be shy with those ratings and comments either!