Oh my gosh, you guys – Halloween baking season is HERE, and I’m practically bouncing with excitement! There’s something about turning classic shortbread into adorable little mummies that just makes me giddy. These Halloween Mummy Shortbread Cookies have been my go-to treat for years – they’re buttery, ridiculously easy to make, and always steal the show at parties.

Table of Contents
Table of Contents
Why You’ll Love These Halloween Mummy Shortbread Cookies
I still remember the first time I made them for my niece’s Halloween party. The kids went absolutely wild for them! Now it’s become our little tradition – every October, we spend an afternoon decorating batches of these cute cookies together. The best part? Even if your piping skills are as shaky as mine (seriously, my first attempts looked more like ghosts than mummies!), they still turn out looking spooky-cute.
What I love most is how simple they are – just a basic shortbread dough, some melted chocolate, and those googly candy eyes that make everything instantly festive. They’re perfect for classroom parties, neighbor gifts, or just keeping your own cookie jar stocked with Halloween magic. Trust me, once you try these, you’ll be hooked!
Okay, can we just take a moment to appreciate how perfect these little mummies are? Here’s why they’ve become my must-make Halloween treat year after year:
- Crazy simple – The dough comes together in minutes with basic ingredients you probably already have
- Kid magic – Decorating these is so fun that even my littlest helpers can join in (and feel proud of their creepy creations!)
- Total crowd-pleasers – That buttery shortbread base + chocolate = a combo nobody can resist
- No fancy skills needed – My first batch looked like mummies who’d been in a tussle, and they still disappeared instantly
- Gift-ready – Pack them in cute boxes or bags for the easiest (and tastiest) Halloween treats to share
Seriously, these cookies are the perfect mix of festive and foolproof – just like Halloween should be!
Print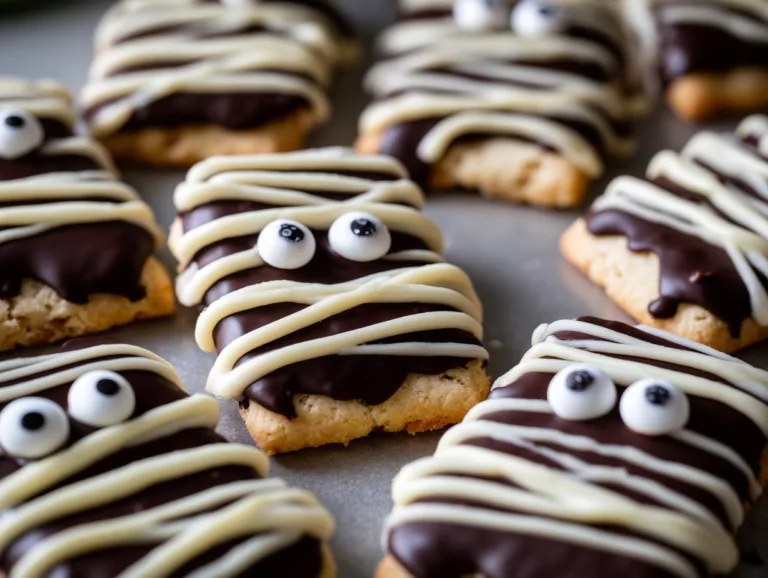
“Delicious Halloween Mummy Shortbread Cookies in 10 Steps!”
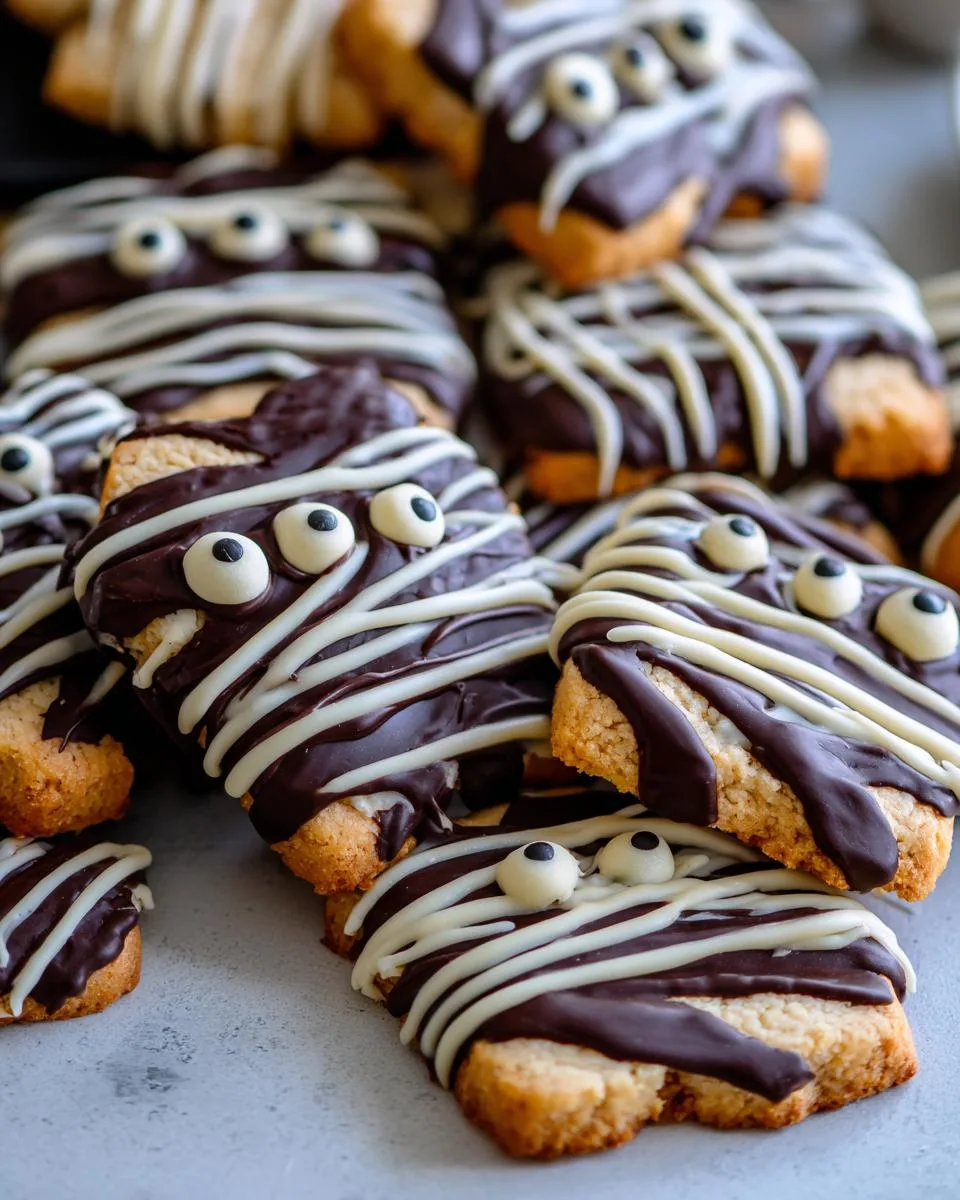
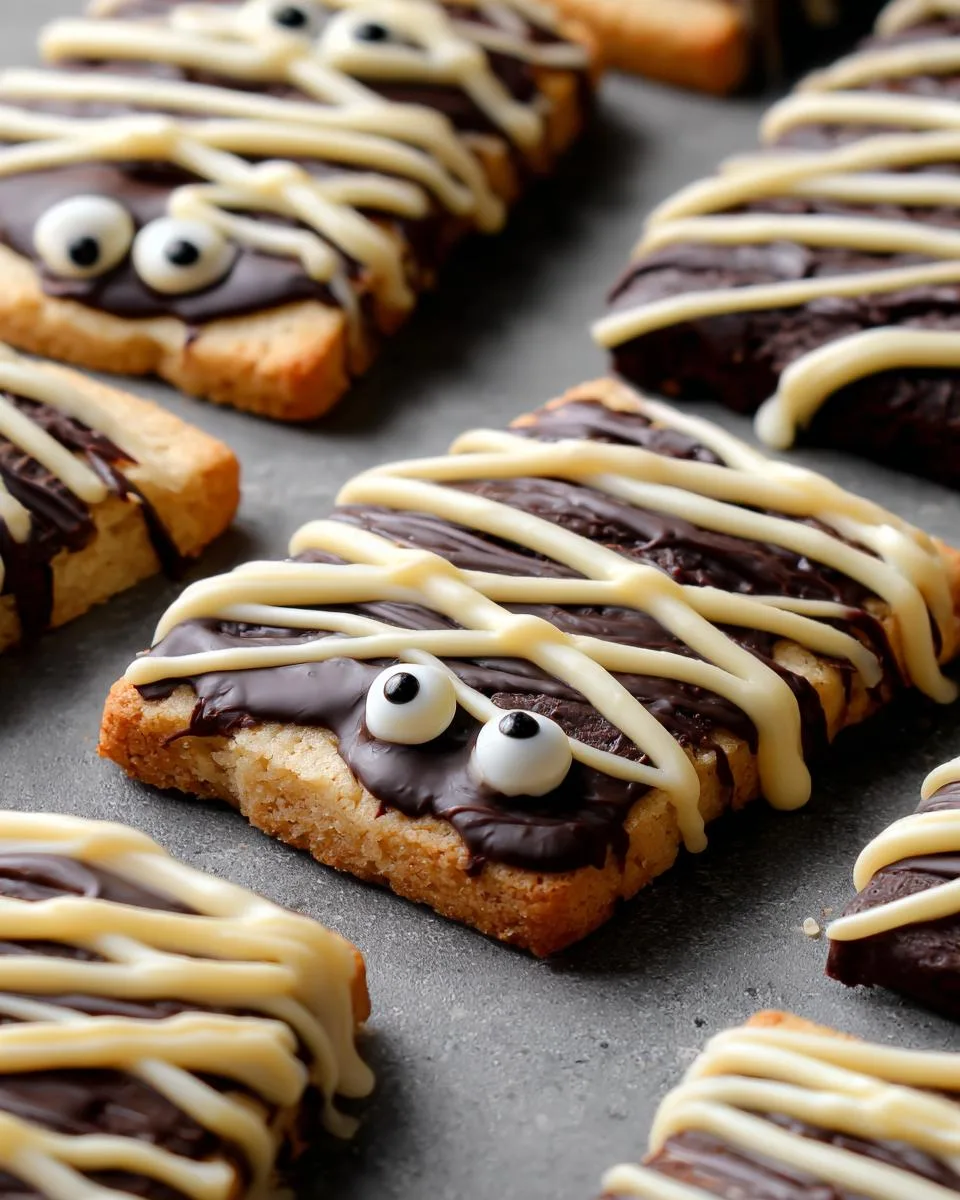
Halloween Mummy Shortbread Cookies are a fun and festive treat perfect for Halloween. These buttery cookies are dipped in dark chocolate, decorated with candy eyes, and drizzled with white chocolate to resemble mummies.
- Total Time: 1 hour 25 minutes
- Yield: Approximately 24 cookies 1x
Ingredients
- 145 g butter, at room temperature
- ½ cup icing sugar, sifted
- ½ tsp vanilla extract
- 1 ½ cups plain flour, sifted
- ½ tsp fine salt
- 150 g dark chocolate buttons
- 100 g white chocolate buttons
- candy eyes
- Ziplock bag
Instructions
- Beat the butter and vanilla extract in a stand mixer or electric mixer at medium speed until well mixed. Add the icing sugar and salt and mix until well combined.
- Change the speed to low. Add the flour and beat until combined. Scrape the sides and bottom a few times until the mixture is well incorporated. Do not overmix.
- Shape the cookie dough into cylinders and wrap in cling wrap. Refrigerate for at least an hour.
- Preheat the oven to 180°C (350°F). Line baking trays with baking paper.
- Slice the dough into ½ cm thick pieces. Place on trays, leaving space between them. Bake for 10 minutes on middle racks. Cool for 5 minutes, then transfer to a cooling tray.
- Melt dark chocolate in a Bain-marie over medium heat, stirring continuously. Remove from heat.
- Place white chocolate in a Ziplock bag and seal tightly. Submerge in hot water until melted.
- Dip one side of each cookie in dark chocolate and add candy eyes. Drizzle melted white chocolate over the cookies.
- Store in an airtight container for up to 2 weeks. Dough can be refrigerated for a week or frozen for a month.
Notes
- Do not overmix the dough to keep cookies tender.
- Space cookies apart as they expand slightly during baking.
- Use a Bain-marie to melt chocolate gently and avoid burning.
- Store cookies properly to maintain freshness.
- Prep Time: 1 hour 15 minutes
- Cook Time: 10 minutes
- Category: Dessert
- Method: Baking
- Cuisine: International
- Diet: Vegetarian
Nutrition
- Serving Size: 1 cookie
- Calories: 120
- Sugar: 8g
- Sodium: 50mg
- Fat: 7g
- Saturated Fat: 4g
- Unsaturated Fat: 2g
- Trans Fat: 0g
- Carbohydrates: 12g
- Fiber: 1g
- Protein: 1g
- Cholesterol: 15mg
Halloween Mummy Shortbread Cookies Ingredients
Here’s everything you’ll need to bring these adorable mummies to life – and yes, I’ve learned the hard way that substitutions can lead to some scary results! Stick with me on these:
- 145 g butter – at room temperature (trust me, cold butter just won’t cream right)
- ½ cup icing sugar – sifted (no lumps allowed in our smooth dough!)
- ½ tsp vanilla extract – the good stuff makes all the difference
- 1 ½ cups plain flour – sifted (I know it’s a pain, but it prevents dense cookies)
- ½ tsp fine salt – balances all that sweetness perfectly
- 150 g dark chocolate buttons – for that rich “mummy wrap” coating
- 100 g white chocolate buttons – the “bandages” that make them look legit
- Candy eyes – the bigger and googlier, the better!
- Ziplock bag – for piping those perfect white chocolate stripes
See? Nothing too wild – just quality ingredients that come together magically. Now let’s get mixing!

Equipment You’ll Need
- Stand mixer or electric mixer
- Baking trays
- Baking paper
- Ziplock bag (for piping)
- Small heatproof bowl (for melting chocolate)
- Cooling rack
How to Make Halloween Mummy Shortbread Cookies
Alright, let’s turn that simple dough into the cutest little mummies you’ve ever seen! I’ll walk you through each step like I’m right there in the kitchen with you. Just follow along, and soon you’ll have a whole army of adorable (and delicious) Halloween treats.
Preparing the Shortbread Dough
First things first – let’s get that dough just right. I’ve learned the hard way that rushing this part leads to tough cookies, so let’s do it properly:
- Beat the butter and vanilla in your mixer until they’re best friends – about 1 minute on medium speed should do it. You want it smooth and creamy, not chunky!
- Add the icing sugar and salt, then mix until everything’s combined. Scrape down the sides – those sneaky dry bits love to hide there.
- Now, the flour! Add it all at once, but here’s my secret – mix on low speed just until the dough comes together. Overmixing is the enemy of tender shortbread, so stop when you no longer see flour streaks.
- Shape the dough into two logs (about 1.5 inches thick) and wrap them tightly in cling wrap. This is crucial – chill for at least an hour. I know, waiting is hard, but cold dough means cookies that hold their shape!
See? Simple as can be. Now let’s bake those bad boys!
Baking the Cookies
Heat that oven to 180°C (350°F) and line your baking trays – this is where the magic happens:
- Slice your chilled dough into ½ cm rounds. Pro tip: use dental floss for perfect slices without squishing the dough!
- Space them about 2 inches apart – they won’t spread much, but they need room to breathe.
- Bake for exactly 10 minutes on the middle rack. No peeking! They’re done when the edges get that perfect pale gold color.
- Let them cool on the tray for 5 minutes (they’re still setting up), then move to a rack to cool completely. Warm cookies + chocolate = messy mummies!
Now comes the REALLY fun part…
Decorating Like a Mummy
Time to bring these cookies to life (sort of)! Here’s how to nail the mummy look:
- Melt your dark chocolate in a heatproof bowl over simmering water (bain-marie). Stir gently until smooth, then remove from heat.
- Dip each cookie halfway into the chocolate. Let the excess drip off, then place on baking paper. Quick, stick on two candy eyes while the chocolate’s still wet!
- For the white chocolate “bandages,” melt the buttons in a ziplock bag submerged in hot water. Snip a tiny corner and drizzle haphazardly over each cookie. The messier, the more mummy-like!
- Let them set completely before stacking – about 30 minutes should do it. Try not to eat them all at once!
See? Even if your drizzles aren’t perfect, they’ll still look adorable. The eyes do all the work, I promise!

Tips for Perfect Halloween Mummy Shortbread Cookies
After making these adorable mummies year after year (and yes, having a few disasters along the way!), here are my hard-won secrets for cookie success:
- Space them out! Even though shortbread doesn’t spread much, giving cookies room prevents any merging mummy mishaps.
- Chocolate too thick? Add a teaspoon of coconut oil to dark chocolate for perfect dipping consistency.
- Eyes popping off? Dab a tiny bit of melted chocolate first to “glue” them in place securely.
- White chocolate seizing up? Make sure no water gets in the bag – even one drop can ruin it!
- Store like a pro: Layer cookies between parchment in an airtight container – they’ll stay fresh for 2 weeks (if they last that long!).
Remember – imperfect mummies are the spookiest (and most delicious) anyway!
Storing and Freezing Instructions
Alright, let’s talk cookie survival! These Halloween Mummy Shortbread Cookies keep beautifully if stored properly. Just layer them between sheets of parchment in an airtight container – they’ll stay fresh at room temperature for about 2 weeks (though they never last that long in my house!).
Want to get ahead? The unbaked dough logs freeze amazingly for up to a month – just thaw overnight in the fridge before slicing. Already decorated cookies can be frozen too! Flash-freeze them first on a tray, then transfer to freezer bags. Thaw at room temperature when the Halloween munchies strike. Easy peasy!
Halloween Mummy Shortbread Cookies Variations
Want to mix things up? These cookies are super fun to customize! Try swapping vanilla for almond extract – it gives them this cozy, nutty flavor that’s perfect for fall. Feeling extra festive? Tint your white chocolate drizzle with orange food coloring for pumpkin-spiced mummies! You could even use peppermint extract and red drizzle for a creepy-candy-cane twist. The possibilities are endless – just have fun with it!
Nutritional Information
Okay, let’s be real – we’re not eating mummy cookies for their health benefits! But for those curious, here’s the scoop per cookie (based on my exact ingredients):
- Calories: 120
- Sugar: 8g
- Fat: 7g
Remember, these are estimates – your numbers might wiggle a bit depending on brands and how generous you are with those chocolate drizzles! But hey, it’s Halloween – enjoy every spooky bite.
FAQs About Halloween Mummy Shortbread Cookies
How do I keep my shortbread cookies from spreading?
The secret is chilling the dough! Those logs need at least an hour in the fridge – cold butter equals cookies that hold their shape. Also, don’t skip the sifting – lumpy flour can cause uneven spreading.
How can I tell when the cookies are done baking?
Shortbread is sneaky – it won’t brown much! Look for lightly golden edges and a matte surface (no shiny spots). They’ll still feel soft coming out of the oven but firm up as they cool. Trust me, 10 minutes is the sweet spot!
Can I make these ahead of time?
Absolutely! The dough keeps refrigerated for a week or frozen for a month. Decorated cookies stay fresh in an airtight container for 2 weeks (if you can resist eating them that long!).
My white chocolate keeps seizing – help!
Oh, I’ve been there! Make sure your ziplock bag is completely dry inside before adding chocolate. If it thickens, try kneading in a few drops of vegetable oil – it works like magic!
Can kids help decorate these?
Heck yes! The messier the drizzles, the more authentic the mummies look. Just supervise the chocolate dipping – little fingers and hot bowls don’t mix. Pro tip: put down parchment paper first for easy cleanup!
Share Your Creations!
I’d LOVE to see your spooky masterpieces! Tag me on Instagram @[yourhandle] with your Halloween Mummy Shortbread Cookies – the wonkier, the better! Nothing makes me happier than seeing all your adorable (and slightly deranged) cookie mummies. Happy haunting… I mean, baking! You can also find more recipes on our site.
If you’re looking for more Halloween treats, check out these Crescent Roll Mummy Dogs or these fun Floating Hand Punch drinks!
For more spooky inspiration, follow us on Facebook!