Nothing screams summer quite like fresh strawberries piled high on fluffy cake with clouds of whipped cream. My strawberry shortcake cups became our family’s go-to dessert after I stumbled upon the genius idea of serving them individually – no slicing, no mess, just pure berry bliss in perfect portions. These little cups pack all the classic flavors you love, but they’re way more fun to eat (and share!). Trust me, once you try this version, you’ll never go back to traditional slices again!

Table of Contents
Table of Contents
Why You’ll Love These Strawberry Shortcake Cups
Oh my goodness, where do I even start? These little cups are absolute game-changers! Here’s why they’ve become my summer obsession:
- No sharing drama – Everyone gets their own perfect portion (no fighting over who got more strawberries!)
- Fresh berry magic – The macerated strawberries create this incredible syrup that soaks into the cake just right
- Make-ahead easy – Bake the cake rounds a day early, then just assemble when you’re ready to impress
- Portable perfection – Take them to picnics, parties, or just enjoy one (or three) on your porch swing
Seriously, these disappear faster than I can make them – and that’s saying something!
Ingredients for Strawberry Shortcake Cups
Okay, let’s gather our goodies! I’ve broken everything down so you can see exactly what makes these cups so special. Pro tip: measure everything before you start – it makes the process so much smoother when you’re not digging through cabinets mid-recipe!
For the Cake:
- 2 cups (284g) all-purpose flour, plus extra for dusting your pan
- 3 Tbsp (26g) cornstarch – our secret weapon for that perfect tender crumb
- 1/2 tsp salt – just enough to balance the sweetness
- 1/2 tsp each baking soda & baking powder – our rising dream team
- 12 Tbsp (170g) unsalted butter, softened to room temperature (if your finger leaves a dent, it’s perfect!)
- 1 1/2 cups (315g) granulated sugar
- 1 tsp lemon zest – trust me, this brightens everything up
- 4 large eggs, also at room temperature
- 1 1/2 tsp vanilla extract – the good stuff if you’ve got it
- 1 cup (283g) sour cream – full fat gives the best texture
For the Strawberry Layer:
- 2 lbs fresh strawberries, diced (save 12 small perfect ones for garnish!)
- 3 1/2 Tbsp (45g) granulated sugar – this helps them release their juices
For the Cream Layer:
- 2 cups (475ml) heavy cream, chilled (cold cream whips better!)
- 6 oz (170g) cream cheese, softened to room temperature
- 1/2 tsp vanilla extract
- 3/4 cup (90g) powdered sugar
Ingredient Notes & Substitutions
That cornstarch in the cake? It’s magic – gives that bakery-style tenderness without drying out. Light sour cream works fine if that’s what you’ve got. For gluten-free folks, your favorite 1:1 flour blend will do the trick (I’ve tested with Bob’s Red Mill with great results). And please, please use real vanilla – the imitation stuff just can’t compare in something this simple and delicious!

How to Make Strawberry Shortcake Cups
Alright, let’s get to the fun part – making these adorable little cups of happiness! I’ll walk you through each step like we’re baking together in my kitchen. Don’t worry if you’re not a pro – this recipe is way easier than it looks, and I’ve got all the tips to make sure yours turn out perfect.
Preparing the Cake
First things first – preheat that oven to 350°F and grab your biggest baking sheet (mine’s 18×13 inches). Butter it up real good, then dust with flour – this is your insurance policy against stuck cake, and nobody wants that tragedy!
Now for the dry ingredients: whisk together your flour, cornstarch, salt, baking soda, and baking powder. Set this aside while you work your butter magic. In your mixing bowl, cream together the softened butter, sugar, and lemon zest until it’s light and fluffy – this should take about 3 minutes with a hand mixer. Scrape down the sides, then add eggs one at a time, mixing well after each. Splash in that vanilla – can you smell how good this is already?
Here’s the key: alternate adding your flour mixture and sour cream in three parts, starting and ending with the flour. Mix just until combined after each addition – overmixing is the enemy of tender cake! Spread this heavenly batter evenly in your prepared pan. It’ll look thin, but trust me, it puffs up beautifully.
Bake for 20-24 minutes until golden and a toothpick comes out clean. Let it cool completely in the pan – I know it’s tempting to rush, but patience gives you perfect cake rounds!
Assembling the Strawberry Layer
While your cake cools, let’s prep those gorgeous berries. Dice most of your strawberries (save those 12 pretty ones for topping!) and toss them with the sugar in a bowl. Let them sit for about 10 minutes – this maceration process is like strawberry alchemy, turning them into sweet, juicy perfection. The sugar draws out their natural juices, creating this incredible syrup that’ll soak into your cake just right.
Making the Whipped Cream
Now for the cloud-like topping! Chill your mixing bowl and beaters in the freezer for 10 minutes – this helps the cream whip up faster and hold its shape better. Whip the heavy cream to soft peaks – that’s when the cream holds its shape but still looks silky. In another bowl, beat the softened cream cheese, powdered sugar, and vanilla until smooth. Gently fold this into your whipped cream – be patient here! You want to keep all that air you just whipped in. The cream cheese adds stability so your topping won’t deflate on you.
Layering the Strawberry Shortcake Cups
Time for the grand finale! Use a round cutter (or even a drinking glass) to cut circles from your cooled cake. In each cup, start with a cake round, then spoon over some of those juicy strawberries (get that syrup in there too!), and top with a generous dollop of your cream mixture. Repeat the layers if you’re feeling fancy, then crown each one with a whole strawberry. Serve these beauties within an hour for maximum freshness – though I won’t judge if you sneak one straight away!
Print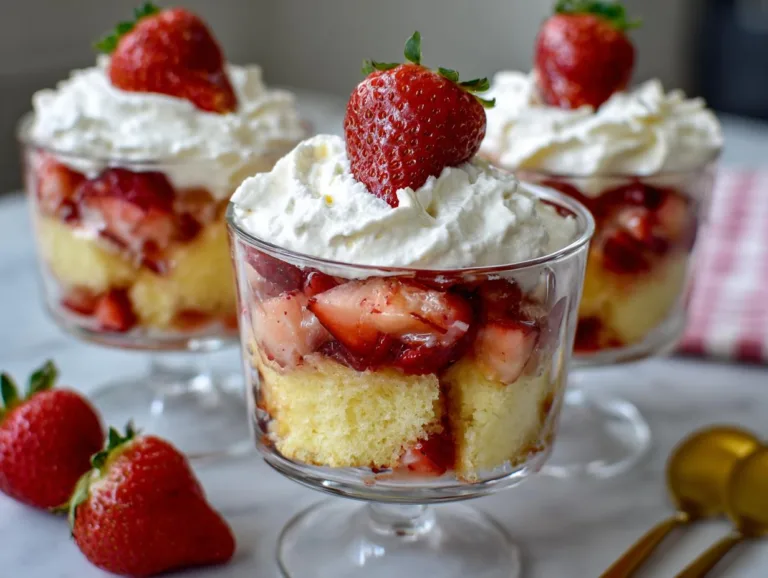
Irresistible Strawberry Shortcake Cups in 3 Easy Steps
Delightful strawberry shortcake cups featuring layers of fluffy cake, fresh strawberries, and creamy whipped topping.
- Total Time: 54 minutes
- Yield: 12 servings 1x
Ingredients
- Cake:
- 2 cups (284g) all-purpose flour, plus more for dusting pan
- 3 Tbsp (26g) cornstarch
- 1/2 tsp salt
- 1/2 tsp baking soda
- 1/2 tsp baking powder
- 12 Tbsp (170g) unsalted butter, softened
- 1 1/2 cups (315g) granulated sugar
- 1 tsp lemon zest
- 4 large eggs
- 1 1/2 tsp vanilla extract
- 1 cup (283g) sour cream
- Strawberry layer:
- 2 lbs fresh strawberries, diced
- 12 small whole strawberries for garnish
- 3 1/2 Tbsp (45g) granulated sugar
- Cream layer:
- 2 cups (475ml) heavy cream
- 6 oz (170g) cream cheese, softened
- 1/2 tsp vanilla extract
- 3/4 cup (90g) powdered sugar
Instructions
- Preheat oven to 350°F. Butter and flour an 18×13-inch baking sheet.
- Whisk dry ingredients in a bowl: flour, cornstarch, salt, baking soda, and baking powder.
- Cream butter, sugar, and lemon zest until fluffy. Mix in eggs one at a time, then vanilla.
- Alternately mix in flour mixture and sour cream in three parts, ending with flour.
- Spread batter evenly in the pan. Bake for 20-24 minutes, until a toothpick comes out clean.
- Cool completely, then cut into 24 rounds.
- Toss diced strawberries with sugar and let sit for 10 minutes.
- Whip heavy cream until soft peaks form.
- In another bowl, whip cream cheese, powdered sugar, and vanilla until fluffy. Fold into whipped cream.
- Assemble cups: cake, strawberries, cream. Repeat layers. Garnish with whole strawberries.
- Serve within an hour for best results.
Notes
- Make cake a day ahead; prepare cream and strawberries just before serving.
- Leftover cake can be frozen for later use.
- Light sour cream works well in this recipe.
- Prep Time: 30 minutes
- Cook Time: 24 minutes
- Category: Dessert
- Method: Baking
- Cuisine: American
- Diet: Vegetarian
Nutrition
- Serving Size: 1 cup
- Calories: 450
- Sugar: 32g
- Sodium: 220mg
- Fat: 28g
- Saturated Fat: 17g
- Unsaturated Fat: 8g
- Trans Fat: 0g
- Carbohydrates: 45g
- Fiber: 2g
- Protein: 6g
- Cholesterol: 140mg
Tips for Perfect Strawberry Shortcake Cups
After making these more times than I can count, here are my hard-earned secrets for strawberry shortcake cup perfection:
- Chill everything for the cream – Your bowl, beaters, even the cream itself. Cold tools = fluffy clouds that hold their shape!
- Room temp is your friend – Eggs and butter at room temperature cream together beautifully for that perfect cake texture.
- Make-ahead magic – Bake the cake rounds up to 2 days ahead, but wait to assemble until serving time to avoid sogginess.
- Slice berries just before serving – They’ll stay bright and fresh instead of getting mushy.
Follow these simple tricks, and you’ll be the strawberry shortcake cup hero at every gathering! You can see more of my kitchen adventures over on Facebook.

Storage & Reheating
Here’s the scoop on keeping your strawberry shortcake cups happy! Assembled cups last about a day in the fridge, but the cake can live in your freezer for up to a month (just wrap it tight!). Whatever you do, don’t freeze the assembled cups – that gorgeous cream turns grainy and sad. Learned that one the hard way!
Strawberry Shortcake Cups FAQs
I get asked about these strawberry shortcake cups all the time – here are the answers to the questions that pop up most often in my kitchen (and my DMs)!
Can I make strawberry shortcake cups ahead of time?
Absolutely! The cake rounds freeze beautifully for up to a month, and you can bake them 2 days in advance if you prefer fridge storage. Just wait to assemble with the strawberries and cream until you’re ready to serve. The components play nicer when they meet at the last minute!
Can I use frozen strawberries instead of fresh?
Oh honey, I wish! Frozen berries release way too much liquid when they thaw, turning your beautiful cups into a soggy mess. Fresh strawberries are non-negotiable here – their texture and natural sweetness make all the difference. If you’re making these off-season, look for the freshest berries you can find, even if they’re not perfectly ripe.
How do I prevent soggy cake in my strawberry shortcake cups?
Two words: timing and technique! First, assemble no more than an hour before serving. Second, don’t drown your cake – spoon the macerated strawberries with just enough juice to moisten without swimming. That cornstarch in the cake recipe helps too – it creates a slightly denser crumb that stands up to the berries better than a super-light cake would.

Nutritional Information
Now, I’m no nutritionist, but I know you might be curious about what’s in these delightful strawberry shortcake cups! Keep in mind that these numbers can vary depending on your specific ingredients and brands. But for a general idea, each serving (and trust me, you’ll want a whole serving to yourself!) comes out to about:
- 450 calories
- 28g fat (hey, that’s where all the deliciousness comes from!)
- 45g carbs
But let’s be real – when you’re biting into layers of fluffy cake, juicy strawberries, and that heavenly cream, the last thing you’re thinking about is numbers. Life’s too short not to enjoy dessert, am I right?
Share Your Creation!
I’d love to see your strawberry shortcake cup masterpieces! Tag me on Instagram or leave a rating – nothing makes me happier than seeing your kitchen adventures with this recipe!