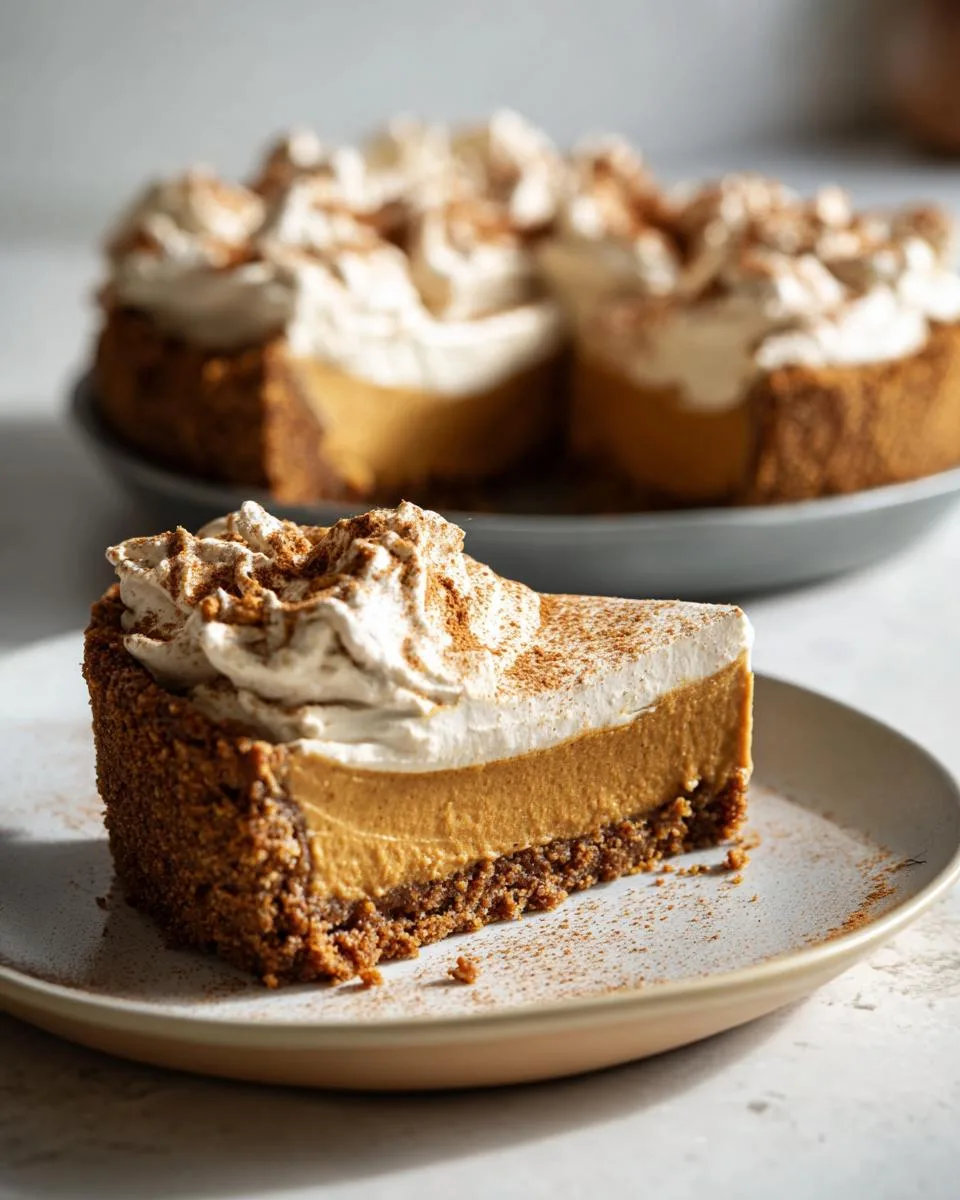
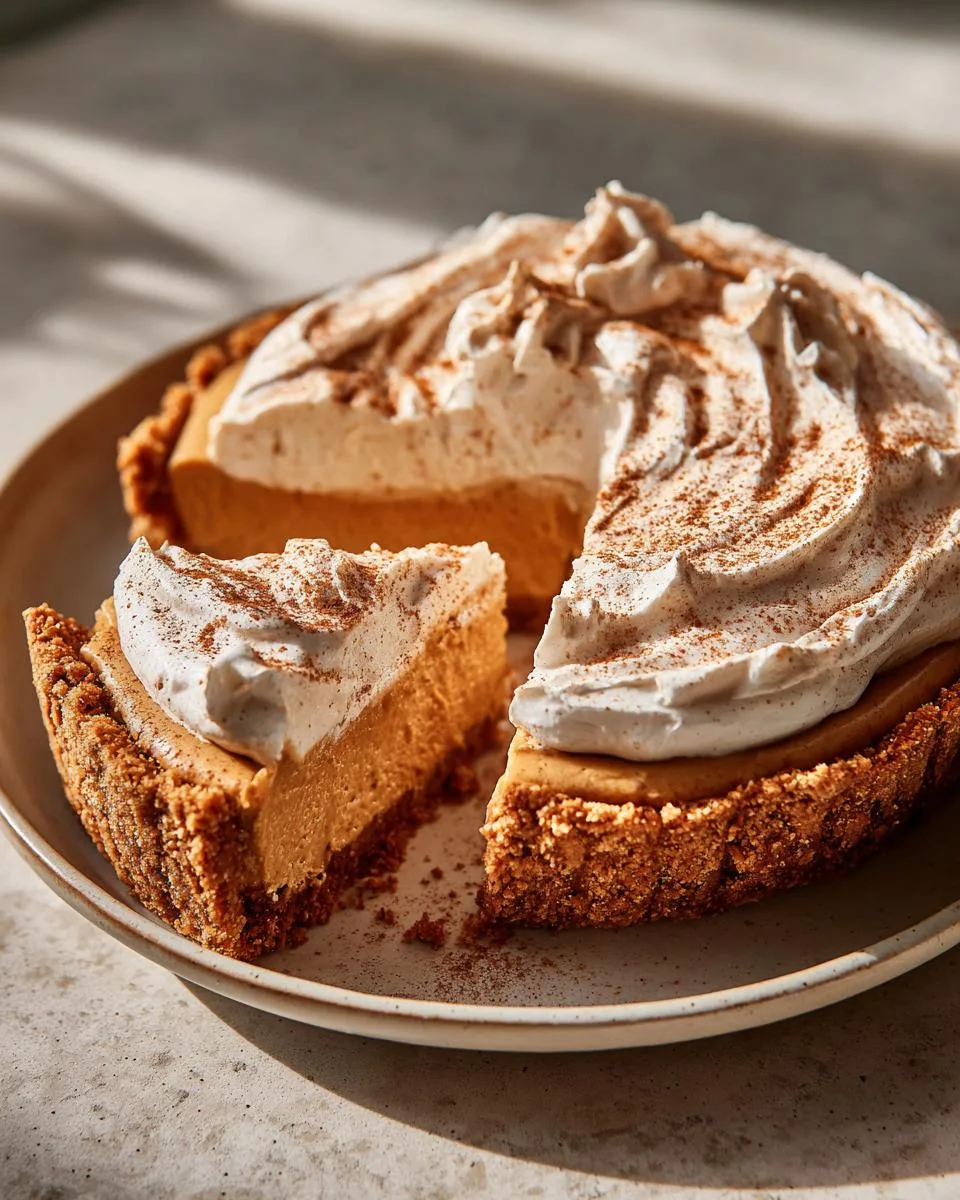
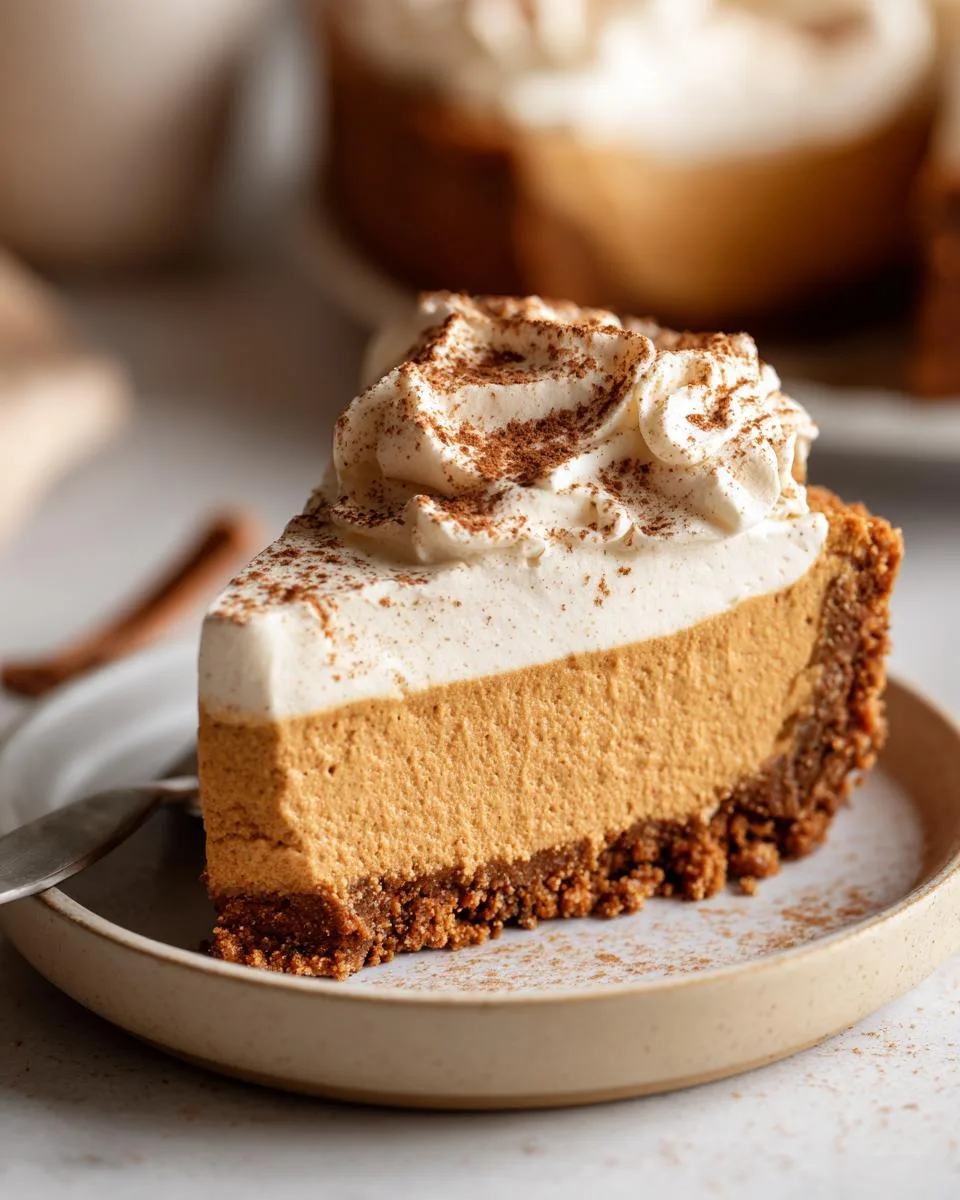
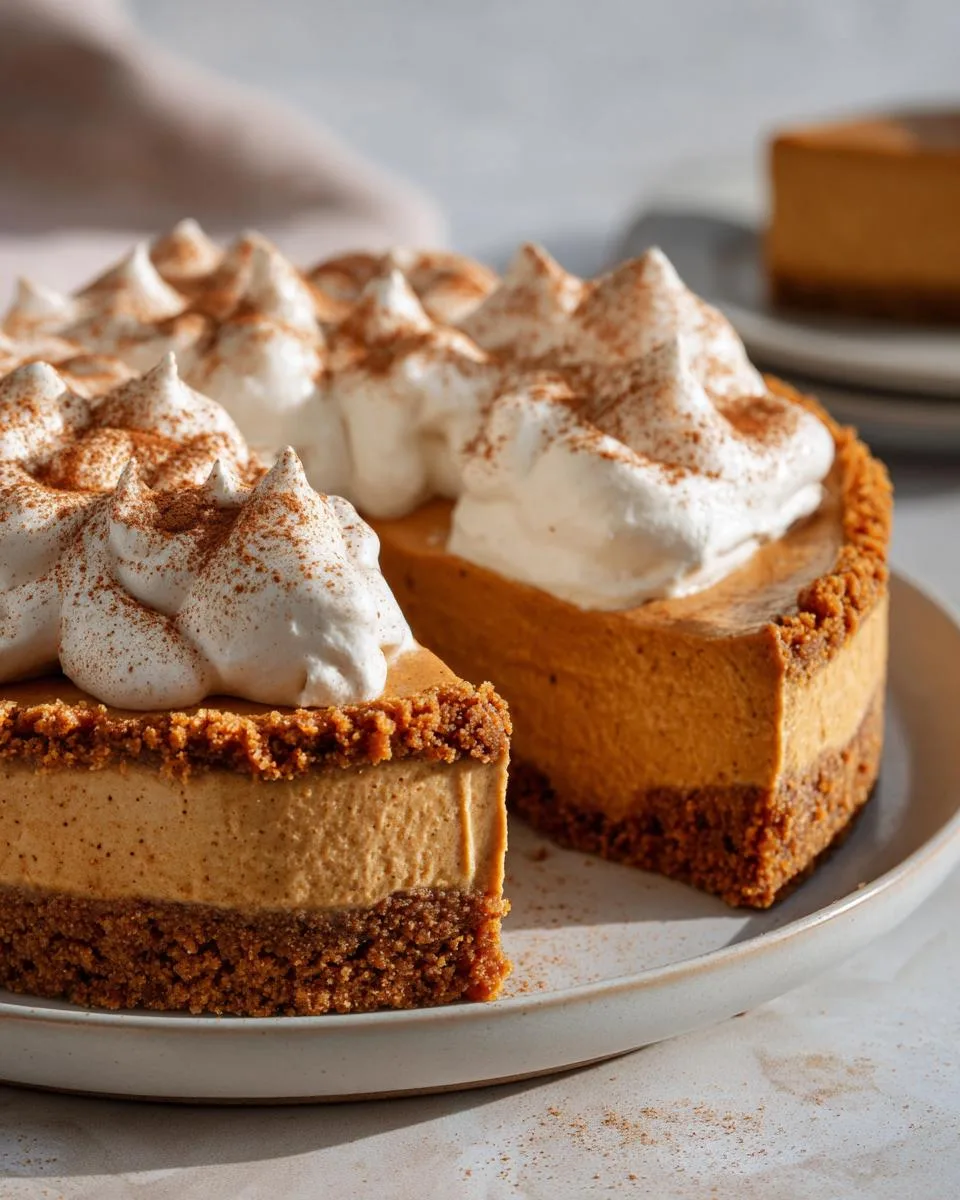
Oh, this pumpkin mousse pie! It’s the dessert that makes me do a little happy dance every fall. Imagine the creamiest, dreamiest pumpkin filling you’ve ever tasted, light as air but packed with warm spices, all cradled in that snappy gingersnap crust. I’ve been making this no-bake wonder for years, and trust me – it disappears faster than you can say “seconds please!” The best part? No oven required. Just whip, fold, chill, and swoon over that perfect balance of spicy and sweet. That gingersnap crust? Absolute genius against the fluffy pumpkin filling. It’s like autumn in every bite.
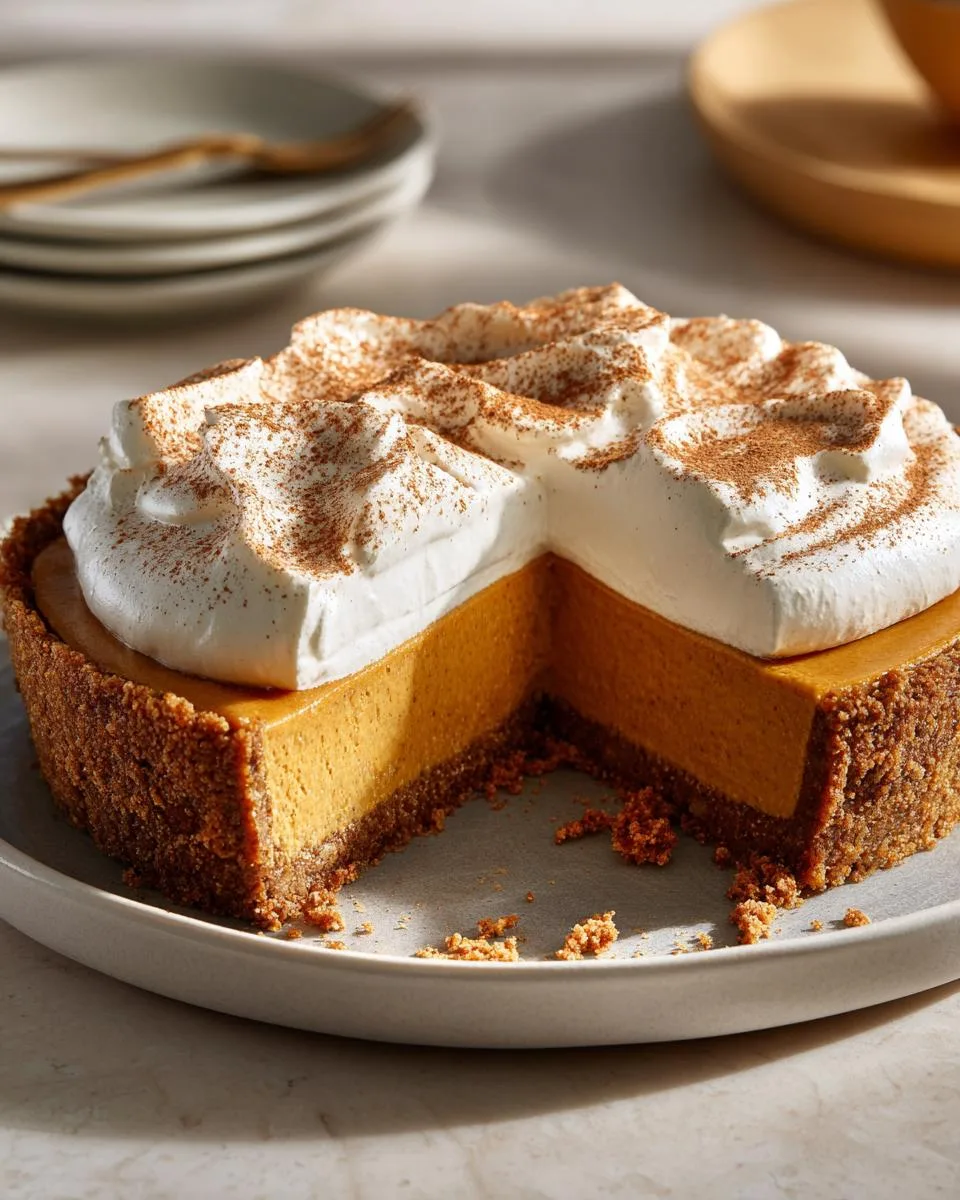
Table of Contents
Table of Contents
Why You’ll Love This Pumpkin Mousse Pie
This pie isn’t just delicious—it’s downright magical. Here’s why it’s become my go-to dessert every fall (and honestly, sometimes year-round):
- No-bake bliss: Skip the oven! This pie comes together with just a mixer and some fridge time.
- That cloud-like texture: The mousse is so light, yet so rich—it’s like eating pumpkin spice whipped cream.
- Spice that’s just right: Not too sweet, not too spicy—just the perfect cozy flavor balance.
- Gingersnap crust magic: That little bit of crunch and molasses flavor? *Chef’s kiss* against the creamy filling.
- Total crowd-pleaser: Looks fancy, tastes incredible, and always gets recipe requests.
Seriously, one bite and you’ll be hooked. I’ve yet to meet someone who doesn’t go back for seconds! I’ve got plenty more where this came from!
Ingredients for Pumpkin Mousse Pie
Okay, let’s gather our goodies! Here’s everything you’ll need for this heavenly pie—and trust me, each ingredient plays a special role in creating that perfect flavor and texture. Pro tip: measure everything before starting (my grandma called this mise en place and she was totally right).
- 2 cups gingersnap cookie crumbs (about 20 cookies—I pulverize them in a food processor until fine)
- ½ cup unsalted butter, melted (the glue that holds that crust together!)
- ¼ teaspoon kosher salt (just a pinch to balance the sweetness)
- 8 oz cream cheese, room temperature (softened is key—no lumps allowed!)
- 1 cup powdered sugar (sifts best if you give it a quick whisk first)
- 1 cup pure pumpkin puree (not pumpkin pie filling—check that label!)
- ½ tablespoon vanilla extract (the good stuff makes a difference here)
- 2 teaspoons pumpkin pie spice (or make your own blend—I sometimes add an extra pinch of cardamom)
- 2 cups heavy whipping cream, very cold (divided—one for the mousse, one for topping)
- 2 tablespoons powdered sugar (for the dreamy cinnamon whipped cloud on top)
- 2 tablespoons maple syrup (the secret depth-builder in the topping)
- 1 teaspoon ground cinnamon (because more spice is always better)
See? Nothing too fancy—just good, quality ingredients treated right. Now let’s make some magic!
How to Make Pumpkin Mousse Pie
Alright, let’s get mixing! This pie comes together in three simple stages – crust, filling, topping – with plenty of fridge breaks in between. I’ll walk you through each step with all my favorite tricks to ensure your mousse pie turns out perfectly light, creamy, and utterly irresistible.
Step 1: Prepare the Gingersnap Crust
First, let’s make that glorious gingersnap base. Grab your food processor (or a zip-top bag and rolling pin if you’re going old-school) and pulverize those cookies into fine crumbs. You’ll know they’re ready when they look like damp sand – no big chunks! Mix the crumbs with melted butter and that pinch of salt until every last crumb is coated. Now, here’s the important part: press the mixture firmly into your pie plate, really working it up the sides. I use the bottom of a measuring cup to compact it evenly. Pop this in the fridge to set while we make the filling – about 15 minutes does the trick.
Step 2: Make the Pumpkin Mousse Filling
This is where the magic happens! In your stand mixer (or with a trusty hand mixer), beat the room-temperature cream cheese and powdered sugar until completely smooth – we’re talking no lumps whatsoever. Scrape down the sides as needed. Now add the pumpkin puree (make sure it’s room temp too!), vanilla, and pumpkin pie spice. Mix until beautifully blended – the color should be a gorgeous, uniform orange.
Now, in a separate bowl (I chill mine first for better results), whip 1 cup of that cold heavy cream to stiff peaks. This means when you lift the beater, the cream holds its shape firmly. Gently fold the whipped cream into the pumpkin mixture in two batches – the first to lighten it, the second to fully incorporate. Be patient and use a big rubber spatula with broad strokes to keep all that airiness. You’ll know it’s ready when no white streaks remain.
Step 3: Whip the Cinnamon Topping
Final flourish time! Using your chilled bowl again, combine the remaining 1 cup heavy cream, powdered sugar, maple syrup, cinnamon and vanilla. Whip it just until soft-stiff peaks form – you want it billowy but still spreadable. Now carefully spoon or pipe this over your pumpkin mousse layer, creating pretty swoops and swirls. The contrast between the smooth mousse and fluffy topping is divine! Pop the whole pie in the fridge for at least 3 hours (overnight is even better) to set completely. Trust me, the wait is worth it when you slice into that perfect, creamy texture.
Print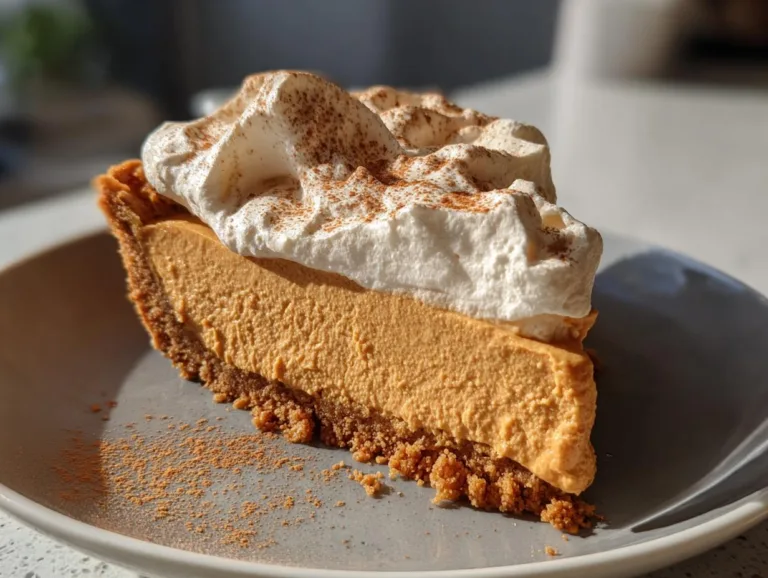
Creamy 3-Layer Pumpkin Mousse Pie Recipe You’ll Crave
A creamy and spiced pumpkin mousse pie with a gingersnap crust, topped with cinnamon whipped cream.
- Total Time: 3 hours 20 minutes
- Yield: 8 servings 1x
Ingredients
- 2 cups gingersnap cookie crumbs
- ½ cup unsalted butter, melted
- ¼ teaspoon kosher salt
- 8 oz cream cheese, room temperature
- 1 cup powdered sugar
- 1 cup pure pumpkin puree
- ½ tablespoon vanilla extract
- 2 teaspoons pumpkin pie spice
- 1 cup heavy whipping cream, very cold
- 1 cup heavy whipping cream, very cold
- 2 tablespoons powdered sugar
- 2 tablespoons maple syrup
- 1 teaspoon ground cinnamon
- 1 teaspoon vanilla extract
Instructions
- In a food processor or blender, pulverize the gingersnap cookies into very fine crumbs.
- Transfer to a large bowl, add the melted butter and salt, and combine with a fork until all crumbs are fully moistened.
- Press the crumbs into a 9” pie plate, compacting it firmly into the bottom and sides. Refrigerate while you prepare the filling.
- In the bowl of a stand mixer fitted with the paddle attachment (or using a hand mixer), beat together the cream cheese and powdered sugar until smooth.
- Add the pumpkin puree, vanilla, and pumpkin pie spice and mix into the cream cheese.
- Add the heavy whipping cream to a different bowl and use the whisk attachment (or hand mixer) to whip the heavy cream to stiff peaks.
- Use a rubber spatula to fold the whipped cream into the pumpkin mixture in two batches, until light, fluffy, and completely combined.
- Add the mixture to the pie crust and spread evenly. Refrigerate for at least 3 hours until set.
- Add the heavy whipping cream, powdered sugar, maple syrup, cinnamon, and vanilla to the bowl and use the whisk attachment (or a handheld mixer) to whip the heavy cream to soft-stiff peaks.
- Spread and swoop on top of the pumpkin mousse filling, then slice and serve.
Notes
- Refrigerate leftovers for up to 3 days.
- Ensure cream cheese and pumpkin puree are at room temperature for smoother mixing.
- Use cold heavy cream for best whipping results.
- Prep Time: 20 minutes
- Cook Time: 0 minutes
- Category: Dessert
- Method: No-Bake
- Cuisine: American
- Diet: Vegetarian
Nutrition
- Serving Size: 1 slice
- Calories: 420
- Sugar: 28g
- Sodium: 180mg
- Fat: 30g
- Saturated Fat: 18g
- Unsaturated Fat: 9g
- Trans Fat: 0g
- Carbohydrates: 35g
- Fiber: 2g
- Protein: 4g
- Cholesterol: 90mg
Tips for the Perfect Pumpkin Mousse Pie
Want to make sure your pumpkin mousse pie turns out absolutely flawless every time? Here are my hard-earned secrets from years of making this crowd-pleaser:
- Chill everything cold: Pop your mixing bowl and beaters in the freezer for 10 minutes before whipping cream. Cold tools = better peaks!
- Don’t rush the cream cheese: Let it soften fully at room temperature – lumpy filling is the enemy of that dreamy texture.
- Gentle folds win: When combining whipped cream with pumpkin mixture, fold slowly with a big spatula to keep it light and airy.
- Fresh spices matter: That jar of pumpkin pie spice from last year? Toss it. Fresh spices make all the difference in flavor.
Follow these simple tricks, and you’ll have the creamiest, most velvety pumpkin mousse pie on the block! You can find more of my favorite baking tips over on my Facebook page.
Storage and Serving Suggestions
This beauty keeps beautifully in the fridge for up to 3 days – just cover it loosely with plastic wrap. (Freezing? Don’t do it – the texture turns grainy!) When serving, I love dusting extra cinnamon on top or drizzling with warm caramel sauce for that extra “wow” factor. A sprinkle of crushed gingersnaps on each slice adds the perfect crunchy contrast too!
Pumpkin Mousse Pie FAQs
Over the years, I’ve gotten so many questions about my favorite pumpkin mousse pie recipe – and I’m happy to share all my tips! Here are the answers to the ones I hear most often:
Can I use graham crackers instead of gingersnaps?
You bet! Graham crackers make a delicious crust too – just add an extra ½ teaspoon of cinnamon to the crumbs to keep that warm spice flavor. But honestly? Try it with the gingersnaps first – that molasses kick is what makes this pie extra special!
How long does the pie need to set in the fridge?
At least 3 hours, but overnight is ideal. I know it’s hard to wait (I stare at mine impatiently too!), but that chilling time lets the mousse firm up perfectly so you get those clean slices. If you’re looking for other no-bake desserts, check out my no-bake pumpkin cheesecake balls.
My whipped cream won’t stiffen – help!
Oh honey, I’ve been there! Make sure your cream is ice cold, your bowl is chilled, and you’re not rushing it. Sometimes adding ¼ teaspoon of cream of tartar helps stabilize things. And never try to whip cream in a warm kitchen!
Can I make this ahead for Thanksgiving?
Absolutely! The pie actually tastes better on day two. Just hold off on the whipped topping until a few hours before serving. I often make it Wednesday for Thursday feasts – one less thing to worry about!
Nutritional Information
Here’s the scoop on what’s in each glorious slice of pumpkin mousse pie (because let’s be real – we’re all having seconds anyway!):
- Calories: 420
- Fat: 30g (18g saturated)
- Carbohydrates: 35g
- Sugar: 28g
- Protein: 4g
- Fiber: 2g
Remember, these are estimates – actual nutrition can vary based on your specific ingredients and brands. But hey, with all that pumpkin goodness, we’re basically eating a vegetable, right? *wink*