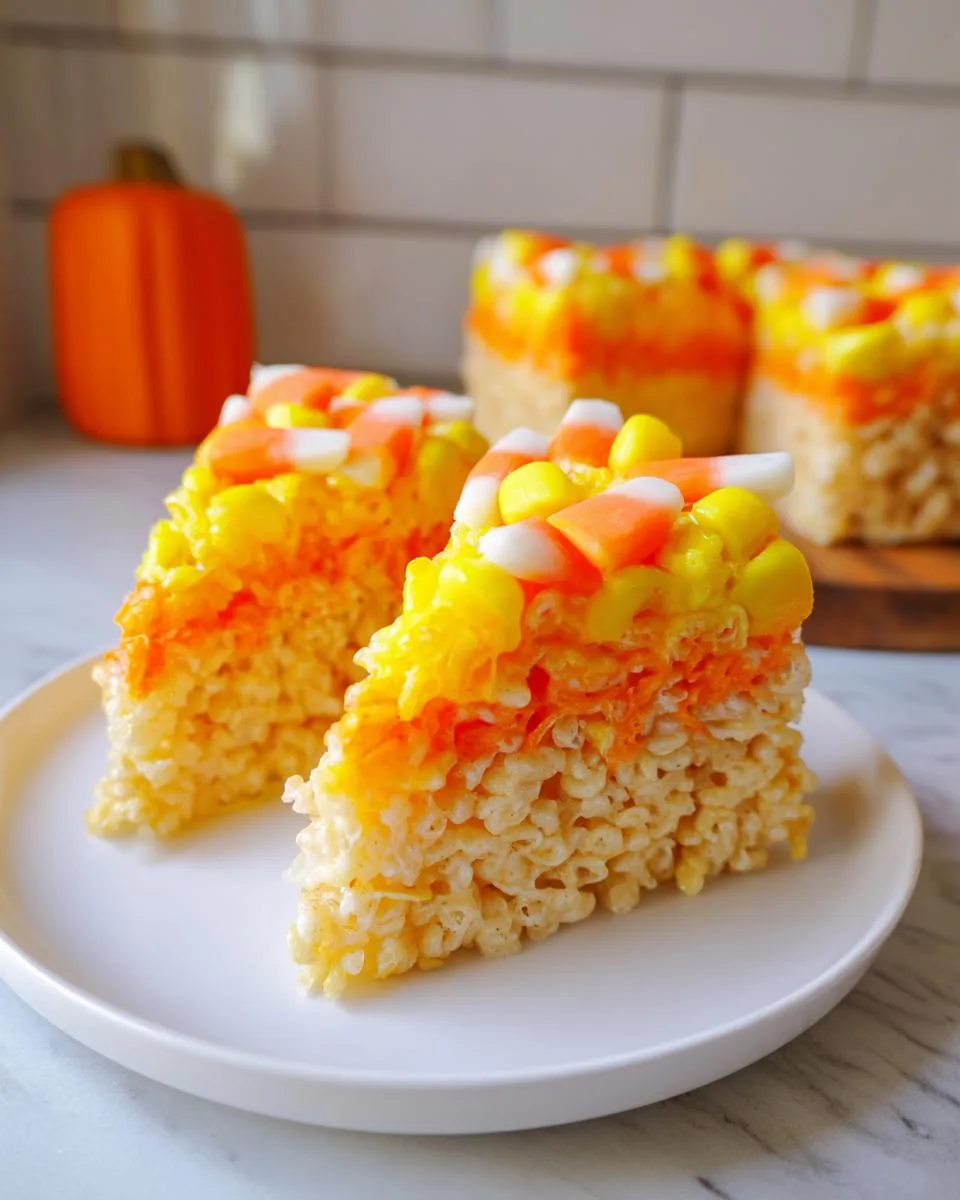
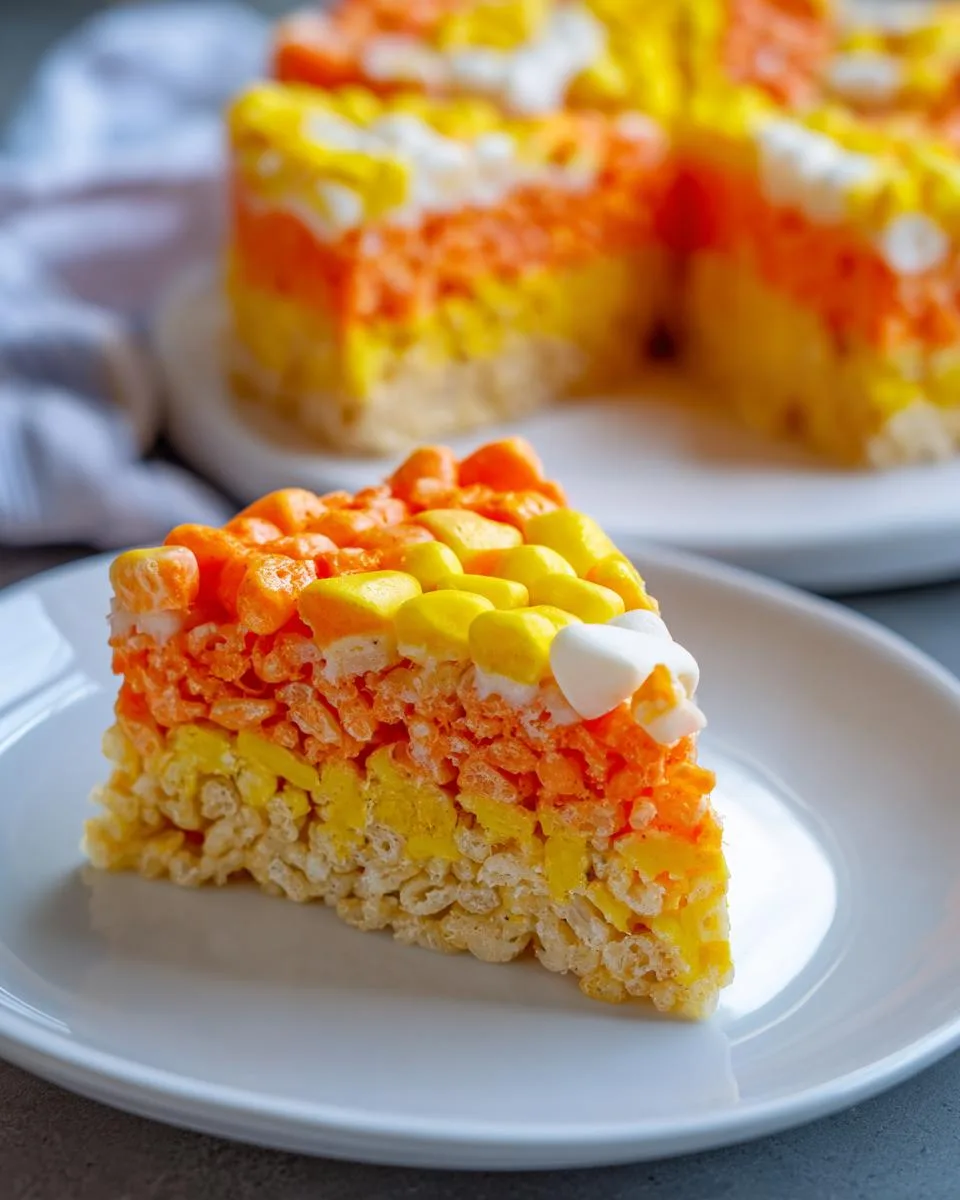
If there’s one thing I love more than classic Rice Krispies treats, it’s giving them a festive twist—especially when Halloween rolls around. These candy corn Rice Krispies are my go-to for a quick, colorful treat that never fails to make people smile. The first time I made them, my nieces went wild for the bright yellow, orange, and white layers—they couldn’t believe how much they looked like actual candy corn! And the best part? No baking required. Just a microwave, a few simple ingredients, and a little patience while they set. Trust me, once you try these, they’ll become your Halloween tradition too. Perfect for parties, class treats, or just a fun afternoon snack with the kids!
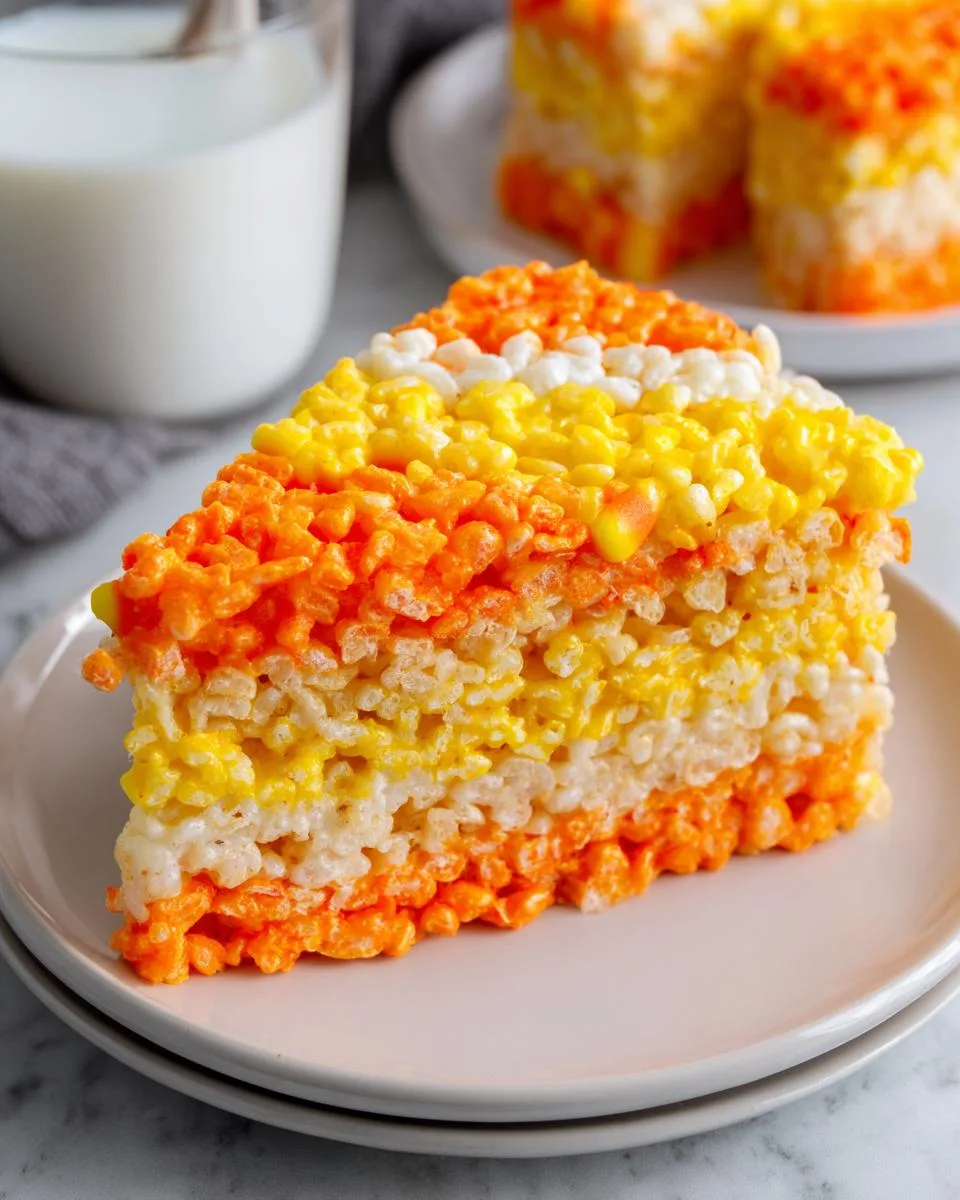
Table of Contents
Table of Contents
Why You’ll Love These Candy Corn Rice Krispies
These treats aren’t just adorable—they’re downright addictive! Here’s why they’ve earned a permanent spot in my Halloween recipe rotation:
- No oven needed – Just a microwave and 5 minutes of active cooking time. Perfect for when you’re short on time (or patience!).
- Instant Halloween vibes – That iconic candy corn look makes everyone smile. I’ve brought these to school parties where they vanished faster than ghosts!
- Kid-approved simplicity – My littlest helpers love pressing the colorful layers into the pan (buttered fingers optional!).
- Customizable colors – Go bold with food gel or keep it pastel for spring parties.
- Nostalgia factor – Classic Rice Krispies treats meet childhood candy memories.
Seriously—what’s not to love? Even the marshmallow-scented kitchen is part of the fun!
Ingredients for Candy Corn Rice Krispies
Okay, let’s talk ingredients! The magic of these treats comes from simple pantry staples, but I’ve learned a few tricks about getting the colors and textures just right. You’ll need three separate batches—one for each candy corn color—but don’t worry, it’s easier than it sounds!
Yellow Layer Ingredients
- 2 1/2 cups mini marshmallows – Trust me, minis melt smoother than the big ones
- 2 tablespoons butter – Unsalted and softened is my go-to
- Big pinch of salt – Balances all that sweetness perfectly
- 5 drops yellow food gel – Gel gives that vibrant candy corn hue
- 2 1/4 cups crisp rice cereal – The classic Rice Krispies crunch we all love
Orange Layer Ingredients
- 1 3/4 cups mini marshmallows – Fewer marshmallows = thinner layer
- 2 tablespoons butter – Same as above, keep it consistent
- Big pinch of salt – Yes, every layer needs it!
- 5 drops yellow food gel + 1-2 drops red food gel – This combo makes the perfect orange
- 1 1/4 cups + 2 tablespoons crisp rice cereal – The extra 2 tbsp helps the texture
White Layer Ingredients
- 3/4 cup mini marshmallows – Smallest batch for the center
- 1 tablespoon butter – Just half the amount of other layers
- Big pinch of salt – See a pattern here?
- 3/4 cup crisp rice cereal – Makes the perfect little white tip
Pro tip: Measure everything before you start—once those marshmallows start melting, things move fast! And don’t skip the gel food coloring; the liquid kind just doesn’t give that same candy-shop brightness.
How to Make Candy Corn Rice Krispies
Alright, let’s get to the fun part – making these adorable layered treats! I promise it’s easier than it looks, and I’ll walk you through each step so your candy corn Rice Krispies turn out picture-perfect every time.
Preparing the Yellow Layer
First things first – grab your biggest microwave-safe bowl (trust me, you’ll need the space!). Toss in the marshmallows, butter, and that big pinch of salt. Microwave on high for 30 seconds – when you pull it out, it’ll look like a puffy cloud! Give it a good stir; if there are still unmelted bits, pop it back in for another 15 seconds. Now comes the magic: whisk in that bright yellow food coloring until it’s completely blended. The color should scream “candy corn” at this point!
Dump in your rice cereal and stir, stir, stir until every last crisp is coated. Here’s where things get hands-on – literally! Butter your palms (don’t be shy with it) and press that beautiful yellow mixture firmly into the edges of your prepared pan. You’re creating the wide base of your candy corn here, so pack it tight!
Adding the Orange Layer
No need to wash the bowl yet – we’re making the orange layer in the same one! Just repeat the melting process with your orange layer ingredients. The key here is getting that perfect candy corn orange – I usually start with 5 yellow drops and 1 red, then add another red drop if needed. Once melted and colored, mix in your cereal and get ready to layer.
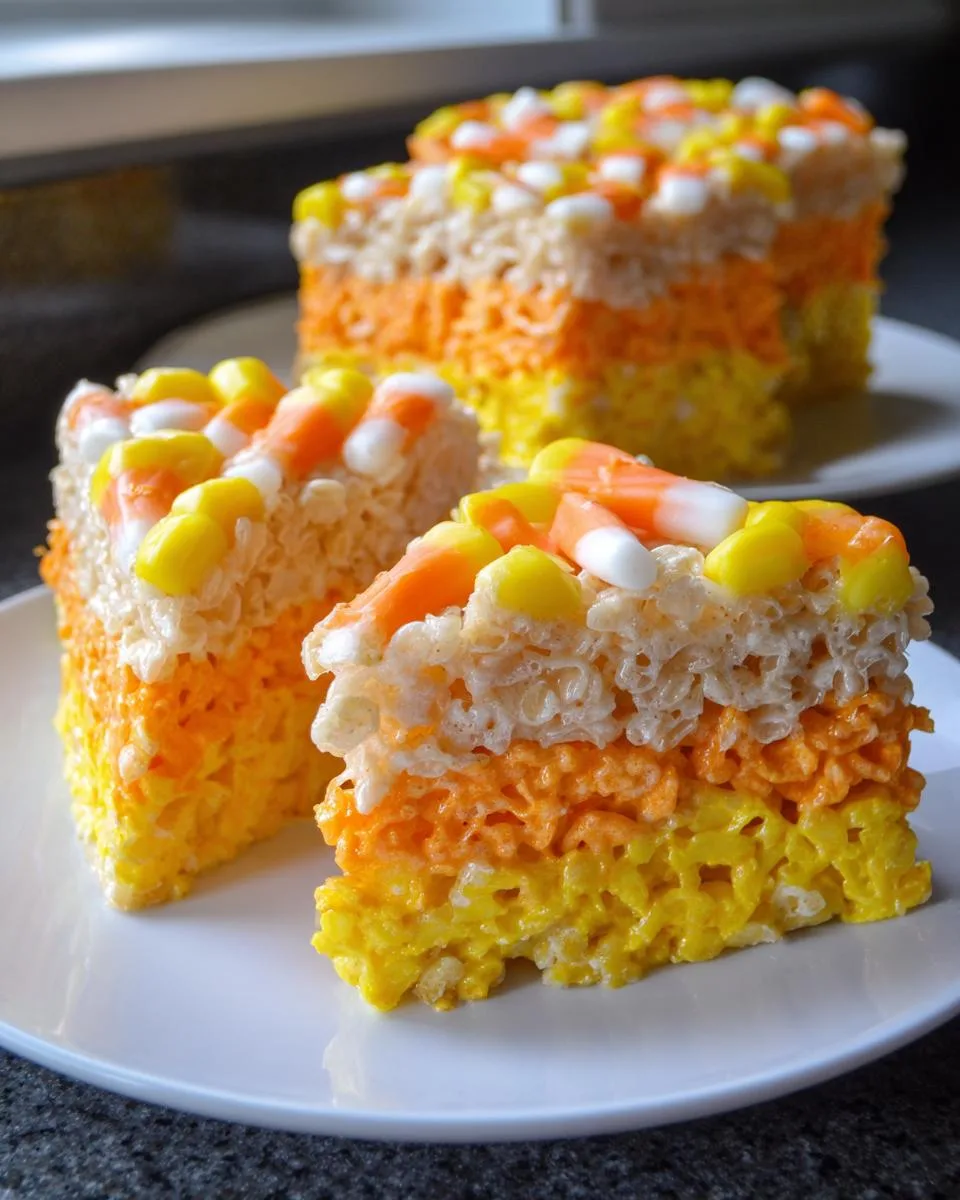
Here’s my secret for clean layers: press the orange mixture right up against the yellow layer, using the back of a buttered spoon to really seal them together. Work quickly but carefully – you want that distinct color separation that makes candy corn so recognizable!
Finishing with the White Layer
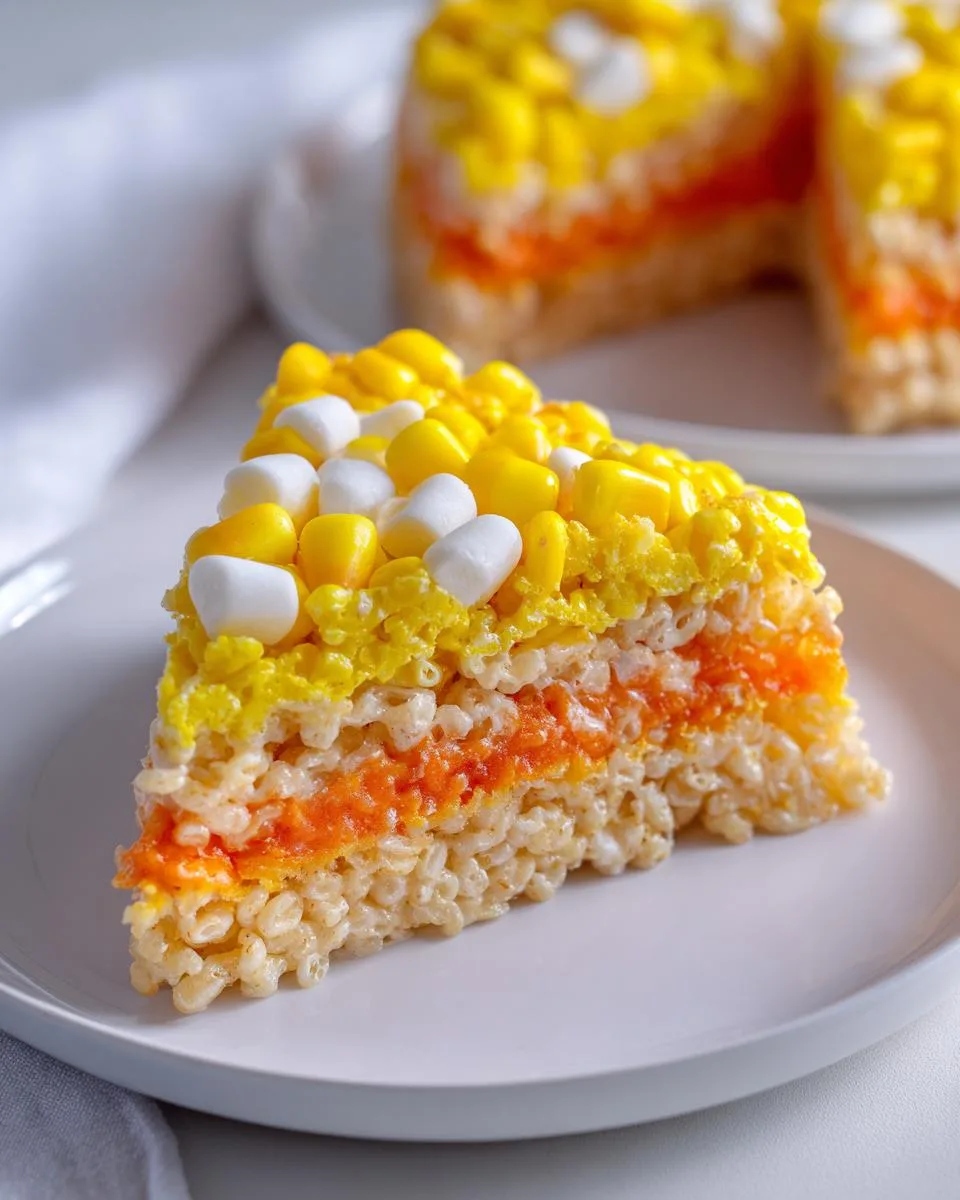
Time for a clean bowl – those last few marshmallows deserve a fresh start! Microwave your white layer ingredients just until melted (careful not to overdo it), mix in the cereal, and press this final batch right into the center of your pan. This forms the cute little white tip of your candy corn.
Now the hardest part – waiting! Let these beauties cool for at least 2 hours (I know, torture!). When they’re completely set, slice them into perfect triangles and watch everyone’s faces light up. The first time I made these, I may or may not have eaten half the pan before my guests arrived… but that’s our little secret!
Print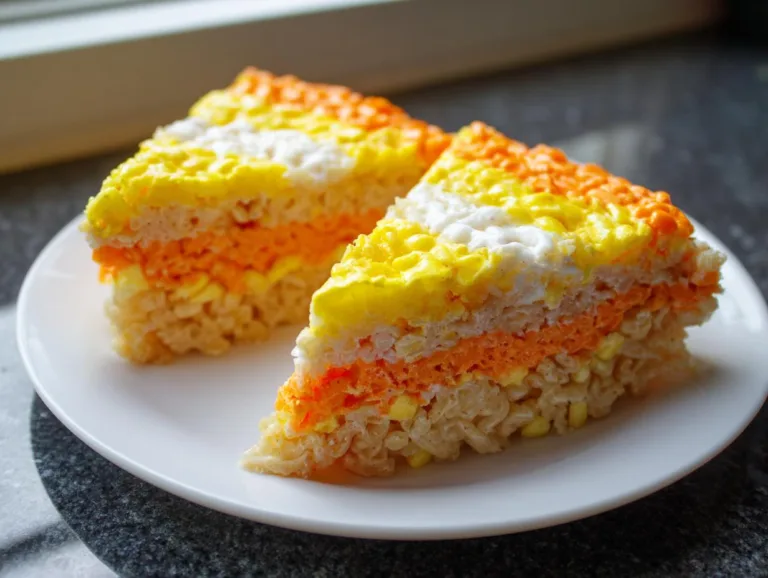
5-Ingredient Candy Corn Rice Krispies Everyone Adores
A fun and colorful twist on classic Rice Krispies treats, featuring layers of yellow, orange, and white to resemble candy corn.
- Total Time: 2 hours 20 minutes
- Yield: 12 servings 1x
Ingredients
- For the yellow layer:
- 2 1/2 cups mini marshmallows
- 2 tablespoons butter
- big pinch of salt
- 5 drops yellow food gel
- 2 1/4 cups crisp rice cereal
- For the orange layer:
- 1 3/4 cups mini marshmallows
- 2 tablespoons butter
- big pinch of salt
- 5 drops yellow food gel
- 1–2 drops red food gel
- 1 1/4 cups + 2 tablespoons crisp rice cereal
- For the white layer:
- 3/4 cup mini marshmallows
- 1 tablespoon butter
- big pinch of salt
- 3/4 cup crisp rice cereal
Instructions
- Spray an 8 or 9″ cake pan with cooking spray or grease with extra butter.
- In a large microwave-safe bowl, combine marshmallows, butter, and salt for the yellow layer. Microwave on HIGH for 30 seconds, stirring until melted. If needed, microwave for another 15 seconds.
- Whisk in yellow food coloring, then stir in rice cereal until well-blended.
- Press the yellow layer around the edges of the pan to form a ring. Use buttered hands for easier handling.
- Repeat the process for the orange layer using the same bowl.
- In a clean bowl, make the white layer in the microwave, then press it into the center of the pan.
- Let cool for at least 2 hours before slicing into triangles.
Notes
- Butter your hands to prevent sticking when pressing the layers.
- Pack each layer firmly against the edges for clean layers.
- Use gel food coloring for vibrant colors.
- Store in an airtight container at room temperature.
- Prep Time: 15 minutes
- Cook Time: 5 minutes
- Category: Dessert
- Method: Microwave
- Cuisine: American
- Diet: Vegetarian
Nutrition
- Serving Size: 1 piece
- Calories: 150
- Sugar: 12g
- Sodium: 100mg
- Fat: 4g
- Saturated Fat: 2.5g
- Unsaturated Fat: 1g
- Trans Fat: 0g
- Carbohydrates: 28g
- Fiber: 0g
- Protein: 1g
- Cholesterol: 10mg
Tips for Perfect Candy Corn Rice Krispies
Want your candy corn Rice Krispies to turn out flawless every time? Here are my tried-and-true tips for success:
- Butter those hands! Seriously, don’t skimp—it’s the only way to press the layers without them sticking to you like glue.
- Pack it tight – Firmly press each layer into the pan to prevent crumbling when you slice them.
- Gel colors are key – Liquid food coloring just doesn’t give that vibrant candy shop look.
- Store airtight – Keep them fresh in a sealed container at room temperature (no fridge needed!).
- Work fast – The marshmallow mixture sets quickly, so have everything ready to go!
Follow these, and you’ll have treats that look (and taste!) like they came from a bakery!
FAQ About Candy Corn Rice Krispies
Got questions about these adorable Halloween treats? I’ve answered all the common ones here – straight from my own trial and error in the kitchen!
Can I use liquid food coloring?
You can, but I don’t recommend it – gel food coloring is the real MVP here. Liquid makes the marshmallow mixture sticky and can dilute the flavor. Gel gives you those bright, candy-shop colors without altering the texture. I learned this the hard way when my first batch turned out pastel and gummy!
How long do they last?
These no-bake desserts stay fresh for about 3 days when stored in an airtight container at room temp. After day one, I like to slip a piece of wax paper between layers to prevent sticking. They never last that long in my house though – between the kids and my sweet tooth, they’re usually gone by Halloween night!
Can I freeze them?
Honestly? Not worth it. While regular Rice Krispies treats freeze okay, the colored layers in these get weirdly brittle when thawed. The texture changes and they lose that perfect chew. Better to make them fresh – they come together so fast anyway!
Why are my layers crumbling?
Ah, the classic crumble! This usually happens if the layers weren’t pressed firmly enough while warm. Next time, really pack each color in there – I use the bottom of a buttered measuring cup for extra pressure. Also, make sure you’re not skimping on the marshmallow-to-cereal ratio. Too much cereal = dry, crumbly mess.
Nutritional Information
Just a quick heads up – these nutrition facts are estimates since brands and ingredient sizes can vary. My calculations are based on standard supermarket ingredients, but your mileage may vary! Each candy corn Rice Krispies triangle contains roughly:
- 150 calories – Perfect for a sweet little treat
- 12g sugar – It is candy-inspired, after all!
- 4g fat – Mostly from that delicious butter
- 28g carbs – The marshmallow and cereal combo
Remember, these are meant to be fun occasional treats – not health food! I always say one (or three) won’t hurt, especially during Halloween season. The exact numbers will change if you use different brands of marshmallows or cereal, so take this as a general guide rather than gospel.
Serving and Storing Candy Corn Rice Krispies
The best way to serve these? Slice them into perfect little candy corn triangles while they’re still in the pan – I use a buttered knife to get clean cuts. For storage, pop them in an airtight container at room temperature (no fridge needed!). Layer them between sheets of wax paper if you’re stacking – that marshmallow glue is strong stuff! They’ll stay fresh and chewy for up to 3 days… if they last that long!
For more fun recipes, check out our recipes page. If you enjoyed these candy corn Rice Krispies, you might also like our Halloween bat cupcakes or our spooky mummy brownies. You can also follow us on Facebook for more cooking inspiration!