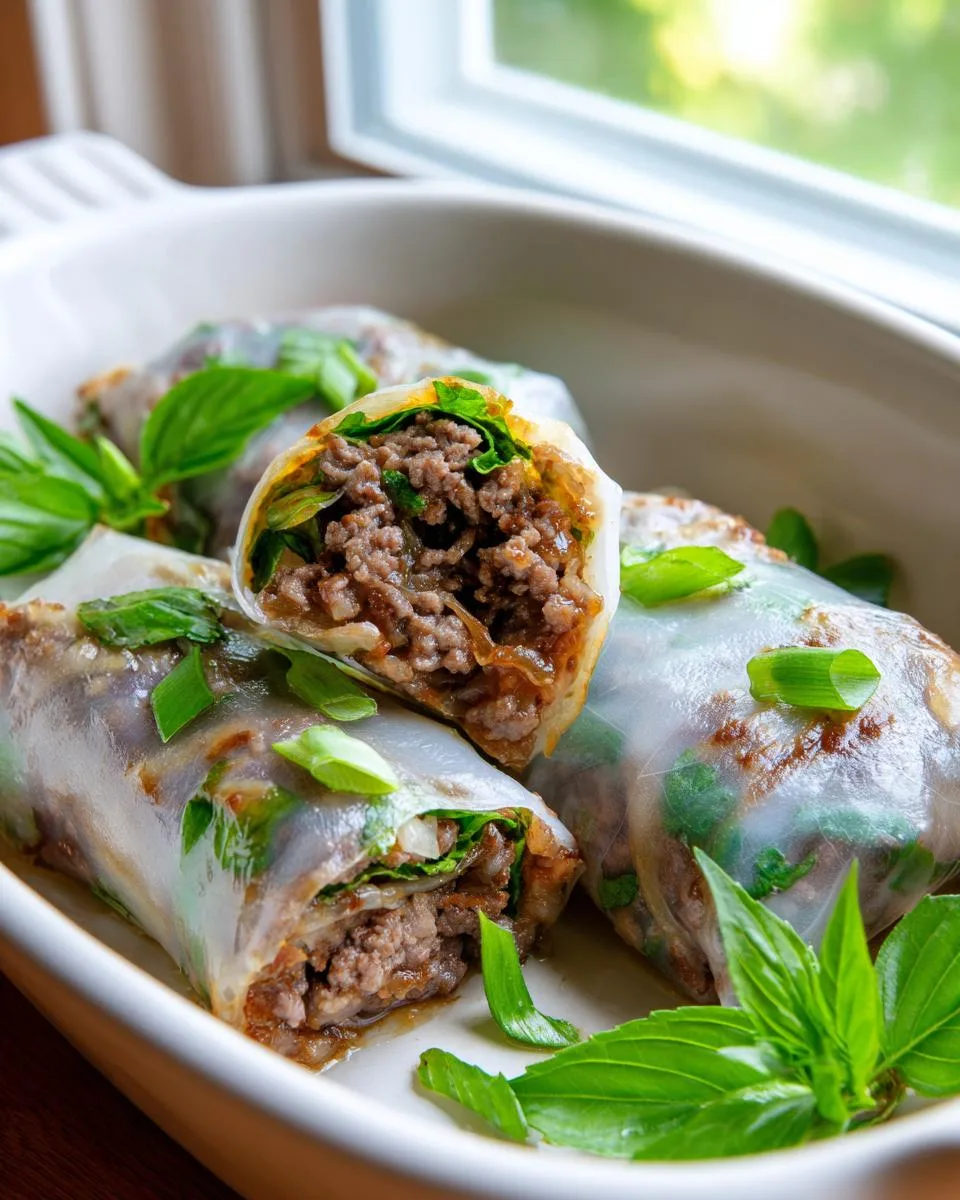
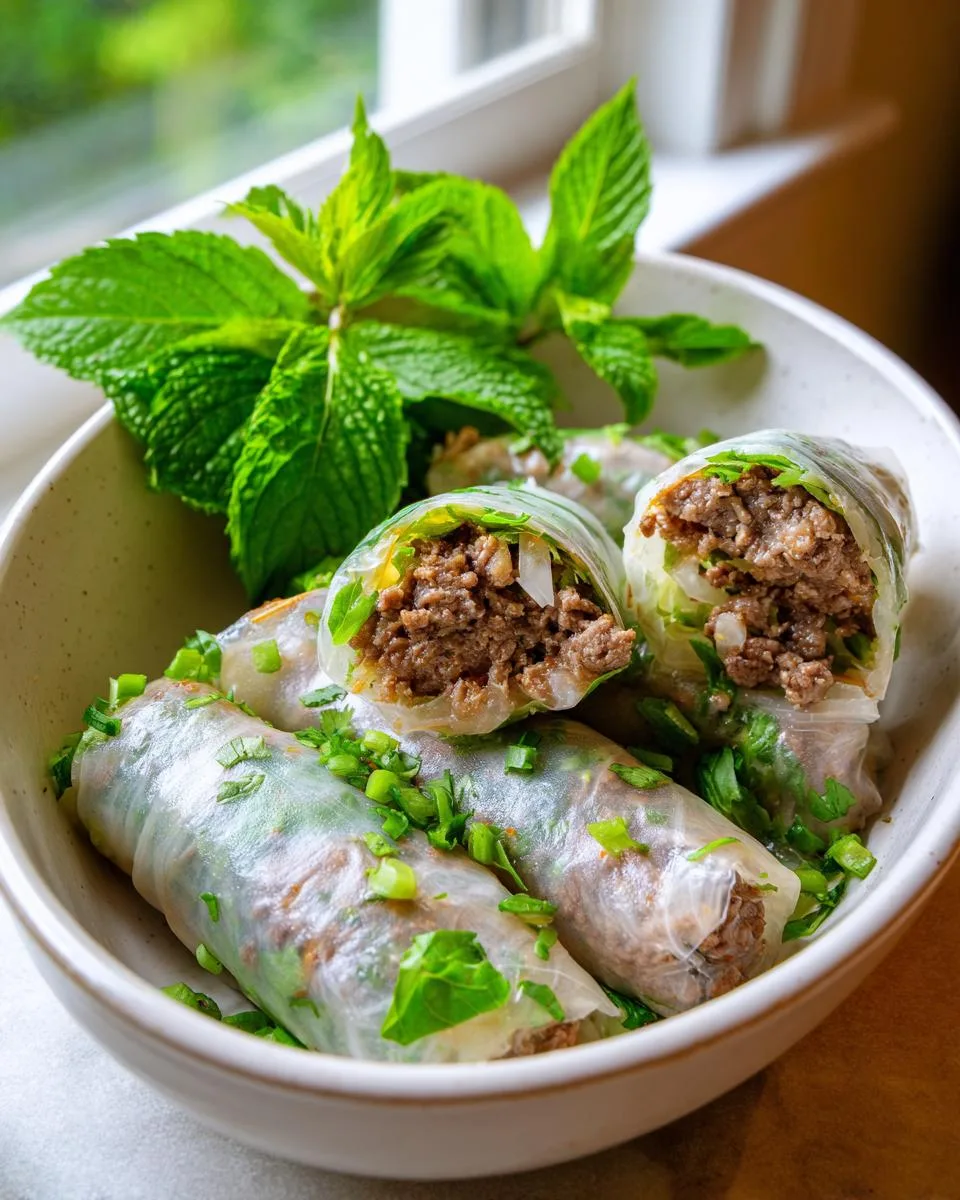
You know those nights when you’re scrambling to put dinner on the table, but you still want something packed with flavor? That’s exactly when my Thai Basil Beef Rolls come to the rescue. This dish has been my go-to for years – ever since I learned the secret of balancing savory ground beef with that incredible anise-kissed Thai basil from my aunt’s favorite Bangkok street vendor.
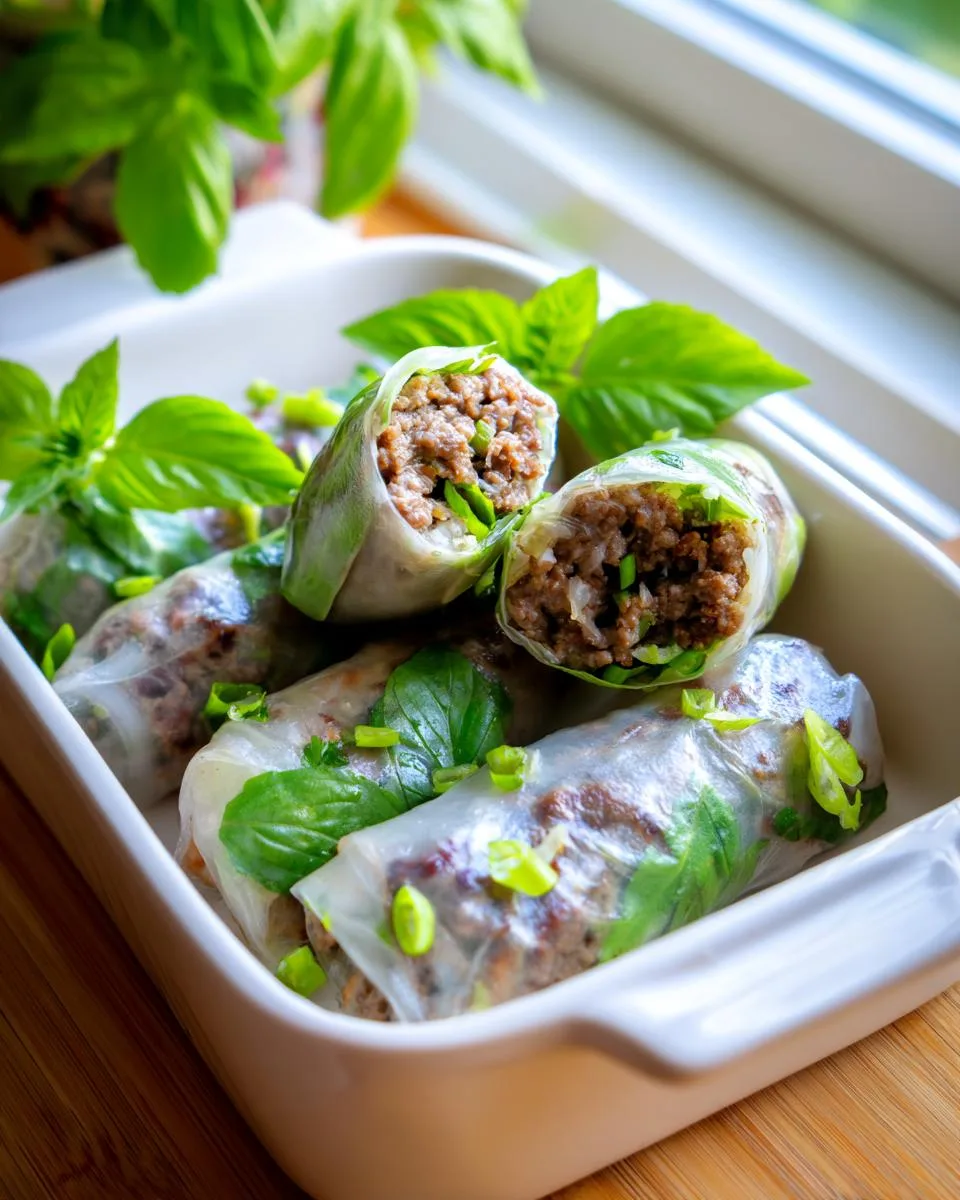
Table of Contents
Table of Contents
Why You’ll Love These Thai Basil Beef Rolls
What makes these rolls so special? They’re lightning-fast to make (we’re talking 30 minutes tops), yet taste like you spent hours in the kitchen. The magic happens when the garlicky beef filling meets fresh herbs, all wrapped up in chewy rice paper with that satisfying crunch of veggies. Trust me, once you try rolling your first one, you’ll be hooked just like I was.
These rolls aren’t just another recipe – they’re your new weeknight superhero! Here’s why they’ve earned a permanent spot in my rotation:
- 30-minute magic: From fridge to table faster than takeout
- Flavor explosion: That garlicky-sweet-salty beef with fresh Thai basil? Absolute perfection
- Healthier than takeout: You control the ingredients – no mystery oils or excess sugar
- Endlessly adaptable: Swap proteins, add veggies, adjust spice – it’s foolproof
- Fun to make: Rolling them feels like a mini cooking adventure (kids love helping!)
I’ve served these to everyone from picky toddlers to foodie friends – they always disappear first!
Ingredients for Thai Basil Beef Rolls
Gathering the right ingredients makes all the difference with these rolls – just like my aunt taught me. Here’s what you’ll need to create that perfect balance of flavors:
- 1 tablespoon vegetable oil (any neutral oil works, but I love peanut for extra aroma)
- 3 cloves garlic, minced – fresh is non-negotiable here!
- 1 small shallot, finely chopped (or 1/4 cup red onion in a pinch)
- 1 pound ground beef (85/15) – the fat ratio keeps it juicy (ground pork or chicken work too)
- 2 tablespoons soy sauce – use light soy for less saltiness
- 1 tablespoon oyster sauce – the secret umami booster
- 1 teaspoon brown sugar – balances the savory notes
- 1 tablespoon fresh lime juice – about half a lime
- 1/2 teaspoon chili flakes or 1 minced Thai chili for heat lovers
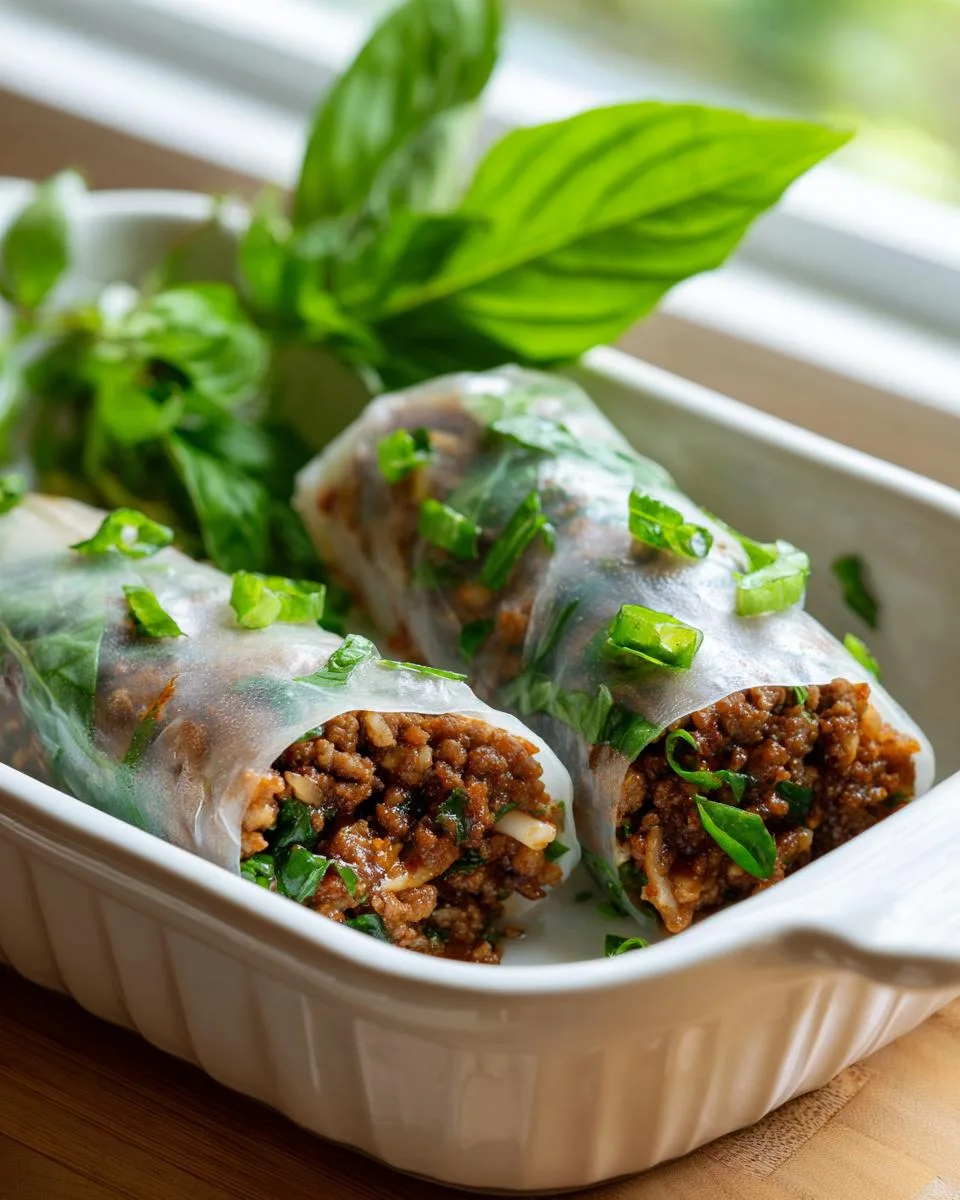
- 1 cup fresh Thai basil leaves, chopped – don’t substitute sweet basil!
- 8-10 rice paper wrappers (the 22cm size works best)
For the optional fresh crunch: mint, cilantro, green onions, or julienned carrots/cucumbers. Trust me, the more herbs the better!
Equipment You’ll Need
You won’t need fancy gadgets for these rolls – just a few basics from your kitchen:
- 10-inch skillet – my trusty cast iron works perfectly
- Shallow plate or pie dish for soaking rice papers (I use my grandma’s old pasta bowl)
- Cutting board & sharp knife – for all that garlic and herb chopping
- Clean kitchen towel – to keep rice papers from sticking while rolling
That’s it! No special tools – just things you probably already have hanging around.
How to Make Thai Basil Beef Rolls
This is where the magic happens! Follow these steps closely—they’re exactly how I’ve been making these rolls for years—and you’ll end up with restaurant-worthy results right in your own kitchen.
Step 1: Cook the Beef Filling
First, heat that oil in your skillet over medium heat until it shimmers—that’s when you know it’s ready. Toss in the garlic and shallot, and here’s my trick: stir constantly for just 30 seconds until fragrant. You want them golden, not burnt!
Add the ground beef next, breaking it apart with your wooden spoon. Cook until it’s no longer pink—about 5 minutes should do it. Now the fun part: pour in the soy sauce, oyster sauce, brown sugar, and chili flakes. Let everything simmer together for 2-3 minutes—this is when all those flavors really marry beautifully.
Remove from heat and stir in the lime juice and Thai basil. The residual heat will wilt the basil just perfectly. Let this mixture cool slightly—trust me, piping hot filling makes rolling impossible!
Step 2: Prepare the Rice Paper Wraps
Fill your shallow plate with warm (not hot!) water—I test it with my wrist like baby bottle temperature. Working one at a time, dip a rice paper wrapper in the water for about 5-10 seconds—count “one Mississippi, two Mississippi…”—until it’s pliable but still holds some stiffness.
Lay it flat on your clean kitchen towel—this absorbs excess water so your rolls don’t get soggy. Here’s my golden rule: don’t soak the next wrapper until you’ve finished rolling the current one. Otherwise, they’ll stick together like glue!
Step 3: Roll and Serve
Place about 2 tablespoons of the beef filling near the bottom third of the wrapper. Top with your fresh herbs and veggies—don’t overstuff! Fold the bottom edge over the filling, tuck in the sides like a burrito, then roll tightly upward.
For beautiful presentation, slice each roll in half diagonally—that shows off all those gorgeous layers. Arrange them on a platter with dipping sauce on the side. Pro tip: leave a little space between rolls so they don’t stick together!
Print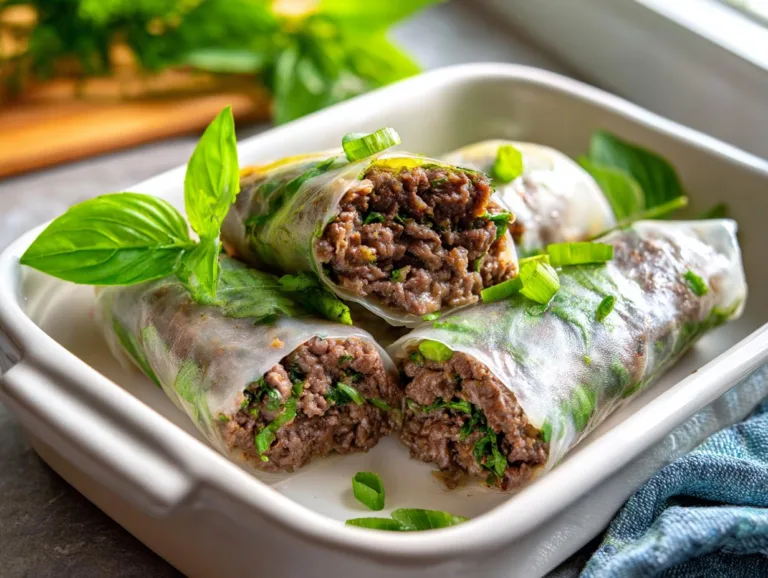
30-Minute Thai Basil Beef Rolls That Wow Every Time
Thai Basil Beef Rolls are a flavorful and easy-to-make dish featuring ground beef with Thai basil, wrapped in rice paper for a fresh and savory bite.
- Total Time: 30 minutes
- Yield: 8–10 rolls 1x
Ingredients
- 1 tablespoon vegetable oil
- 3 cloves garlic, minced
- 1 small shallot, finely chopped
- 1 pound ground beef (85/15)
- 2 tablespoons soy sauce
- 1 tablespoon oyster sauce
- 1 teaspoon brown sugar
- 1 tablespoon fresh lime juice
- 1/2 teaspoon chili flakes or 1 minced Thai chili
- 1 cup fresh Thai basil leaves, chopped
- 8 to 10 rice paper wrappers
- 1/2 cup fresh mint leaves (optional)
- 1/2 cup cilantro leaves (optional)
- 1/4 cup sliced green onion (optional)
- 1/4 cup julienned carrots or cucumbers (optional)
- 1/4 cup dipping sauce (soy-lime or chili-garlic blend)
Instructions
- Heat oil in a skillet over medium heat. Sauté garlic and shallot until fragrant.
- Add ground beef and cook until browned, breaking it apart.
- Stir in soy sauce, oyster sauce, brown sugar, and chili flakes. Simmer for 2–3 minutes.
- Add lime juice and chopped Thai basil. Remove from heat and let cool slightly.
- Fill a shallow plate with warm water and set up a rolling station with fillings nearby.
- Dip one rice paper in warm water for 5–10 seconds, then place on a clean surface.
- Add beef filling, herbs, and veggies near the bottom of the wrapper.
- Fold the bottom over the filling, tuck in the sides, and roll tightly.
- Repeat with remaining wrappers and filling.
- Serve sliced in half with dipping sauce on the side.
Notes
- Thai basil has a distinct anise-like flavor that sets it apart from sweet basil.
- You can substitute ground pork or chicken if preferred.
- For extra crunch, add bean sprouts or shredded cabbage.
- Store leftovers in an airtight container in the fridge for up to 2 days.
- Prep Time: 15 minutes
- Cook Time: 15 minutes
- Category: Main Dish
- Method: Stovetop
- Cuisine: Thai
- Diet: Low Lactose
Nutrition
- Serving Size: 1 roll
- Calories: 180
- Sugar: 2g
- Sodium: 350mg
- Fat: 9g
- Saturated Fat: 3g
- Unsaturated Fat: 5g
- Trans Fat: 0g
- Carbohydrates: 12g
- Fiber: 1g
- Protein: 12g
- Cholesterol: 35mg
Tips for Perfect Thai Basil Beef Rolls
After making these rolls more times than I can count, I’ve picked up some foolproof tricks that’ll make yours shine:
- Rice paper timing is key: Soak just until pliable – limp wrappers tear easily (ask me how I know!)
- Fresh herbs make the dish: No Thai basil? Skip it entirely – sweet basil changes the flavor completely
- Cool your filling: Warm beef turns wrappers gummy – 10 minutes cooling time saves headaches
- Roll tight but gentle: Think “snug burrito” pressure – too firm and the wrapper bursts
- Double stack for beginners: Use two slightly overlapped wrappers for extra-sturdy rolls
My biggest lesson? Don’t stress the first few rolls-IDinner for you!-they’ll still taste amazing even if they’re not picture-perfect.
Substitutions and Variations
The beauty of these rolls? You can tweak them endlessly! When I’m out of ground beef, ground pork or chicken work beautifully—just add an extra pinch of brown sugar to balance the flavors. Vegetarian friends? Try crumbled tofu or mushrooms sautéed with the same seasonings.
For gluten-free versions, swap the soy sauce with tamari and ensure your oyster sauce is GF. Missing Thai basil? Skip it entirely—regular basil changes the flavor profile too much. Bulk them up with shredded cabbage, bean sprouts, or matchstick carrots for extra crunch. And that dipping sauce? Sometimes I mix hoisin with sriracha for a sweet-spicy kick—my husband’s favorite!
The key is treating this recipe as your playground—I’ve never made the same version twice! If you are looking for more dinner inspiration, check out my full collection of recipes.
Serving Suggestions
These rolls shine brightest with simple sides – just like I had them in Bangkok! For dipping, I alternate between my quick soy-lime sauce (mix 2 parts soy with 1 part lime juice and a pinch of sugar) and spicy sriracha mayo. Need something heartier? Serve with jasmine rice or a crisp cucumber salad. The contrast of warm, savory rolls against cool, crunchy veggies? Absolute perfection!
Storing and Reheating
Here’s the deal with leftovers – they’re rare in my house, but when they happen: stash rolls in an airtight container separated by parchment paper (so they don’t stick together) for up to 2 days. Never freeze them – rice paper turns rubbery! My trick? Reheat gently in a dry skillet over medium-low until just warmed through – about 30 seconds per side. Microwaving makes them soggy, and trust me, you don’t want that!
Nutritional Information
Here’s the breakdown per roll (your numbers might vary slightly depending on exact ingredients):
- 180 calories – lighter than most takeout!
- 9g fat (3g saturated) – thanks to that 85/15 beef ratio
- 12g protein – keeps you full longer
- 12g carbs – mostly from the rice wrapper
Remember folks – these are estimates! Your exact nutrition will depend on your specific ingredients and how generous you are with the fillings. I always say – focus on the fresh flavors first, numbers second!
Frequently Asked Questions
Q1. Can I use regular basil instead of Thai basil?
Oh honey, I wish I could say yes – but trust me, it’s not the same! Thai basil has this incredible licorice-like flavor that regular sweet basil just can’t match. If you can’t find Thai basil (check Asian markets!), honestly? Skip it altogether rather than substituting. The dish will still taste great without it!
Q2. What’s the best beef cut for these rolls?
I swear by 85/15 ground beef – that 15% fat keeps the filling juicy without being greasy. If you’re grinding your own, chuck or sirloin works beautifully. My aunt in Bangkok actually uses a mix of chuck and pork belly for extra richness – but that’s next-level decadence!
Q3. How do I keep my rice paper from tearing?
Don’t soak longer than 10 seconds! The wrapper should still feel slightly stiff when you lay it out – it keeps softening as you work. My other secret? Use room temperature water instead of cold. Changed my rolling game completely!
Q4. Can I make these ahead for a party?
Absolutely! Prep the filling up to a day in advance (it actually tastes better after sitting!), but roll them fresh. Guests love assembling their own – just set up a rolling station with all the fixings. It’s become my go-to dinner party trick!
Share Your Feedback
Nothing makes me happier than hearing how your Thai Basil Beef Rolls turned out! Did you stick to the classic version or put your own spin on it? Maybe you discovered a brilliant new dipping sauce combo or found the perfect herb balance? I want to hear all about it!
Drop your thoughts in the comments below – your tips might help another home cook perfect their rolls. Snap a photo of your masterpiece and tag me on Instagram (#ThaiBasilBeefRolls) – I feature my favorite reader creations every Friday! And if this recipe saved your busy weeknight like it has mine countless times, consider rating it below. Your feedback helps me create more of the recipes you love! You can also follow along with my family’s cooking adventures on Facebook.
Happy rolling, friends – can’t wait to see what you create!