Oh my gosh, you have GOT to try these pumpkin rice krispie treats – they’re the cutest little fall treats that always disappear first at my Halloween parties! I’ve been making them every October since my niece was in kindergarten (she’s in middle school now, can you believe it?), and they never fail to bring smiles. The best part? They come together in about 15 minutes flat with just a handful of ingredients you probably already have.
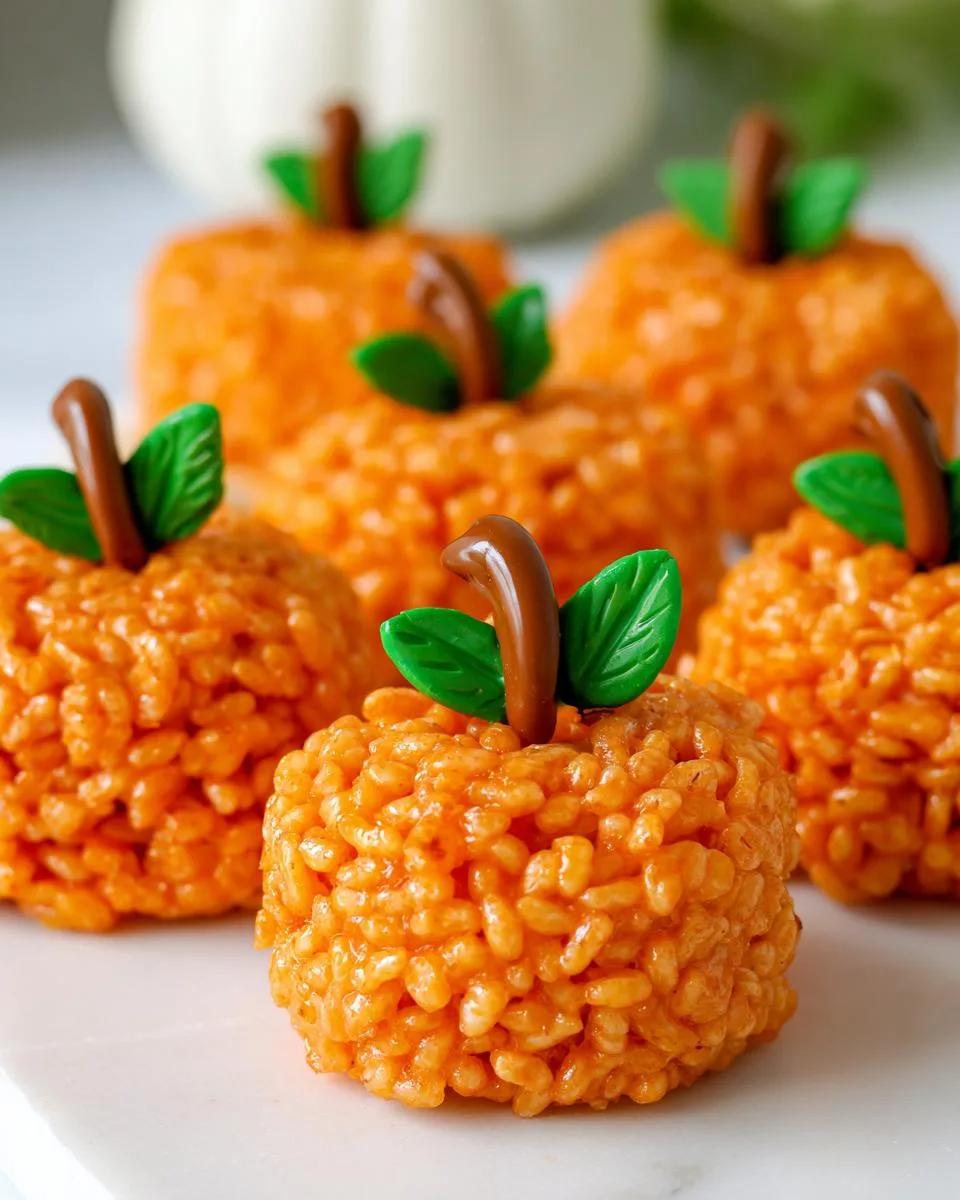
Table of Contents
Table of Contents
Why You’ll Love These Pumpkin Rice Krispie Treats
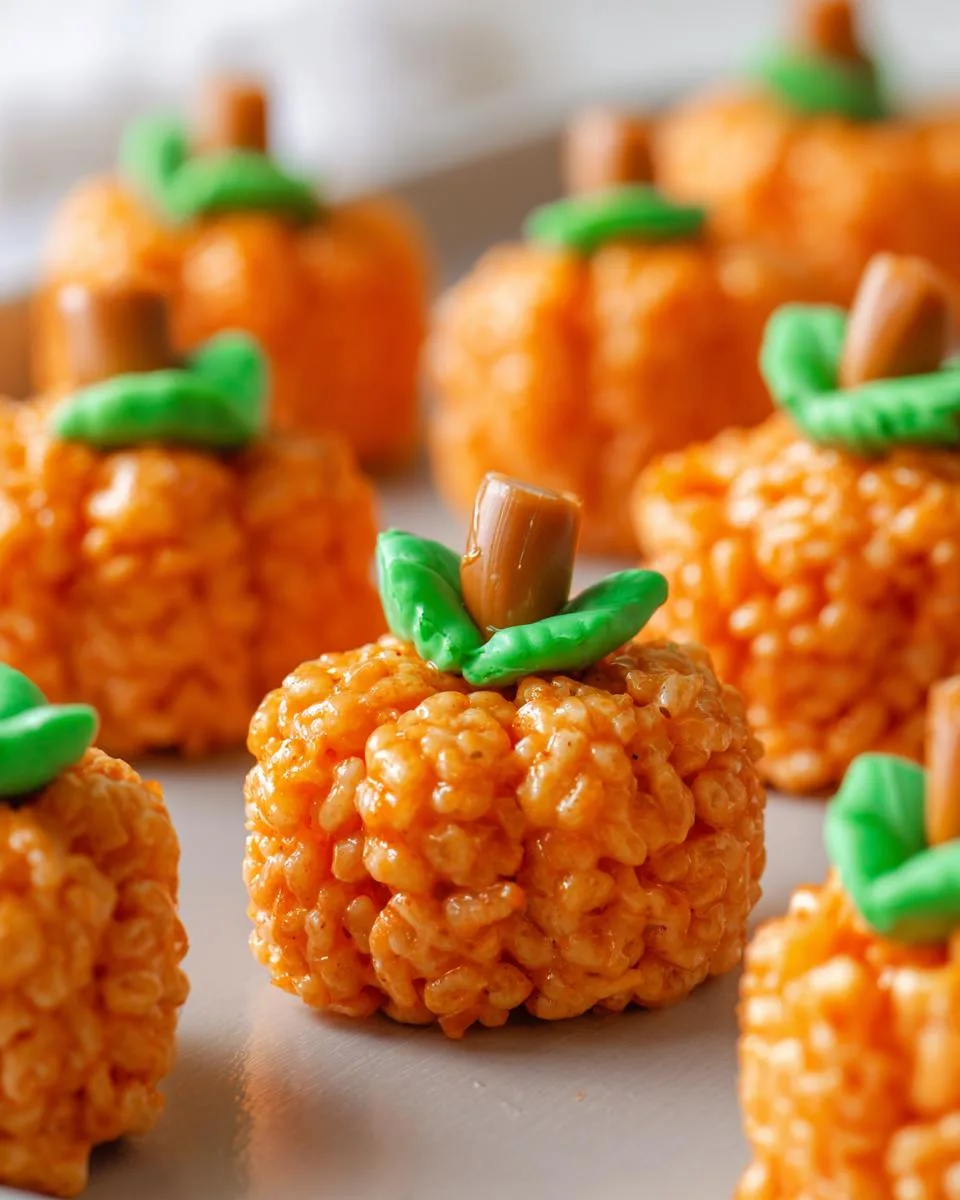
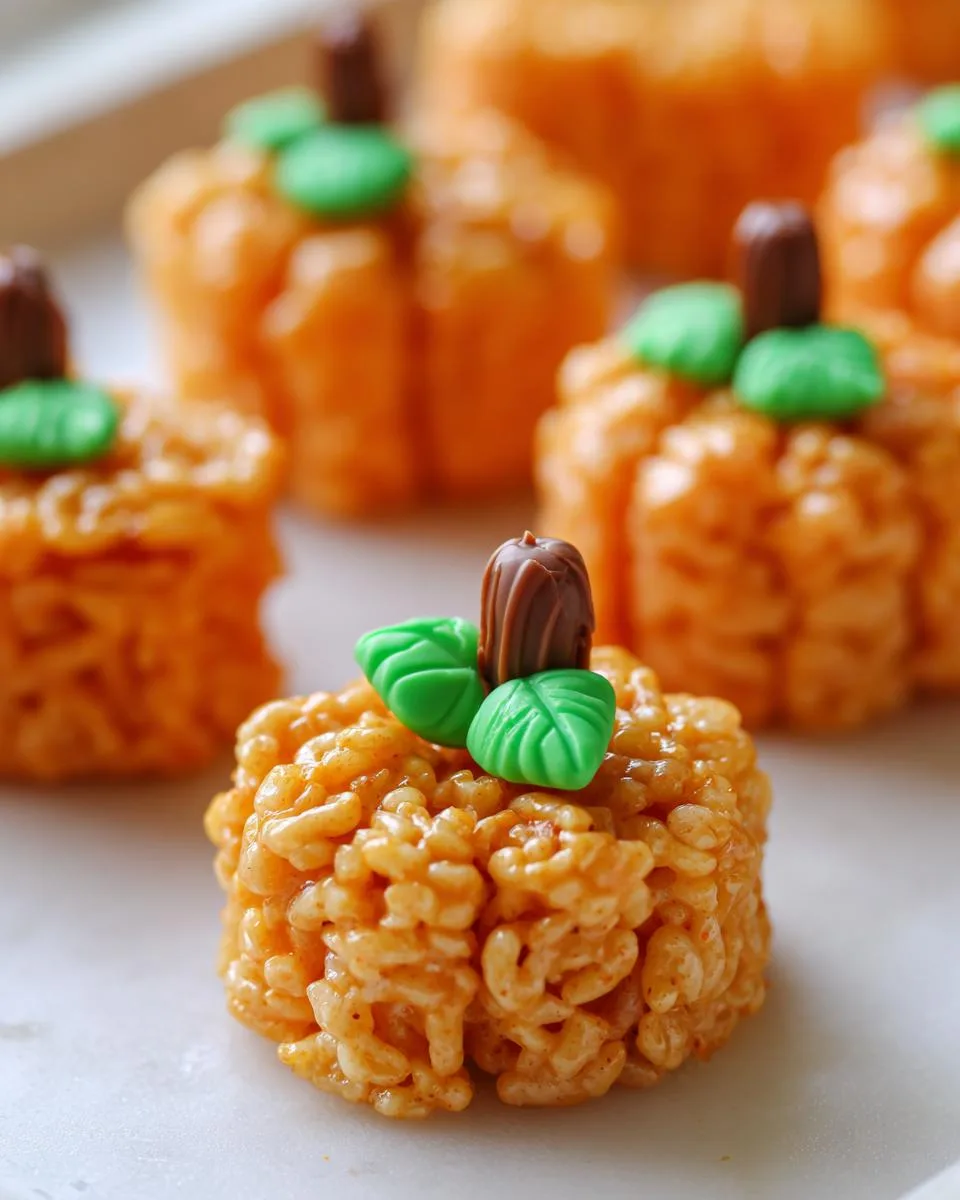
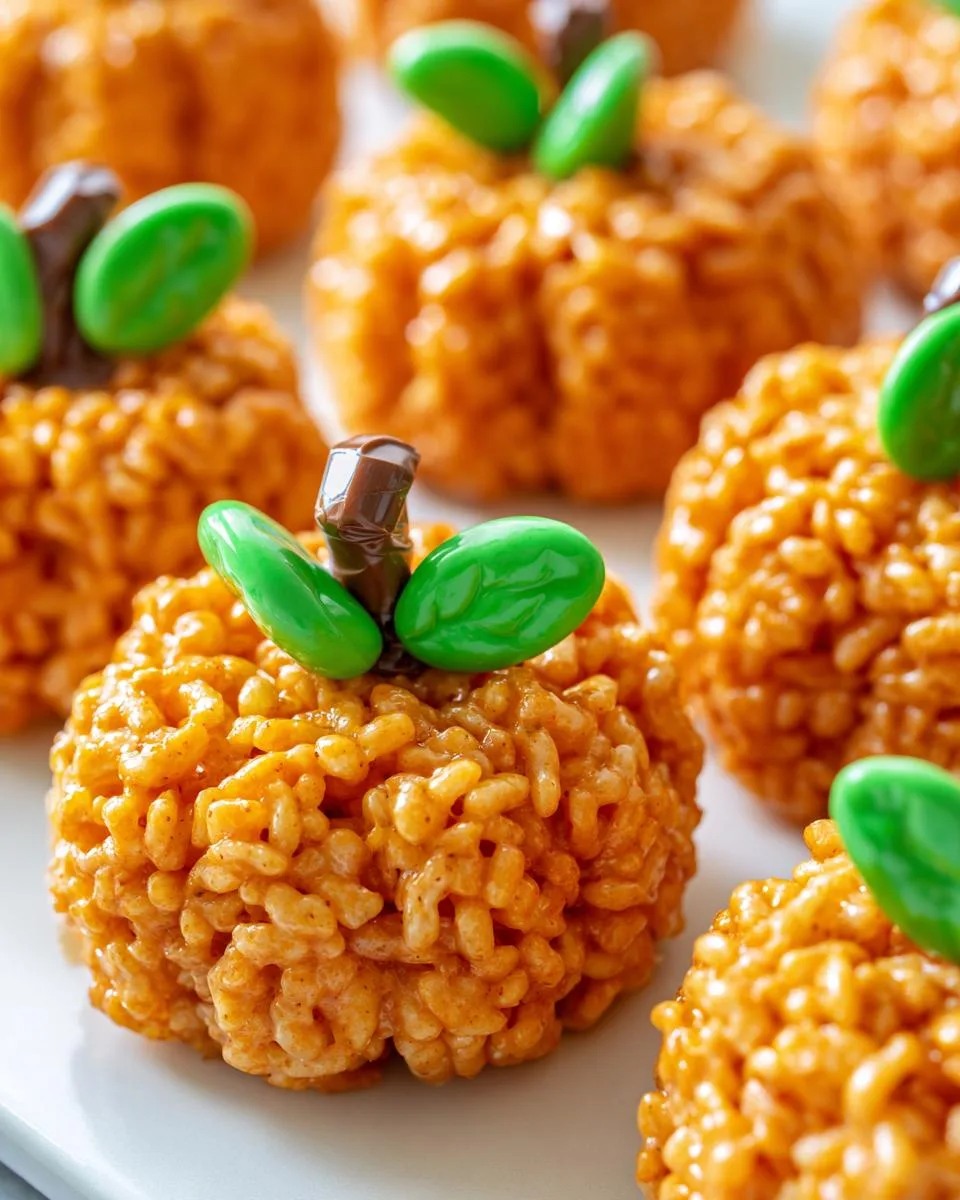
These aren’t your ordinary rice krispie squares – we’re talking bright orange pumpkin-shaped delights with tootsie roll stems and green M&M leaves that look almost too adorable to eat. Almost. Trust me, once that marshmallow-crispy goodness hits your taste buds, all bets are off. I love how they’re equally perfect for classroom parties, cozy autumn nights, or just when you need a little edible sunshine on a gloomy fall day.
What makes them extra special is how customizable they are – go bold with super vibrant orange food coloring for Halloween, or keep it softer for Thanksgiving. Either way, they’re guaranteed to be the talk of any gathering. And don’t even get me started on how much fun kids have helping shape them!
Listen, I know you’re going to adore these little pumpkin-shaped delights as much as I do – here’s why:
- No-bake magic: No oven needed! Just one pot and about 15 minutes of your time – perfect for when you’re short on time but want something special.
- Kid-approved fun: My nieces and nephews go wild for these. Shaping the pumpkins together has become our favorite fall tradition.
- Festive flair: That bright orange color just screams autumn happiness. They make any party table instantly more cheerful.
- Totally customizable: Want them extra orange? Go for it! Prefer chocolate stems instead of Tootsie Rolls? No problem – make them your own!
Seriously, these treats check all the boxes – easy, adorable, and downright delicious.
Ingredients for Pumpkin Rice Krispie Treats
Okay, let’s gather our goodies! Here’s exactly what you’ll need to make these adorable pumpkin rice krispie treats (trust me, measure carefully – I learned the hard way that eyeballing marshmallows never ends well!):
- 6 cups Rice Krispies cereal (the classic kind – generic puffed rice just doesn’t have the same magic)
- 6 cups mini marshmallows (I always grab an extra bag just in case – sticky fingers happen!)
- 3 tablespoons unsalted butter (salted works in a pinch, but unsalted lets you control the flavor better)
- Orange gel food coloring (gel works SO much better than liquid – it gives that perfect pumpkin hue without making the treats soggy)
- 10 Tootsie Roll candies (for the cute little stems – the midgees size is perfect)
- 10 green M&M’s (or green candy melts if you can’t find the right color M&M’s)
That’s it! Simple pantry staples that transform into something totally festive. Now let’s get mixing!
Equipment You’ll Need
Grab these trusty kitchen tools before we dive in – you probably have most of them already! A large pot (I use my 4-quart Dutch oven), a heatproof spatula (silicone is my favorite for marshmallow duty), measuring cups, and non-stick spray (for your hands – this is KEY when shaping those sticky pumpkins). That’s really all you need to make magic happen!
How to Make Pumpkin Rice Krispie Treats
Alright, let’s turn these simple ingredients into adorable pumpkin-shaped delights! Follow these steps carefully – I’ve made every mistake in the book so you don’t have to. Trust me, that burned marshmallow smell lingers for days!
Step 1: Melt Butter and Marshmallows
First, melt your butter in that large pot over low heat – I can’t stress this enough! Medium heat will scorch your marshmallows faster than you can say “oops.” Once the butter’s melted, toss in those mini marshmallows and keep stirring. They’ll go from fluffy to gooey in about 3-4 minutes. Patience is key here – resist the urge to crank up the heat!
Step 2: Add Food Coloring
Now for the magic! Remove the pot from heat and stir in about ½ teaspoon of orange gel food coloring. Gel is the way to go – liquid coloring makes the mixture too wet. Start with less; you can always add more until you get that perfect pumpkin orange. I usually end up using about ¾ teaspoon total for a vibrant hue. Stir until no white streaks remain!
Step 3: Mix in Cereal
Dump in all 6 cups of Rice Krispies at once and start folding gently. Work quickly while the mixture is warm – it gets harder to mix as it cools. Make sure every last crispy bit gets coated in that gorgeous orange marshmallow goodness. If some areas look pale, add a tiny bit more coloring and keep mixing!
Step 4: Shape Pumpkin Treats
Here’s where things get messy (and fun)! Spray your hands generously with non-stick spray – I’m talking like you’re preparing for battle. Scoop about ½ cup of mixture and roll it into balls, then gently flatten the bottoms so they stand up. Pro tip: slightly indent the tops with your thumb where the stem will go. Work fast – they set quickly!
Step 5: Decorate and Set
Now for the cute factor! Press a Tootsie Roll “stem” into each pumpkin’s center indent. Add a green M&M beside it as the “leaf.” Be gentle – the treats are still soft! Let them set for about an hour at room temp. Resist sneaking one early (though I won’t judge if you do – the warm, gooey version is heavenly).
Print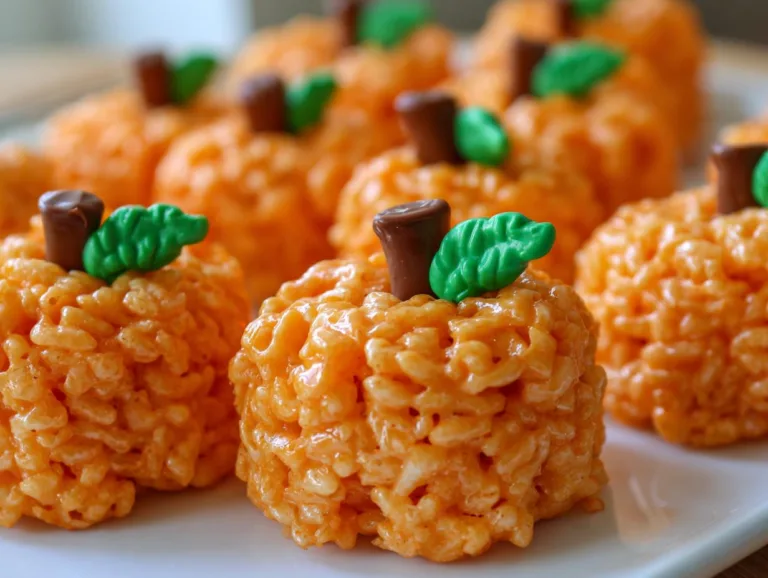
15-Minute Pumpkin Rice Krispie Treats That Steal the Show
Pumpkin Rice Krispie Treats are a fun, festive twist on the classic dessert. These easy-to-make treats are shaped like pumpkins and decorated with candy for a cute Halloween or fall-themed snack.
- Total Time: 1 hour 20 minutes
- Yield: 10 pumpkin treats 1x
Ingredients
- 6 cups Rice Krispies Cereal
- 6 cups Miniature Marshmallows
- 3 tablespoons Unsalted Butter
- Orange Gel Food Coloring
- 10 Tootsie Roll Candies
- 10 Green M&M Candies
Instructions
- In a large pot, melt butter over medium heat.
- Once butter is melted, add marshmallows and cook over medium heat, stirring frequently, until melted.
- Remove from the heat and stir in ½ teaspoon of orange gel food coloring.
- Add rice krispies cereal, stirring until well coated and color is evenly distributed. Add additional orange gel coloring if needed for your perfect pumpkin shade.
- Spray your hands with non-stick spray and form the rice krispie treat mixture into 10 large balls.
- Add a tootsie roll “stump” in the middle of each pumpkin ball and add a green M&M to make the “leaf.”
- Allow the pumpkin rice krispie treats to set for an hour.
Notes
- Store the treats in an airtight container at room temperature for up to 3 days.
- For best results, use fresh marshmallows.
- Adjust the food coloring to achieve your desired pumpkin shade.
- Prep Time: 10 minutes
- Cook Time: 10 minutes
- Category: Dessert
- Method: No-Bake
- Cuisine: American
- Diet: Vegetarian
Nutrition
- Serving Size: 1 pumpkin treat
- Calories: 220
- Sugar: 25g
- Sodium: 120mg
- Fat: 6g
- Saturated Fat: 3g
- Unsaturated Fat: 2g
- Trans Fat: 0g
- Carbohydrates: 42g
- Fiber: 0g
- Protein: 2g
- Cholesterol: 10mg
Tips for Perfect Pumpkin Rice Krispie Treats
After making dozens (okay, maybe hundreds) of these pumpkin rice krispie treats over the years, I’ve picked up some foolproof tricks to ensure yours turn out perfect every time:
- Fresh marshmallows are non-negotiable – That half-used bag from last month? Toss it. Stale marshmallows won’t melt properly and leave your treats disappointingly hard.
- Gel food coloring wins every time – Liquid coloring makes the mixture too wet and can leave weird streaks. Gel gives that vibrant pumpkin color without altering the texture.
- Grease everything – Your hands, the measuring cups, even the spatula! Nothing sticks worse than half-dried marshmallow goo.
- Work fast but don’t rush – The mixture sets quickly, but take an extra minute to get your pumpkins nicely shaped before decorating.
- Store them right – Keep in an airtight container at room temp (not the fridge – they get rock hard!). They’re best within 2 days but will last up to 3.
Oh! And if your orange color isn’t popping enough, add a tiny drop of red gel coloring to deepen the shade – works like a charm!
Variations and Substitutions
The beauty of these pumpkin rice krispie treats is how easily you can mix them up! My niece once declared the green M&Ms “too mainstream” – so we used green jelly beans instead. Here are some of my favorite swaps:
- Vegan version: Use vegan butter and Dandies marshmallows – they work just as well!
- Candy alternatives: No Tootsie Rolls? Try chocolate chips or even pretzel sticks for stems. Green sprinkles make cute “leaves” too.
- Flavor boost: Add ½ tsp pumpkin pie spice to the melted marshmallow for extra autumnal warmth.
- Color fun: Use purple coloring for Halloween “ghost pumpkins” or mix yellow/orange for a sunset effect.
The only limit is your imagination – though I’d avoid raisins (my disastrous “healthy version” experiment still haunts me).
Serving and Storing Pumpkin Rice Krispie Treats
Here’s the scoop on keeping these pumpkin rice krispie treats fresh and fabulous! They’re happiest stored in an airtight container at room temperature – no fridge needed (trust me, refrigeration turns them into little orange rocks). Layer them between sheets of wax paper so they don’t stick together. They’ll stay perfectly chewy for about 3 days, though let’s be real – they never last that long in my house! For parties, I love arranging them on a cake stand with some autumn leaves – instant centerpiece that disappears fast!
Nutritional Information
Okay, let’s be real – we’re not eating pumpkin rice krispie treats for their health benefits! But since you asked, here’s the scoop: Each adorable pumpkin treat clocks in around 220 calories, with most coming from those delicious marshmallows and cereal. These numbers are estimates based on standard brands – your exact counts might vary slightly depending on which marshmallows or cereal you use. The Tootsie Rolls and M&Ms add just a tiny bit extra sugar and fat, but come on – it’s Halloween! Worth every sticky, sweet bite if you ask me.
Frequently Asked Questions
How long do pumpkin rice krispie treats take to harden?
They’ll be set enough to handle after about 30 minutes, but I always wait a full hour for perfect firmness. If you’re in a hurry, you can pop them in the fridge for 15-20 minutes – just don’t leave them in too long or they’ll get too hard!
Can I make these ahead of time for a party?
Absolutely! They actually taste best when made the day before – the flavors meld together beautifully. Just store them in that airtight container I mentioned. Pro tip: Add the candy decorations right before serving so the colors stay bright.
What’s the most common mistake people make with rice krispie treats?
Hands down – burning the marshmallows by using too high heat. Low and slow is the way to go! Also, not greasing your hands before shaping is a rookie mistake I’ve made too many times. That sticky mess is no joke!
Why do mine keep falling apart?
Usually means either not enough marshmallow mixture (measure carefully!) or you waited too long to shape them. The mixture cools fast – work quickly while it’s still warm and pliable.
Can I use regular marshmallows instead of mini?
You can, but minis melt faster and more evenly. If using large marshmallows, chop them first and watch closely – they burn easier!
Final Thoughts
There you have it – everything you need to create these irresistible pumpkin rice krispie treats that’ll have everyone asking for your recipe! Seriously, make a double batch because they disappear faster than Halloween candy. Tag me if you make them – I’d love to see your pumpkin masterpieces! You can find more fun dessert recipes on our site.